











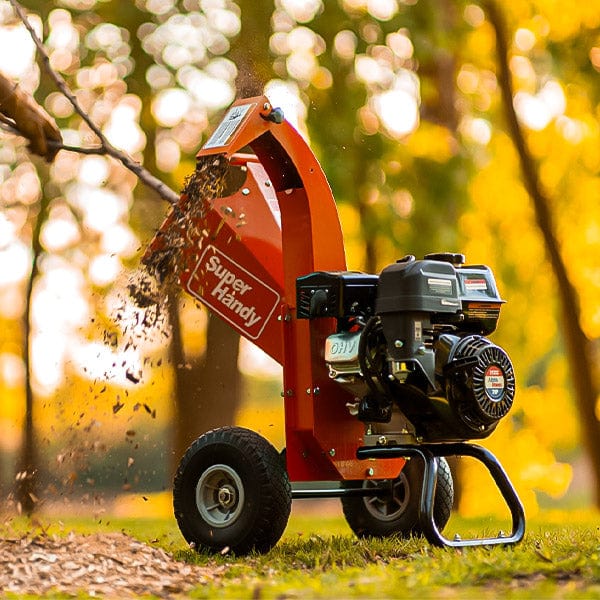
Understanding Why Your Wood Chipper Engine Runs But Rotor Won't Spin
An engine wood chipper has two primary systems working together: the engine, which creates power, and the drivetrain, which uses that power to spin the rotor. When the engine runs but the rotor doesn't, it means the connection between these two systems has been interrupted.
Think of it like a car with the engine on but stuck in neutral. The power is there, but it isn't being sent to the wheels. In a wood chipper, this "drivetrain" is typically composed of a clutch, drive belts, and pulleys. The clutch is the component responsible for engaging and disengaging the rotor. When you activate it, it tightens the drive belts, allowing the engine to turn the rotor. If any part of this power transfer system fails, your engine will run perfectly while the chipping mechanism remains still. Whether you have a versatile 3 IN 1 wood chipper or another model, the principle is the same.
Safety First: Essential Precautions Before Troubleshooting Your Chipper
Before you touch a single bolt or belt, safety must be your top priority. A wood chipper is a powerful machine with sharp, fast-moving parts. Attempting to diagnose or repair it while it's running or could accidentally start is extremely dangerous.
Follow these critical safety steps before beginning any inspection:
- Turn Off the Engine: Ensure the machine is completely shut down.
- Let It Cool: The engine and exhaust components can become extremely hot. Give them at least 15-20 minutes to cool down to prevent severe burns.
- Disconnect the Spark Plug: This is the most important step. Pull the wire cap off the spark plug. This physically prevents the engine from accidentally starting while you are working on it.
- Wear Protective Gear: Always wear heavy-duty gloves and safety glasses to protect your hands and eyes from sharp edges and debris.
- Work on a Stable Surface: Make sure the chipper is on level, solid ground and cannot roll or tip over.
- Consult Your Manual: Every model is slightly different. Your owner's manual contains specific diagrams and information about your machine's components.

Common Culprits: Identifying the Root Cause of a Non-Engaging Rotor
Several issues can prevent the engine's power from reaching the rotor. By understanding the most common culprits, you can narrow down your search and find the solution more quickly. These issues can affect any model, from a small electric unit to a heavy-duty 4 inch wood chipper.
Here are the most likely reasons your rotor isn’t engaging:
- Disengaged or Faulty Clutch: The clutch mechanism, which is responsible for tightening the drive belts, may not be engaging properly.
- Worn, Broken, or Slipped Drive Belts: The belts that connect the engine to the rotor may be too loose to transfer power, or they may have snapped or fallen off the pulleys.
- Broken Shear Pin/Bolt: Many chippers have a shear pin that is designed to break if the rotor becomes jammed, protecting the engine from damage.
- Jammed Rotor: A piece of wood or debris may be physically wedged in the rotor housing, preventing it from turning.
- Failed Centrifugal Clutch: On models equipped with a centrifugal clutch, worn-out internal springs or shoes can prevent it from engaging when the engine revs up.
Step-by-Step Guide: Checking the Clutch Mechanism for Engagement Issues
For many engine wood chippers, a manually operated clutch is the first place to look. This system often uses a lever to move a tensioner pulley that tightens the drive belts. If this mechanism fails, the belts will remain slack, and the rotor won't spin.
Follow these steps to inspect your clutch:
- Locate the Clutch Lever: Find the handle or lever used to engage the rotor. On many models, like a towable wood chipper, this is a large, prominent bar. On a compact wood chipper, it might be a smaller handle near the engine.
- Inspect Linkages: With the engine off and the spark plug disconnected, trace the path from the lever to the belt housing. Look for any bent rods, disconnected springs, or loose cables. The problem could be as simple as a cotter pin that has fallen out.
- Test the Lever’s Action: Move the lever back and forth between the "engaged" and "disengaged" positions. It should move smoothly but with some resistance as it operates the tensioner. If the lever feels floppy or completely stuck, the linkage is likely broken or disconnected.
- Check the Tensioner Pulley: Safely remove the belt guard (usually held on by a few bolts). Watch the tensioner pulley as you operate the lever. When you move it to the "engaged" position, the pulley should press firmly against the drive belts. If it doesn't move or doesn't apply enough pressure, the clutch linkage needs adjustment or repair.
Inspecting the Drive Belt: Signs of Wear, Damage, or Misalignment
The drive belt is the critical link between your engine wood chipper's engine and the rotor assembly. It transfers the rotational power that makes the chipping happen. If this belt is compromised, the engine will run perfectly, but the rotor will remain motionless.
After ensuring your machine is off and the spark plug is disconnected, remove the belt guard to access the drive system. Carefully inspect the belt for these common signs of failure:
- Wear and Tear: Look for cracks, fraying, or missing chunks. A belt with visible damage cannot grip the pulleys effectively and is at risk of snapping.
- Glazing: A belt that appears shiny or glossy has become "glazed." This happens from heat and slippage, hardening the rubber and severely reducing its grip.
- Tension: A belt that is too loose will slip on the pulleys, often creating a high-pitched squeal when the engine revs up, but it won't transfer power. Conversely, a belt that is too tight puts excessive strain on the engine and rotor bearings, leading to premature failure. Check your owner's manual for the correct tension specification, but generally, there should be about half an inch of play when you press on the middle of the belt.
- Misalignment: Check that the engine pulley and the rotor pulley are perfectly aligned. If they are offset, the belt will wear unevenly and may jump off the pulleys entirely.
If the belt is damaged, glazed, or stretched beyond adjustment, it must be replaced. This is often a straightforward repair that can quickly get your compact wood chipper back in service.

Troubleshooting the PTO Shaft: Ensuring Proper Connection and Function
For larger, tractor-driven, or towable wood chipper models, power is transferred via a Power Take-Off (PTO) shaft. This component is designed with a specific weak point to protect the chipper's gearbox and the tractor's transmission from damage caused by a sudden jam.
The most common point of failure is the shear pin or shear bolt. This small pin is engineered to break or "shear" if the rotor experiences a torque overload, instantly disconnecting the driveline. If your PTO shaft is spinning but the rotor isn't, the shear pin is the first thing to check.
- Locate the Shear Pin: It is typically found on the yoke connecting the PTO shaft to the chipper's input shaft.
- Inspect for Damage: A sheared pin will be broken in two, with the pieces often still inside the bolt hole. You may need to use a punch and hammer to remove the broken fragments.
- Replace Correctly: Always replace a sheared pin with an identical one from the manufacturer. Using a standard, hardened bolt is extremely dangerous, as it will not break under load, potentially causing catastrophic damage to your equipment.
Also, ensure the PTO shaft is securely connected at both the tractor and the chipper. A loose connection can prevent power transfer and damage the splines on the shafts.
Examining the Rotor and Blade Assembly: Obstructions and Damage
If the power transfer system (belt or PTO) seems fine, the problem may be a physical obstruction preventing the rotor from turning. A severe jam can stop the rotor so abruptly that the engine continues to run while the belt slips or the clutch remains disengaged.
WARNING: Before inspecting the rotor, you must turn off the engine, wait for all moving parts to stop, and disconnect the spark plug wire to prevent any chance of an accidental start.
Open the housing to get a clear view of the cutting chamber. Look for:
- Lodged Material: A large, tough piece of wood or a build-up of stringy green material can become wedged between the rotor and the housing, effectively locking it in place.
- Foreign Objects: Rocks, metal, or other debris accidentally fed into the chipper can cause a serious jam.
- Blade Damage: Inspect the chipper blades themselves. A broken blade can become wedged against the anvil or housing, preventing rotation.
If you find an obstruction, use a sturdy piece of wood or another tool to carefully pry it loose. Never put your hands inside the chipping chamber. Once the jam is cleared, try to turn the rotor by hand (with the spark plug still disconnected) to ensure it moves freely before reassembling the unit and starting the engine. A 3 IN 1 wood chipper with easy access to the rotor makes this inspection much simpler.
Assessing the Centrifugal Clutch: How it Works and What to Look For
Many gas-powered engine wood chippers, from a mini wood chipper to a heavy-duty 4 inch wood chipper

Troubleshooting Hydraulic Systems (If Applicable): Fluid Levels and Pump Issues
While most residential wood chippers use a direct-drive system with belts and a centrifugal clutch, some larger, more powerful models—especially commercial or towable wood chipper units—may use a hydraulic system to power the feed rollers or even engage the rotor. If your machine is equipped with hydraulics and the rotor isn't engaging, this system is a prime suspect.
Always consult your owner's manual to confirm if your chipper has a hydraulic system and to identify the correct fluid type.
- Check the Hydraulic Fluid Level: With the engine off and cool, locate the hydraulic fluid reservoir. It will have either a dipstick or a sight glass. Ensure the fluid is at the "full" mark. Low fluid can introduce air into the system, causing the pump to whine and preventing it from building enough pressure to engage components.
- Inspect the Fluid Condition: Healthy hydraulic fluid is typically clear with an amber or reddish tint. If the fluid appears milky, it's contaminated with water. If it's dark and smells burnt, it has been overheated. Debris or metallic specks in the fluid signal serious internal wear. In any of these cases, the system should be drained, flushed, and refilled with new fluid.
- Look for Leaks and Listen for Odd Noises: Visually inspect all hydraulic hoses, fittings, and seals for signs of leaks. A small leak can lead to a significant loss of fluid and pressure over time. When the engine is running, listen to the hydraulic pump. A loud whining or grinding sound is a clear indicator of a problem, such as air in the system or a failing pump.
If the fluid level is correct and the condition is good, but you still have no hydraulic function, the issue may lie with a clogged filter, a faulty control valve, or the pump itself, which may require professional diagnosis.
When to Call a Professional: Recognizing Complex Mechanical Problems
While many engagement issues can be resolved with basic tools and troubleshooting, it's crucial to know your limits. Attempting a repair beyond your skill level can lead to further damage or, more importantly, serious injury. It's time to put down the tools and call a certified small engine or equipment mechanic if you encounter any of the following:
- Loud, Destructive Noises: If engaging the rotor produces severe grinding, clanking, or banging sounds, shut the engine off immediately. This often points to a catastrophic failure inside the clutch or rotor assembly, such as shattered bearings or broken internal parts.
- Suspected Internal Engine Damage: If you suspect the problem lies with the engine's crankshaft or an internal component responsible for transferring power, this is not a typical DIY repair.
- Major Hydraulic System Failure: If you've checked the fluid and can't find an obvious leak, but the hydraulic system is completely unresponsive or making loud noises, the pump or control valve has likely failed. These are complex and expensive components to replace.
- Visible Cracks in Major Components: Any cracks found in the engine casing, rotor housing, or main equipment frame are critical safety failures. Do not operate the machine under any circumstances.
- You're Not Confident: There's no shame in calling for help. If you've gone through the basic troubleshooting steps and are still unsure of the cause, or if the repair requires specialized tools you don't own, a professional can diagnose and fix the problem efficiently and safely. Even a reliable 4 inch wood chipper can develop complex issues that are best left to an expert.
Preventative Maintenance Tips to Avoid Rotor Engagement Problems
The best way to fix a problem is to prevent it from happening in the first place. A consistent maintenance routine will dramatically reduce the chances of your wood chipper's rotor failing to engage, ensuring it's ready to work when you are.
- Follow a Regular Inspection Schedule: Before each use, do a quick walk-around. Look at the drive belts for cracks or fraying. Check that guards are secure. This simple habit can help you spot developing problems early.
- Keep It Clean: Wood chips, sap, and dirt can build up on and around the clutch, pulleys, and belts. This debris can cause parts to overheat, slip, or seize. After each use, use a leaf blower or compressed air to clean the engine and drive system area.
- Mind Your Belts: The drive belt is the critical link between your engine and the rotor. Periodically check its tension—it should have a small amount of play but shouldn't feel loose. A slipping belt is a common cause of a non-engaging rotor.
- Lubricate Moving Parts: Your owner's manual will specify which parts need lubrication, such as rotor bearings. Sticking to this schedule prevents friction and premature wear on key components that support the rotor.
- Don't Overload the Machine: Every engine wood chipper has a maximum branch diameter capacity. Forcing oversized or tough, knotty wood into your chipper puts extreme stress on the clutch and drive belt, leading to slippage and eventual failure. Use a mini wood chipper for small yard debris and a larger model for bigger jobs.
- Proper Storage: When not in use, store your compact wood chipper in a shed or garage, or under a waterproof cover. This protects belts from UV degradation and prevents moisture from causing rust on the clutch and bearings.

Frequently Asked Questions About Wood Chipper Rotor Engagement
Why does my wood chipper rotor spin slowly or stop when I add wood?
This is a classic sign that power isn't being transferred effectively from the engine to the rotor. The most common cause is a loose or worn drive belt. When the engine is idling, the belt might have enough grip to turn the rotor, but as soon as you introduce a load (wood), the increased resistance causes the belt to slip on the pulleys. You may hear a squealing sound accompanying this. Another possibility is a worn-out centrifugal clutch. The clutch pads or springs may be so worn that they can't maintain a firm grip under load. Finally, ensure you aren't overloading the machine. Even a powerful 4 inch wood chipper has its limits; feeding it material that is too large or hard can cause the rotor to stall.
Can a simple jam cause the rotor to not engage at all?
Absolutely. A significant jam in the rotor housing can prevent the rotor from moving at all. When you start the engine and throttle up, the clutch will try to engage, but it can't turn a rotor that is physically blocked. This can result in the engine stalling, the drive belt smoking and slipping violently, or the belt breaking. Before investigating any other cause, perform a thorough safety check: turn off the engine, wait for all moving parts to stop, and disconnect the spark plug wire. Then, carefully inspect the infeed chute and the rotor chamber for any lodged wood, debris, or foreign objects.
How often should I check the drive belt on my engine wood chipper?
Regular belt inspection is key to preventing engagement problems. For best practice:
- Before each use: Perform a quick visual check. Look at the belt tension—it should typically deflect about 1/2 inch under firm thumb pressure. Make sure it's seated correctly in the pulley grooves.
- Every 25 hours of operation: Conduct a more detailed inspection. With the machine off and the spark plug disconnected, remove the belt guard. Look for signs of wear such as cracking, glazing (a shiny, smooth surface), fraying, or missing chunks. A glazed belt will slip easily, while a cracked one is at risk of snapping. Replace the belt if you see any of these signs.
Is it normal to hear a squealing sound when the rotor is supposed to engage?
No, a high-pitched squeal is a clear distress signal. This sound is almost always caused by a slipping drive belt. The noise is the sound of the rubber belt sliding against the metal pulley instead of gripping it. This happens for two main reasons: the belt is too loose and lacks proper tension, or the belt is old, hardened, and "glazed," losing its natural grip. On a 3 IN 1 wood chipper, this is one of the first and most obvious signs that your belt needs to be tightened or replaced. Ignoring it can lead to a snapped belt or damage to the pulleys.
What's the difference between a centrifugal clutch and a manual clutch?
Understanding your clutch type is crucial for troubleshooting.
- Centrifugal Clutch: This is the most common type on consumer-grade and compact wood chipper models. It works automatically. As you increase the engine's RPM, centrifugal force pushes weighted clutch "shoes" outward to engage with a drum, which then turns the drive pulley. There is no lever to pull; engagement is based entirely on engine speed.
- Manual or Lever-Actuated Clutch: Found on some larger, heavy-duty, or towable wood chipper models, this system requires you to manually engage the rotor using a lever or handle. This lever tightens the drive belt or engages a clutch plate, connecting the engine's power to the rotor. If a machine with this system isn't engaging, the issue could be with the lever linkage, tensioner pulley, or the belt itself.
Could low engine oil cause the rotor not to engage?
Indirectly, yes. Low engine oil will not directly stop a clutch from working. However, most modern wood chipper engines are equipped with a low-oil sensor. This safety feature is designed to shut the engine off automatically if the oil level drops to an unsafe point, preventing catastrophic engine damage. If your engine starts but then sputters and dies as you throttle up—before the centrifugal clutch has a chance to engage—it could be the low-oil sensor at work. Always check your engine oil level as a first step in any troubleshooting process.
Related Products


Leave a comment
All comments are moderated before being published.
This site is protected by hCaptcha and the hCaptcha Privacy Policy and Terms of Service apply.