









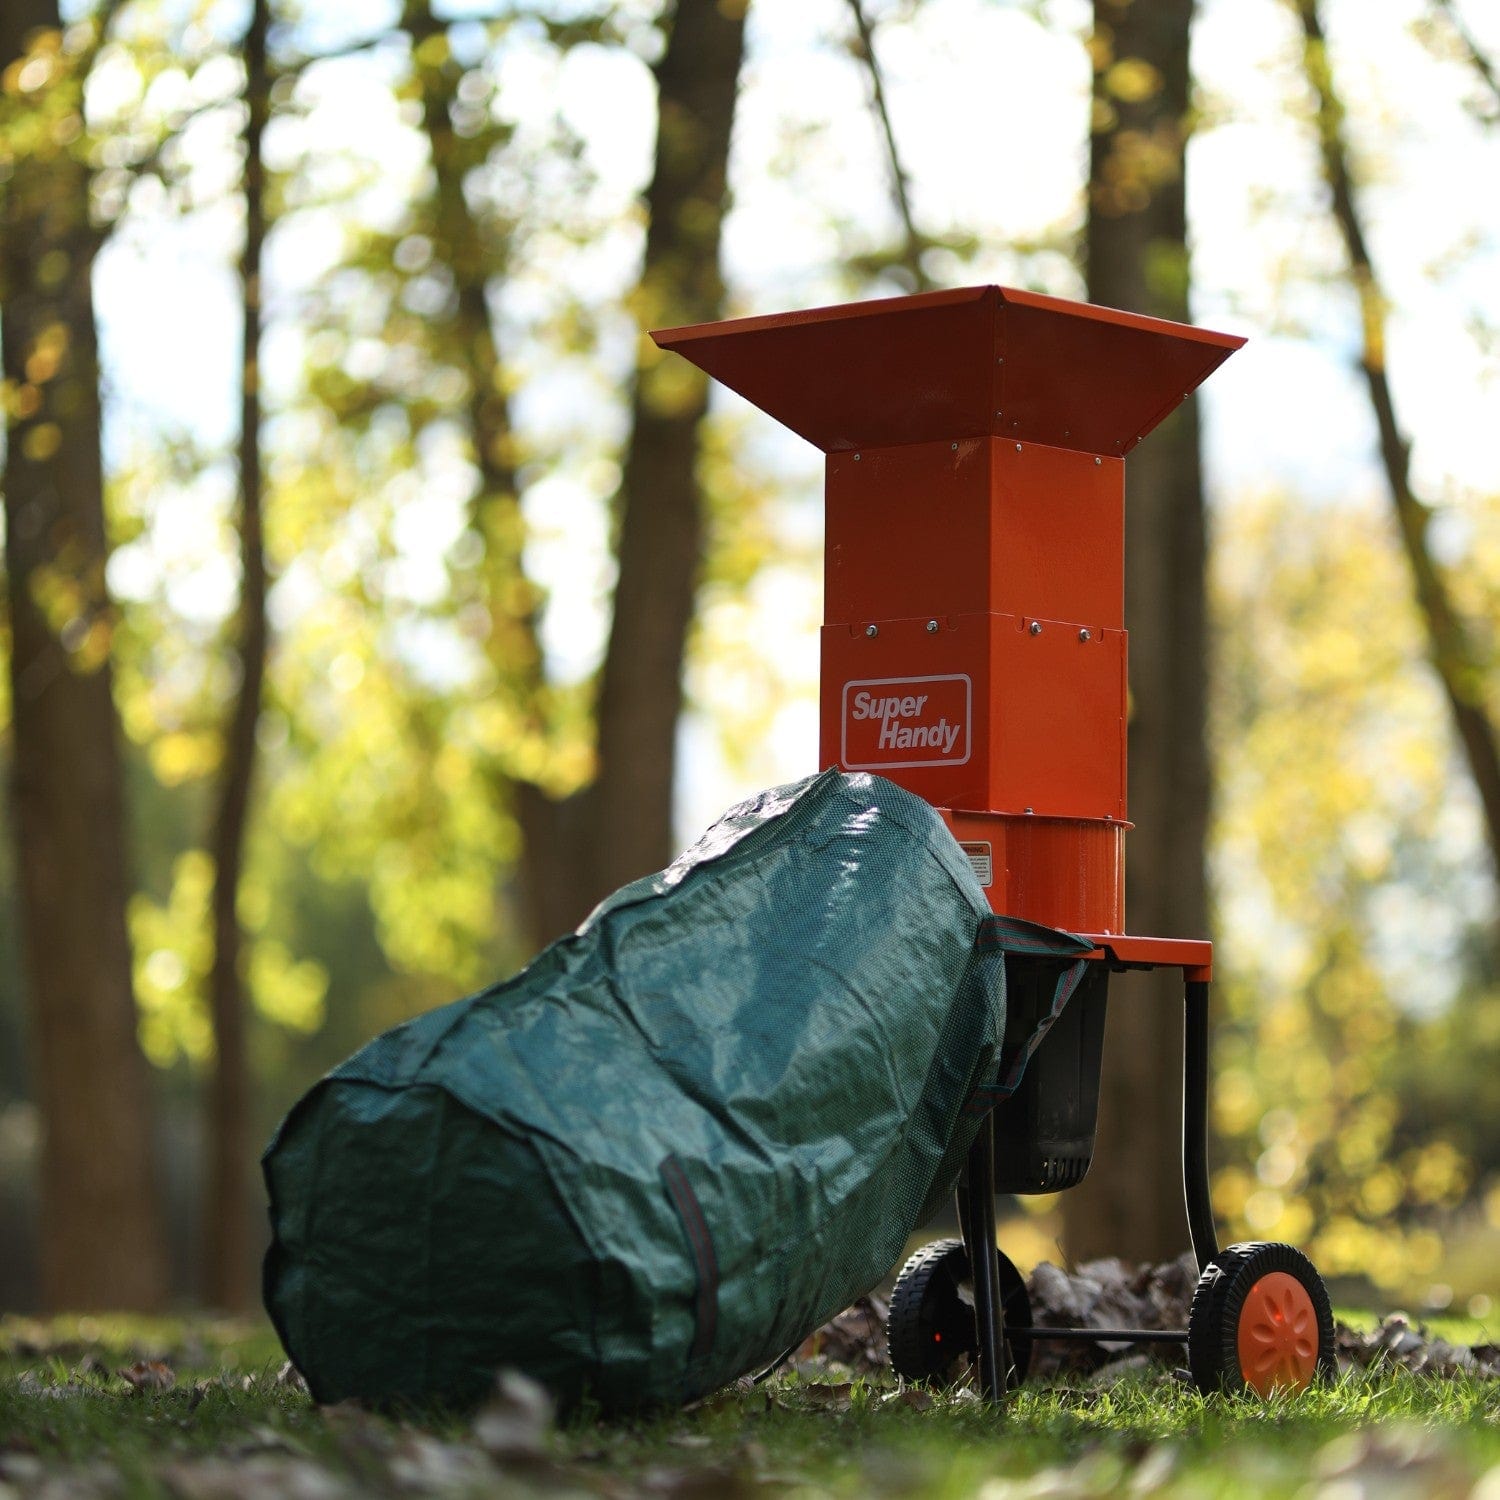
Understanding How Electric Leaf Mulchers Work: A Quick Overview
Before diving into troubleshooting, it helps to know the basics of how your machine operates. At its core, an electric leaf mulcher uses a motor to power a high-speed cutting system, which is typically a set of durable strings or small blades. You feed leaves into the top hopper, where they are funneled down into the cutting chamber. The cutting mechanism shreds the leaves into fine pieces, reducing their volume significantly. This freshly made mulch is then deposited into an attached collection bag, ready for use in your garden beds or compost pile. Understanding this simple process—input, shred, output—is the first step to diagnosing any problem.
Safety First: Essential Precautions Before Troubleshooting
Your safety is the absolute top priority when working with any power equipment. Attempting to fix a leaf mulcher while it's connected to a power source is extremely dangerous and can lead to serious injury. Before you inspect, clean, or attempt to fix any part of your mulcher, you must follow this critical rule: always disconnect the power supply. For a corded model, unplug it from the wall outlet. For a cordless model, remove the battery pack.
Once the power is disconnected, wait a few moments to ensure all moving parts have come to a complete stop. Always wear appropriate personal protective equipment (PPE), including heavy-duty work gloves and safety glasses, to protect your hands and eyes from sharp edges and flying debris. According to the OSHA hand and power tool safety guidance, proper user training and PPE are fundamental to preventing workplace accidents, a principle that applies equally to home use. Work on a stable, level surface to prevent the machine from tipping over while you inspect it.

Electric Leaf Mulcher Not Turning On: Power Supply Checks
If your electric leaf mulcher won’t start, the problem is most often related to the power supply. Don't assume the machine is broken; start by checking the most obvious culprits.
For Corded Models:
- Check the Plug: Ensure the power cord is firmly plugged into the wall outlet and the mulcher itself.
- Test the Outlet: Plug another device, like a lamp or a phone charger, into the same outlet to confirm it has power. If not, check your home’s circuit breaker or fuse box and reset any tripped breakers.
- Inspect the Extension Cord: Examine the entire length of your extension cord for any cuts, frays, or damage. A damaged cord can interrupt the flow of electricity. Also, ensure you are using a heavy-duty, outdoor-rated extension cord that is appropriate for the amperage of your mulcher.
For Cordless Models:
- Check the Battery: Make sure the battery is fully charged. Most batteries have an indicator light to show their charge level.
- Secure the Battery: Remove and re-insert the battery to ensure it is properly seated and making a solid connection with the contacts.
- Clean the Contacts: Inspect the metal contacts on both the battery and the mulcher. If they are dirty or corroded, gently clean them with a dry cloth.
Troubleshooting a Jammed Electric Leaf Mulcher: Clearing Debris Safely
A jam is one of the most common issues you’ll encounter, usually caused by feeding too many leaves at once, trying to mulch wet, heavy leaves, or accidentally introducing foreign objects like sticks, acorns, or rocks. If your mulcher hums but doesn't shred, or if it shuts off abruptly during use, it's likely jammed.
Here’s how to clear it safely:
- Disconnect the Power! This cannot be stressed enough. Unplug the unit or remove the battery immediately.
- Wait for Motion to Stop: Give the cutting lines or blades time to come to a complete standstill.
- Put on Gloves: Protect your hands with thick work gloves.
- Never Use Your Hands: Do not reach into the hopper or discharge chute with your hands. The cutting mechanism is sharp, even when stationary.
- Use a Tool: Carefully use a wooden stick, a broom handle, or a manufacturer-provided clearing tool to dislodge the compacted material from the hopper. You may also need to clear debris from the outlet chute at the bottom.
- Inspect for Damage: Once the clog is cleared, visually inspect the cutting lines or blades for any damage before reassembling and reconnecting the power.
Electric Leaf Mulcher Making Strange Noises: Identifying the Cause
An electric leaf mulcher should produce a consistent, powerful hum during operation. When that sound changes to something more alarming, it's time to stop and investigate. Always unplug the unit before inspecting it.
- Grinding or Scraping: This is the most concerning noise. It often means a hard object like a rock, acorn, or thick branch has found its way into the mulching chamber and is colliding with the cutting mechanism. It could also indicate a loose or damaged blade. Turn the machine off immediately and clear the foreign object.
- Loud Rattling: A rattling sound usually points to a loose component. This could be a bolt on the housing, a loose part in the motor assembly, or debris bouncing around inside the hopper without being properly shredded. Check all external nuts and bolts to ensure they are tight.
- High-Pitched Whining: If the motor begins to whine at a higher-than-normal pitch, it's a sign of strain. You might be feeding material too quickly, or the motor's bearings could be wearing out. Try reducing the volume of leaves you feed at one time. If the sound persists even with a light load, the motor may require service.
Why Isn't My Electric Leaf Mulcher Mulching Effectively? Blade and Bag Issues
If you're ending up with large, poorly-shredded leaf pieces instead of fine mulch, the problem usually lies with the blades or the collection bag. Ineffective mulching not only looks bad but also means the machine is working harder than it needs to.
The most common culprit is dull or damaged cutting blades (or trimmer lines on some models). Over time, blades lose their sharp edge from hitting dirt, twigs, and thousands of leaves. Dull blades tear and rip leaves instead of slicing them, resulting in a coarse, stringy output. Unplug your electric leaf mulcher and inspect the blades for nicks, chips, and dullness. Many blades can be flipped to use a second sharp edge, sharpened, or replaced entirely.
Another frequent issue is the collection bag. An overfilled bag prevents air from flowing through the system. This creates backpressure that stops leaves from feeding into the chamber properly and can even blow dust and debris back out of the hopper. For best results, empty the collection bag when it is about two-thirds full.

Overheating Electric Leaf Mulcher: Common Culprits and Solutions
An overheating motor is a serious issue that can cause permanent damage. If you notice your mulcher getting excessively hot or shutting off unexpectedly, stop using it immediately and let it cool down completely.
The most common cause of overheating is blocked air vents. Your mulcher’s motor has vents to draw in cool air and exhaust heat. Over time, these can become clogged with fine dust and debris, trapping heat inside. Unplug the unit and use a stiff brush or compressed air to clear all ventilation slots.
Other causes include:
- Overloading: Forcing too many leaves into the hopper at once puts a massive strain on the motor. Feed leaves at a steady, manageable pace.
- Dull Blades: As mentioned, dull blades force the motor to work harder to shred material, generating excess heat.
- Improper Extension Cord: Using an extension cord that is too long or not the right gauge (thickness) for your mulcher can cause a voltage drop. This forces the motor to pull more amps to compensate, leading to overheating. Following OSHA guidance on hand and power tool safety includes using correctly rated cords for all electric equipment. Always check your owner’s manual for the recommended extension cord specifications.
Dealing with Clogged Chutes: Ensuring Smooth Operation
A clogged chute is one of the most common interruptions when using a leaf mulcher, especially when dealing with damp leaves. A clog prevents material from entering the mulching chamber or exiting into the bag, bringing your work to a halt.
Clogs are typically caused by feeding wet, matted leaves, pushing material in too quickly, or allowing the collection bag to get too full. If you notice leaves are no longer feeding or mulch has stopped flowing into the bag, your machine is likely clogged.
Follow these steps to clear it safely:
- Stop the machine immediately.
- UNPLUG the electric leaf mulcher from the power source. This is the most important step. Never attempt to clear a clog with your hands while the machine is plugged in, even if it's turned off.
- Wait for all moving parts to come to a complete stop.
- Carefully inspect the inlet hopper and the discharge chute.
- Use a wooden stick or a purpose-built clearing tool to break up and remove the impacted leaves. Do not use your hands.
- Once the clog is cleared, you can safely plug the unit back in and resume mulching.
Electric Leaf Mulcher Smells Like Burning: What to Do Immediately
A burning smell coming from your electric leaf mulcher is a serious warning sign that requires immediate action. Do not hesitate.
- Unplug the Machine Immediately: Your first and most important step is to disconnect the mulcher from its power source to prevent electrical shock or a potential fire.
- Allow it to Cool Down: Do not touch the motor housing or attempt any inspection until the unit has cooled down completely, which could take at least 30-60 minutes.
- Inspect for the Cause: Once cool, look for the source of the smell. Common culprits include:
- Overworked Motor: Pushing too many leaves, especially wet or green ones, into the machine at once can strain the motor, causing it to overheat and produce a burning odor.
- Blocked Vents: Debris, dust, and leaves can clog the motor's air vents, trapping heat and causing it to overheat.
- Internal Electrical Fault: A short circuit or damage to the internal wiring can cause plastic components or wire insulation to melt and burn.
If the smell was caused by overheating from a simple clog or overwork, clearing the blockage and allowing the motor to cool may solve the problem. However, if you see melted plastic, damaged wires, or the smell returns immediately upon restarting with no load, stop using the machine. It likely has an electrical fault that requires professional attention.

Maintaining Your Electric Leaf Mulcher for Optimal Performance
Consistent maintenance is the key to keeping your Electric leaf mulcher running efficiently and safely for years. A well-maintained tool is not only more effective but also significantly safer to operate.
Follow these simple steps after each use:
- Clean Thoroughly: After unplugging the unit, use a brush and a damp cloth to clean all leaf residue, sap, and dust from the hopper, mulching chamber, and discharge chute. This prevents corrosion and future jams.
- Inspect the Cutting Lines: Check the mulching lines or blades for wear and tear. Worn-out lines will shred leaves poorly and put more strain on the motor. Replace them according to your user manual's recommendations.
- Check Hardware: The vibration of the motor can loosen nuts and bolts over time. Periodically give your machine a quick once-over to ensure all fasteners are tight.
- Store Properly: Store your leaf mulcher in a clean, dry area like a garage or shed. Protecting it from the elements prevents rust on metal parts and degradation of the electrical components.
Proper tool care is a cornerstone of workplace and home safety. Maintaining your equipment in good condition, including keeping all guards in place and ensuring it's clean and functional, aligns with the best practices outlined in the OSHA hand and power tool safety guidance.
When to Call a Professional: Recognizing Irreparable Damage
While many issues can be fixed with simple troubleshooting, some problems are best left to a qualified technician or may indicate it's time to replace the unit. Prioritizing your safety is paramount, so stop using the mulcher and seek help if you notice any of these red flags:
- Cracked Housing: A crack in the main body or motor housing compromises the structural integrity and safety of the machine.
- Damaged Power Cord: Frayed, cut, or exposed wires on the power cord create a severe risk of electric shock.
- Persistent Electrical Problems: If the mulcher repeatedly trips circuit breakers or if you’ve identified a persistent burning smell that isn’t from overheating, there is likely a dangerous internal electrical fault.
- Bent or Broken Motor Shaft: If the blade or cutting head wobbles excessively and you’ve confirmed the blades are secure, the motor shaft itself may be damaged, which is typically not a user-serviceable repair.
Frequently Asked Questions About Electric Leaf Mulcher Problems
Have a question we haven't covered yet? This section addresses some of the most common queries users have about their electric leaf mulchers, providing quick and direct answers to help you get back to your yard work.
FAQ: My mulcher is blowing dust everywhere, what's wrong?
If your yard work session is suddenly clouded by an excessive amount of dust, it's a sign that something is off with your mulching process or your machine. An electric leaf mulcher will always produce some dust, but a large plume indicates a specific issue. Here are the most common culprits:
-
Your Leaves Are Too Dry: The primary cause of excessive dust is overly dry, brittle leaves. When these leaves hit the high-speed cutting mechanism, they don't just get shredded—they can pulverize into a fine powder that easily becomes airborne. To combat this, try mulching after a light morning dew or lightly misting your leaf pile with a garden hose before you begin. You want them damp, not soaking wet.
-
The Collection Bag is Full: Your mulcher needs airflow to operate correctly. As the collection bag fills up, air has a harder time escaping through the bag's porous fabric. This back-pressure can force air and dust out through any available opening, such as the seams around the motor housing or the hopper. The solution is simple: empty your collection bag more frequently, ideally when it's about two-thirds full.
-
A Damaged or Improperly Attached Bag: Check the collection bag itself for any rips, holes, or worn-thin areas where dust can escape. Also, ensure the bag is securely and correctly attached to the mulcher’s outlet port. A loose connection creates a perfect escape route for dust and debris.
[IMAGE PLACEHOLDER]
Regardless of the cause, working in a cloud of dust is unpleasant and can be a respiratory irritant. It's always a good practice to protect yourself. According to the Occupational Safety and Health Administration's guidance on hand and power tool safety, using the proper personal protective equipment (PPE) is crucial. Always wear safety glasses and a dust mask when operating your leaf mulcher to protect your eyes and lungs.
FAQ: Can I mulch wet leaves with my electric mulcher?
While it might seem convenient to mulch leaves right after a rainstorm, it is generally not recommended. Mulching wet leaves can create several problems for you and your machine.
First, wet leaves are heavy and tend to clump together. This sticky, dense material can easily clog the mulcher’s intake hopper and wrap around the cutting mechanism, leading to a jam. Clearing these soggy clogs is a messy and time-consuming task.
Second, forcing wet, heavy material through the machine puts significant strain on the motor of your electric leaf mulcher. This can lead to overheating and, in some cases, may shorten the motor's lifespan or cause it to fail prematurely.
Finally, the output is less than ideal. Instead of light, airy mulch, you’ll get a heavy, sodden paste that is difficult to spread in garden beds and can promote mold and fungus growth.
For best results, wait for the leaves to be mostly dry or slightly damp. If you absolutely must process wet leaves, do so in very small quantities and try to mix them with a larger volume of dry leaves to help prevent clogs and reduce the strain on the motor.
FAQ: How often should I replace the mulching blades?
There is no one-size-fits-all answer for blade or cutting line replacement, as the lifespan depends entirely on usage. The key is to inspect them regularly and recognize the signs of wear.
Several factors influence how quickly your blades will dull:
- Frequency and Volume: A homeowner who uses their mulcher for a few weekends in the fall will have blades that last many seasons. A professional landscaper using it daily may need to sharpen or replace them multiple times a year.
- Type of Debris: Mulching only leaves is easy on the blades. If you frequently feed your machine small twigs, acorns, pinecones, and other harder debris, the cutting edges will wear down much faster.
- Accidents: Accidentally sucking up a rock, piece of gravel, or other hard object can immediately nick, chip, or ruin a blade.
You'll know it's time to sharpen or replace the blades when you notice these signs:
- Decreased Performance: The mulcher struggles to pull material in, or the resulting mulch is stringy and torn rather than finely chopped.
- Increased Jams: Dull blades have to work harder, which can lead to more frequent clogs.
- Excessive Vibration or Noise: A bent or unbalanced blade can cause the whole machine to vibrate abnormally.
As a rule of thumb, inspect the cutting mechanism at the beginning of each season. Check for visible nicks, dull edges, or bending. Many models, including a quality electric leaf mulcher, use durable cutting line instead of blades, which is often easier and more affordable to replace. Always consult your owner's manual for specific instructions on inspecting and replacing the cutting components for your model.
Related Products


Leave a comment
All comments are moderated before being published.
This site is protected by hCaptcha and the hCaptcha Privacy Policy and Terms of Service apply.