


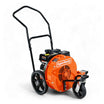


Keeping your SuperHandy stump grinder in top working condition is crucial for efficient stump removal. One important maintenance task is replacing the belt, which can wear out over time due to regular use. If you’re looking to replace the belt yourself, follow this straightforward guide to ensure a smooth and successful process.
Tools and Materials Needed
- Socket wrench or impact driver
- New replacement belt
- Assistant (optional, for easier handling)
Step 1: Remove the Belt Cover
Start by removing the belt cover to access the belt mechanism. Use a socket wrench or impact driver to unscrew the 4 bolts securing the cover in place. Once removed, set the cover and bolts aside in a safe place.
Step 2: Relieve Belt Tension
Next, release the clutch lever to relieve the tension on the belt. This step is crucial as it makes it easier to remove the old belt and install the new one.
Step 3: Loosen the Belt Guide Posts
Locate the 3 belt guide posts. Use your wrench to loosen them slightly, but do not remove them completely. Loosening these posts will allow you to adjust the belt’s position.
Step 4: Remove the Old Belt
To remove the old belt, go to the grinder pulley. Turn the grinder wheel while guiding and pulling the belt off the pulley track. This process may require some effort and assistance. Carefully guide the belt off and remove it completely.
Step 5: Install the New Belt
Place the new belt onto the pulley track. Ensure that the belt is positioned correctly and evenly. Align it with the grooves on the pulley and ensure it is seated properly.
Step 6: Apply Tension to the New Belt
Pull the clutch lever into the operating position to apply tension to the new belt. This step is important for ensuring the belt functions correctly and has the right amount of tension.
Step 7: Adjust the Belt Guides
Tighten the 3 belt guide posts while leaving about a 1/2 inch space between the belt and the posts. This gap is crucial for proper belt alignment and performance.
Step 8: Check Belt Tension
Release the clutch lever and check the belt tension. The belt should not be too tight or too loose. Adjust if necessary to ensure optimal performance.
Step 9: Reinstall the Belt Cover
Finally, reinstall the belt cover by securing it with the 4 bolts you removed earlier. Make sure the cover is aligned properly and securely fastened.
Conclusion
Replacing the belt on your SuperHandy stump grinder doesn’t have to be a daunting task. By following these steps, you can ensure that your equipment remains in good working order and continues to perform effectively. Regular maintenance, including belt replacement, will extend the life of your stump grinder and keep it running smoothly.
For more tips and maintenance guides, be sure to check out our other blog posts and resources. If you have any questions or need further assistance, don’t hesitate to reach out to our support team!


Leave a comment
This site is protected by hCaptcha and the hCaptcha Privacy Policy and Terms of Service apply.