


Owning a wood chipper, chipper shredder, or garden shredder is an investment in maintaining your property efficiently. Whether you're processing fallen branches, garden waste, or preparing mulch, these powerful machines significantly cut down on manual labor. However, like any piece of heavy-duty equipment, their performance and lifespan are directly tied to the care they receive. Proactive maintenance isn't just about fixing problems; it's about preventing them altogether, ensuring your wood chipper operates reliably season after season.
Regular upkeep translates into numerous benefits:
- Extended Lifespan: A well-maintained machine experiences less wear and tear, delaying the need for costly replacements.
- Optimal Performance: Sharp blades, clean filters, and proper lubrication ensure maximum chipping efficiency, saving you time and fuel.
- Enhanced Safety: Regular checks identify potential hazards before they lead to accidents.
- Reduced Operating Costs: Preventing major breakdowns through routine service is far more economical than reactive repairs.
- Consistent Power Delivery: An engine that's routinely cared for will provide reliable, uninterrupted power, tackling tough jobs with ease.
By integrating a maintenance routine into your schedule, you're not just preserving your equipment; you're safeguarding your time, your wallet, and your peace of mind.
Essential Pre-Operation Checks for Consistent Performance and Safety
Before you even think about starting your wood chipper, a quick yet thorough series of pre-operation checks is paramount. These inspections are your first line of defense against unexpected breakdowns and, more importantly, a crucial step in ensuring safe operation. Neglecting these simple steps can lead to decreased efficiency, premature component wear, and even serious injury. Make these checks a habit every time you prepare to use your machine.
Daily Visual Inspections and Fluid Level Verification
Every operation day should begin with a comprehensive walk-around inspection of your wood chipper.
- General Condition: Look for any loose bolts, nuts, or components. Vibrations during operation can loosen fasteners, and catching these early can prevent significant damage. Pay attention to guards and safety shields—ensure they are securely in place and undamaged, especially around the feed chute and discharge area. A quick overall inspection helps confirm that all parts are secure.
- Debris Removal: Inspect the feed chute, discharge chute, and around the engine for any accumulated debris, wood chips, or foreign objects. Blockages can impede performance and create dangerous projectile hazards.
- Blade/Knife Inspection: While a deep dive into blade maintenance is discussed next, a quick visual check for excessively dull, chipped, or broken blades is crucial. Damaged blades can cause imbalance and inefficient chipping.
-
Fluid Levels:
- Engine Oil: Check the engine oil level using the dipstick. Ensure it's within the recommended range. Low oil can lead to catastrophic engine failure. Refer to your owner's manual for the correct oil type and capacity for your specific wood chipper.
- Fuel: Confirm you have sufficient and fresh fuel. Stale fuel can cause starting issues and engine problems. Always use the recommended fuel type.
- Hydraulic Fluid (if applicable): If your chipper features a hydraulic feed system, check the hydraulic fluid reservoir level. Low fluid can impair feed roller function.
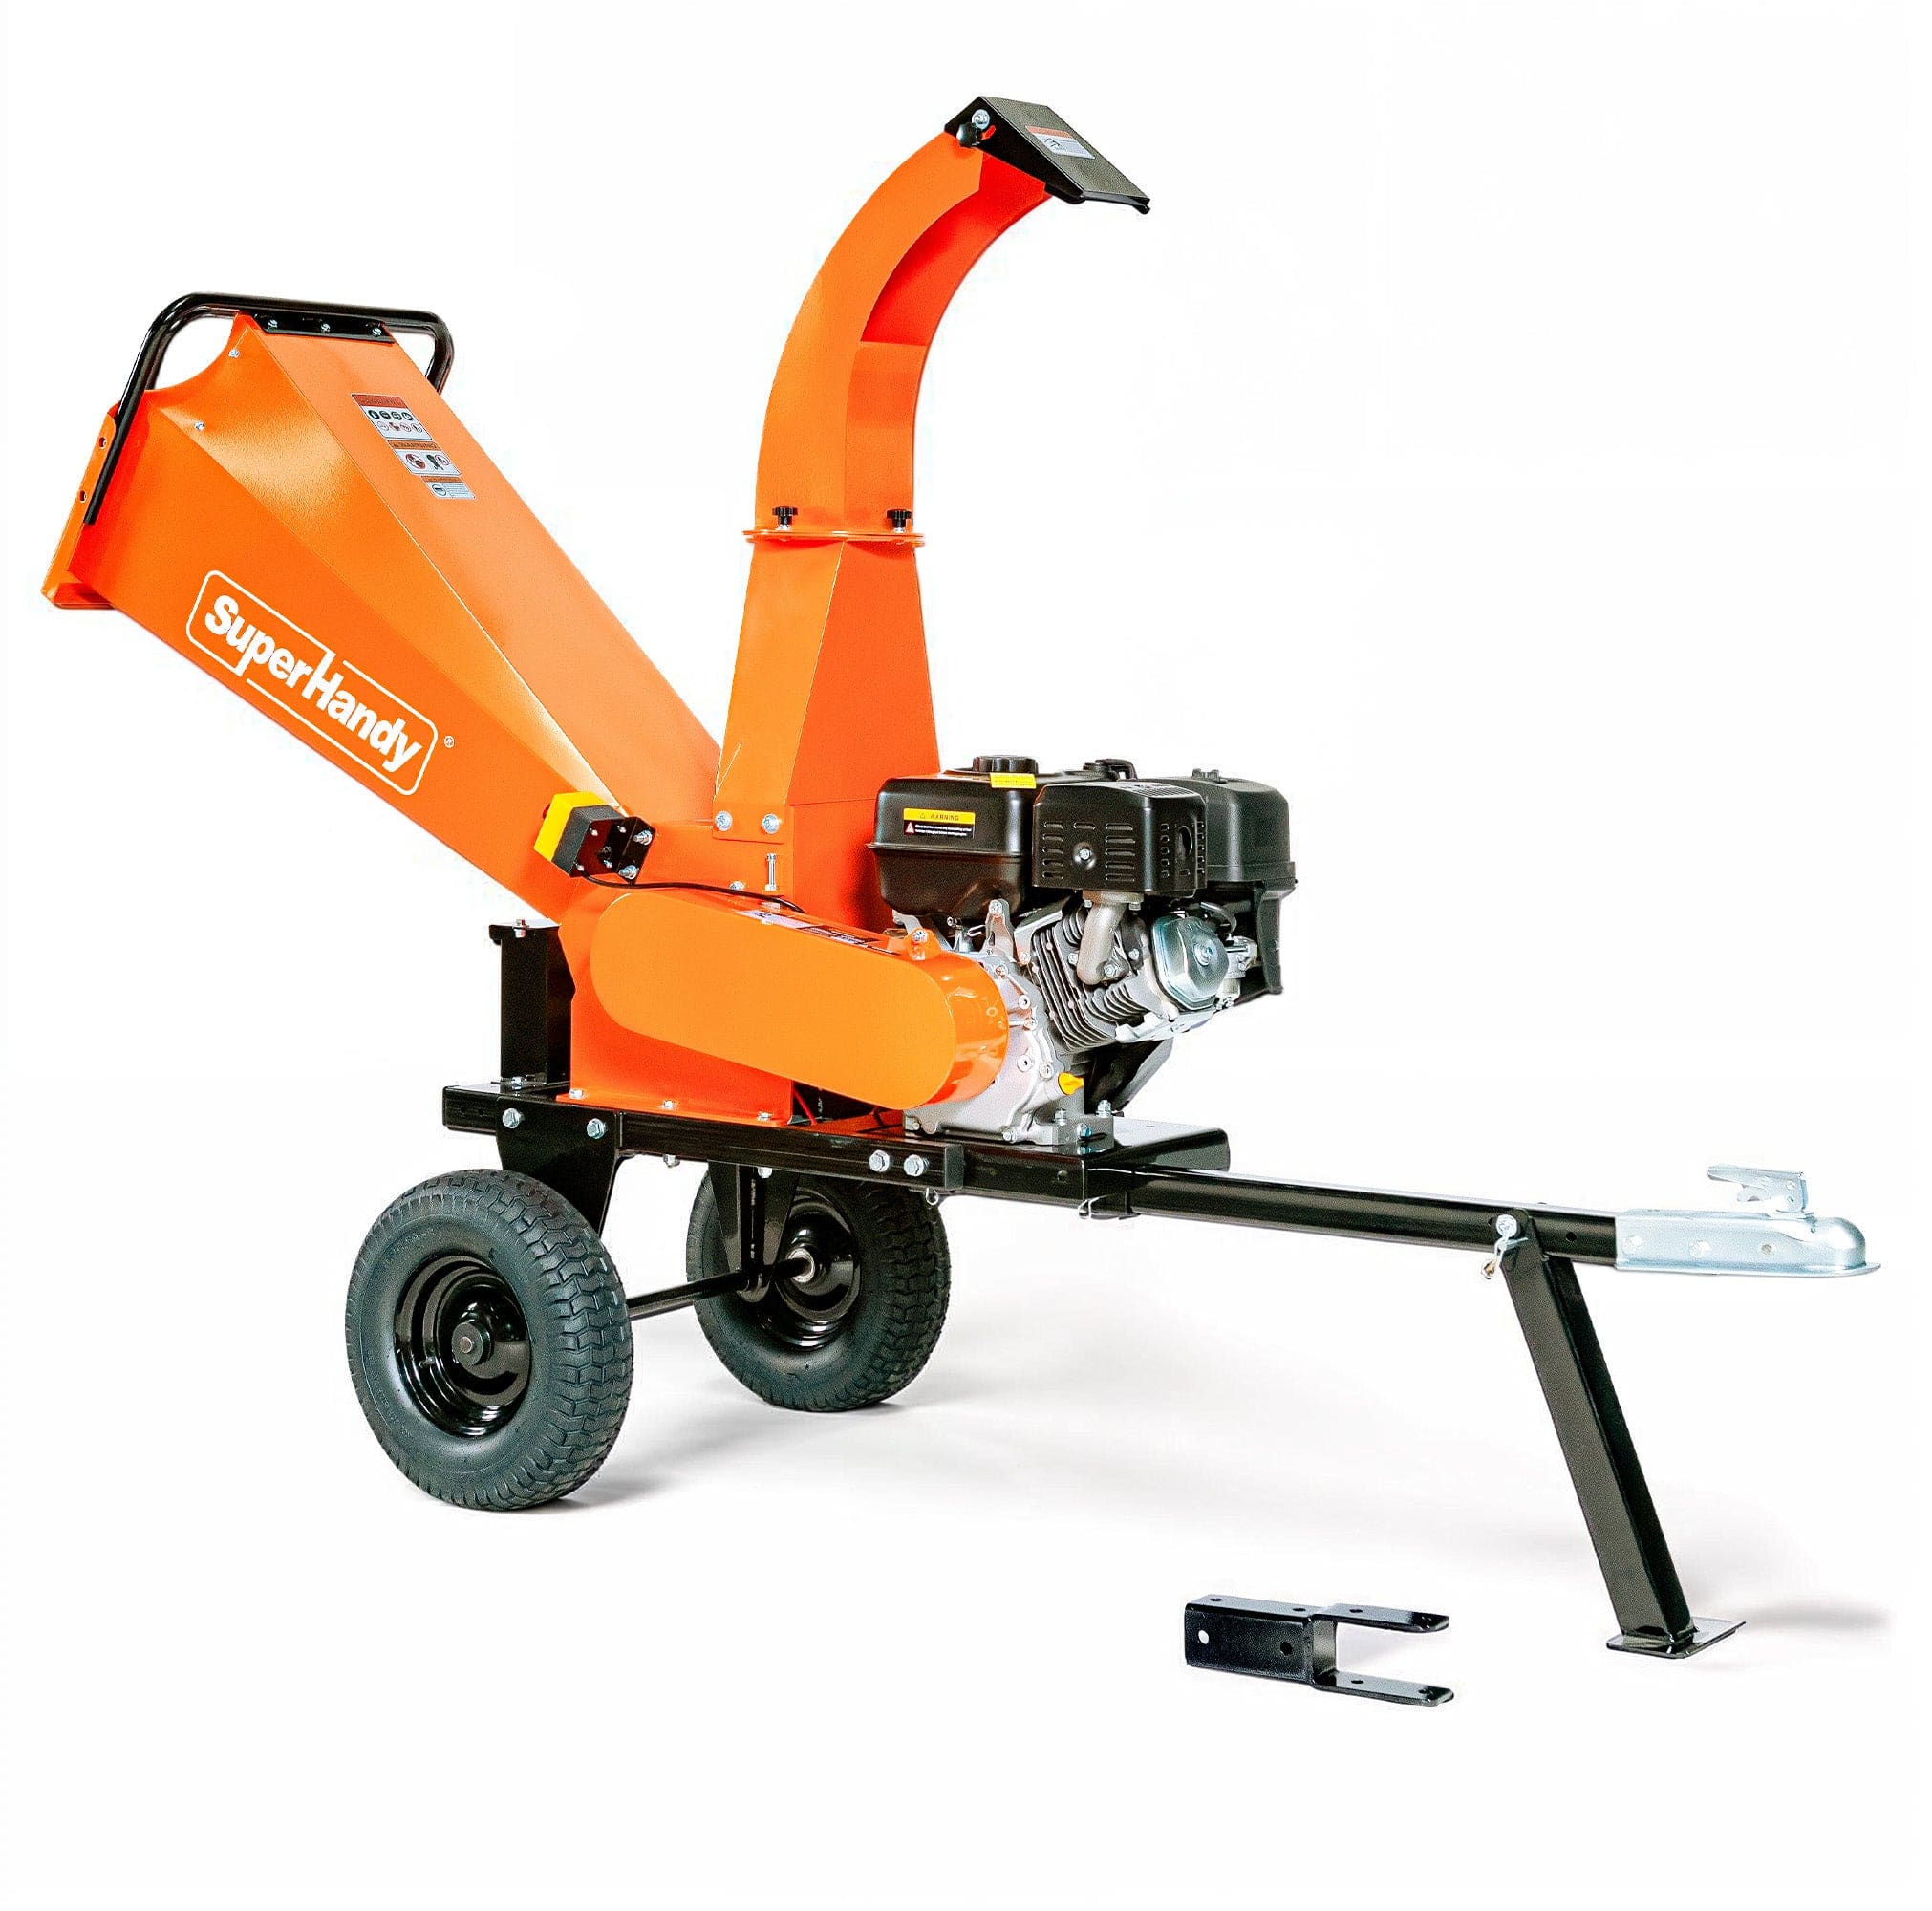
- Tires and Wheels (for towable models): For towable Wood Chipper Shredder, inspect tire pressure and condition. Ensure lug nuts are tight and the hitch mechanism is secure.
Mastering Blade and Knife Maintenance: Sharpening, Replacement, and Optimal Cutting Efficiency
The heart of any wood chipper's performance lies in its blades. Sharp, well-maintained blades are not merely an enhancement; they are fundamental to safe, efficient, and effective operation. Dull or damaged blades force the engine to work harder, consume more fuel, produce subpar chips, and significantly increase the risk of jams and premature wear on other components like belts and bearings. Investing time in proper blade maintenance ensures your machine, from compact garden shredders to powerful Wood Chipper, delivers its best performance with every use.
When and How to Sharpen or Replace Chipper Blades
Maintaining sharp blades is paramount for your wood chipper's efficiency and longevity. Dull blades don't chip; they tear and shred, putting undue stress on the engine and drive system, leading to inefficient operation and potential breakdowns. You'll know it's time to inspect your blades if your chipper struggles to process material, produces stringy or inconsistent chips, vibrates excessively, or simply takes longer to get the job done. For active users, checking blades every 20-30 hours of operation or at least annually is a good practice.
Sharpening Your Blades: Before you begin, always ensure the engine is off and the spark plug wire is disconnected to prevent accidental starting. Wear heavy-duty gloves and eye protection. To sharpen, remove the chipper blades following your machine's manual, consult the specific manual for blade access). Many blades are reversible, offering a fresh edge once flipped. If not, use a bench grinder or a professional sharpening service. The key is to maintain the original cutting angle, removing only enough material to restore a sharp edge, and to ensure each blade is sharpened equally to maintain balance. Unevenly sharpened blades can cause vibration and damage.
Replacing Your Blades: There comes a point when sharpening is no longer viable due to nicks, cracks, or excessive material removal. If your blades are severely damaged, too thin, or can no longer hold a sharp edge, it's time for a replacement. Always use OEM (Original Equipment Manufacturer) replacement blades to ensure proper fit, balance, and material quality. When installing new blades, make sure they are correctly oriented and torqued to the manufacturer's specifications. After installation, manually turn the chipping disc to ensure free movement and proper clearance. Investing in high-quality blades ensures your wood chipper operates at peak performance, whether it's a compact model or a more robust unit.
Engine Health: Regular Servicing for Uninterrupted Power Delivery
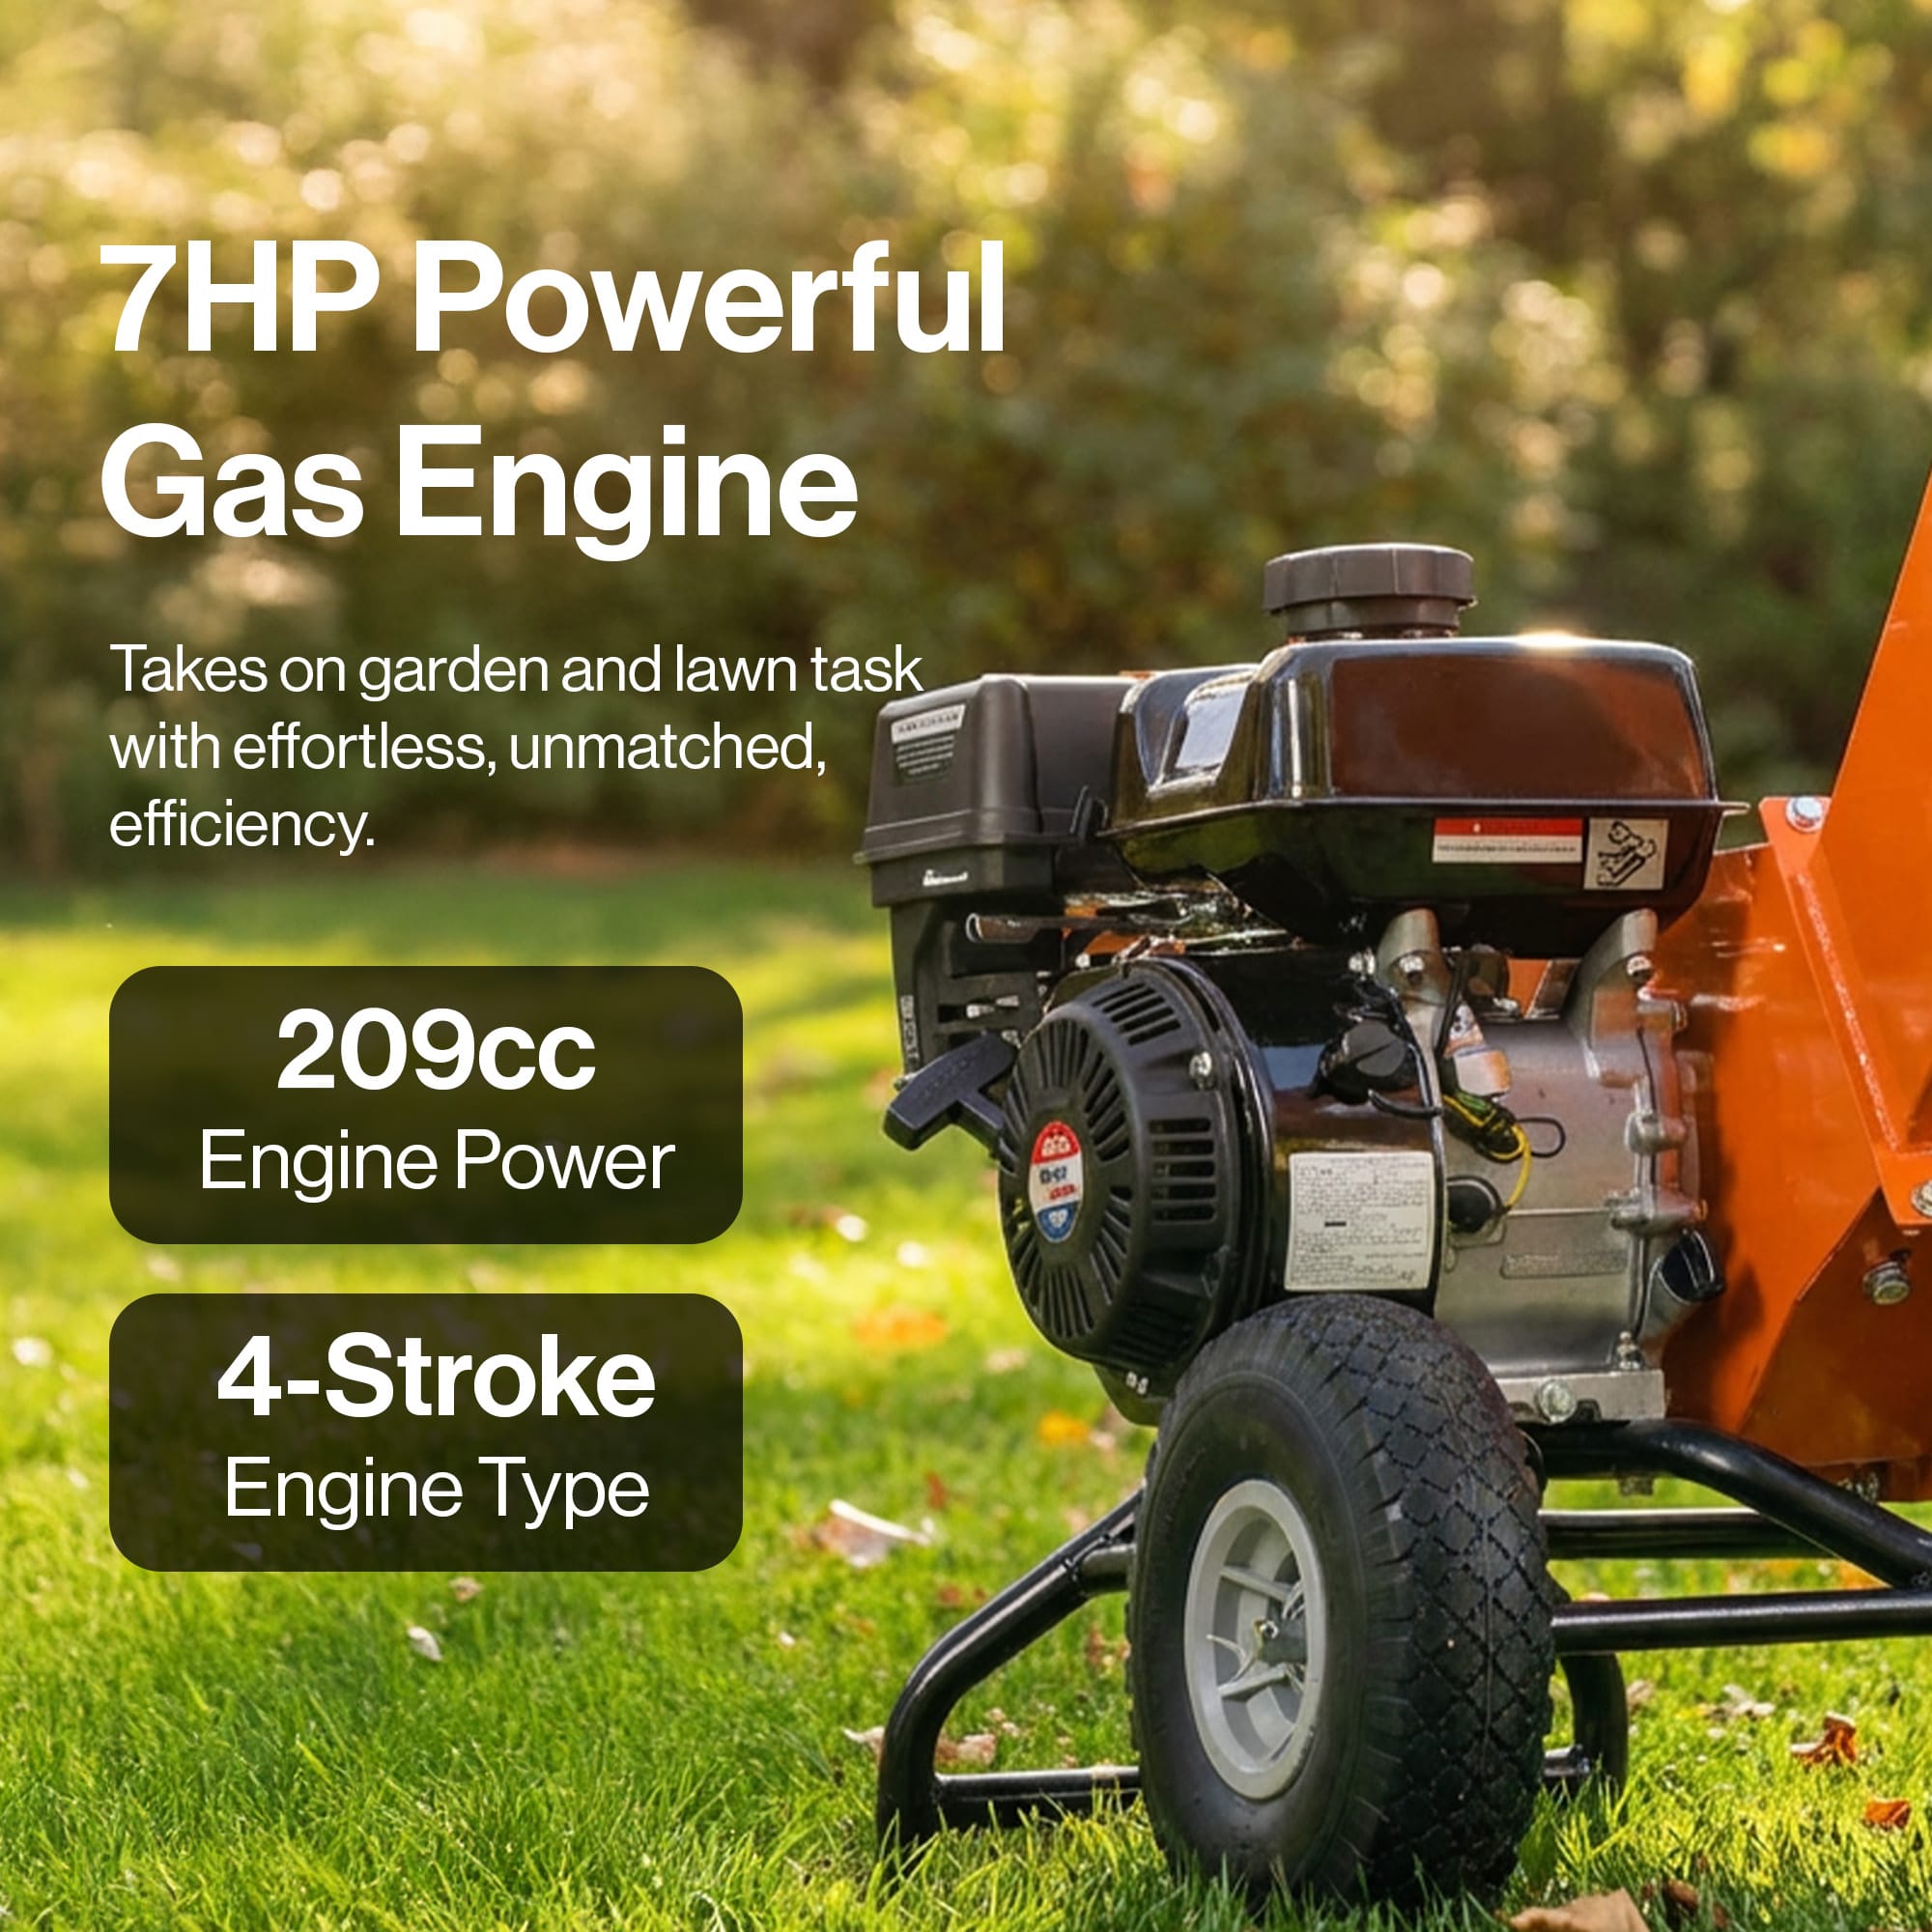
The engine is the heart of your wood chipper, providing the power to tackle stubborn branches and debris. Neglecting engine maintenance can lead to reduced performance, increased fuel consumption, difficult starting, and premature failure. Regular servicing, as outlined in your chipper's owner's manual (applicable to all Wood Chipper Shredders), is crucial for ensuring uninterrupted power delivery and extending the life of your machine.
Oil Changes, Filter Management, and Spark Plug Care
These three components are fundamental to engine health and are relatively easy to maintain.
Oil Changes: Engine oil lubricates moving parts, reduces friction, dissipates heat, and cleans the engine. Over time, oil breaks down and becomes contaminated. Consult your chipper's manual for specific oil change intervals, often recommended after the first 5-10 hours of use (break-in period) and then every 25-50 hours or annually, whichever comes first. Always use the recommended oil type (e.g., SAE 30 or 10W-30 for many small engines) and quantity. Draining warm oil ensures better removal of contaminants.
Filter Management:
- Air Filter: A clean air filter prevents dirt and debris from entering the engine's combustion chamber, which can cause significant damage. Inspect the air filter before each use. Paper filters should be replaced when dirty, while foam filters can often be cleaned with soap and water, dried thoroughly, and lightly oiled (if specified) before reinstallation.
- Fuel Filter: The fuel filter traps impurities in the fuel before they reach the carburetor. Check your manual for its location and recommended replacement schedule, typically annually or if you notice fuel delivery issues. A clogged fuel filter can lead to engine sputtering or failure to start.
Spark Plug Care: The spark plug ignites the air-fuel mixture, crucial for engine operation. Annually or every 50 hours, remove and inspect the spark plug. Look for signs of fouling (black carbon deposits), excessive wear, or damage. Clean any deposits with a wire brush. Check the gap with a feeler gauge and adjust if necessary, according to your engine's specifications. If the plug is heavily fouled, worn, or damaged, replace it with a new one of the correct type and heat range for your specific wood chipper.
Drive System Integrity: Inspecting and Adjusting Belts, Pulleys, and Bearings
The drive system—comprising belts, pulleys, and bearings—transfers power from the engine to the chipping mechanism. Its integrity is vital for efficient and safe operation of any wood chipper. Regular inspection prevents power loss, excessive wear, and potential system failure.
Belts: Over time, belts can stretch, crack, fray, or glaze, losing their grip and efficiency. Visually inspect all drive belts for these signs of wear. Proper belt tension is critical; too loose, and the belt will slip, causing loss of power and rapid wear; too tight, and it puts undue stress on bearings and the engine crankshaft. Most manuals provide instructions on how to check and adjust belt tension, usually involving a specific amount of deflection under pressure. Replace any belt that shows significant wear, damage, or can no longer maintain proper tension.
Pulleys: While inspecting belts, also check the pulleys. Look for any signs of wear, chips, or excessive buildup that might affect belt seating or cause imbalance. Ensure pulleys are securely fastened and spin freely without wobble. Misaligned pulleys can cause rapid belt wear and inefficient power transfer.
Bearings: Bearings facilitate smooth rotation of shafts and pulleys. Listen for any unusual noises like grinding, squealing, or rumbling, which could indicate worn bearings. Also, check for excessive play or looseness in the shafts. Most modern wood chippers use sealed bearings that do not require lubrication, but if your model has grease zerks, follow the manual's recommendations for periodic greasing. Promptly replace any worn bearings to prevent more extensive damage to your chipper.
Lubrication and Tensioning for Smooth Operation
To ensure your wood chipper operates at peak efficiency and avoids premature wear, proper lubrication and correct belt tension are paramount for its drive system and moving parts. Regular lubrication reduces friction on bearings, pivot points, and linkages, preventing overheating and seizing. Consult your wood chipper's owner's manual to identify all grease zerks and lubrication points, along with the recommended type of grease (typically lithium-based) and application frequency. Apply grease until a small amount squeezes out, indicating the component is adequately lubricated.
The drive belt, crucial for transferring power from the engine to the chipping mechanism, requires precise tension. A belt that is too loose will slip, causing a significant drop in chipping performance, excessive heat, and accelerated belt wear. Conversely, a belt that is too tight can put undue stress on engine and rotor bearings, leading to costly damage. Check belt tension by pressing down on the longest span of the belt; typically, it should deflect about 1/2 to 3/4 inch (12-19mm). If adjustment is needed, follow your chipper shredder’s manual for loosening the engine or idler pulley mounting bolts, adjusting the tension, and then re-tightening securely. This vital step helps ensure consistent power delivery and extends the life of your machine, whether it's a compact garden shredder or a robust Wood Chipper.
Troubleshooting Common Wood Chipper Problems and Quick Fixes
Even with meticulous maintenance, your wood chipper might occasionally encounter operational hiccups. Knowing how to diagnose and quickly address common issues can save you significant downtime and repair costs. Most problems, such as jams or performance drops, can often be traced back to a few key areas that are easily remedied with a little know-how and adherence to safety protocols. Before attempting any troubleshooting or repairs, always ensure the engine is turned off, cooled down, and the spark plug wire is disconnected to prevent accidental starting. This fundamental safety step protects both you and your equipment.
Diagnosing Jams, Performance Drops, and Unusual Noises
Jams: A common frustration, jams usually occur when material backs up in the feed chute or around the blades, causing the machine to strain or stall.
- Symptoms: Reduced feeding, complete stoppage, engine lugging, material visible in the hopper.
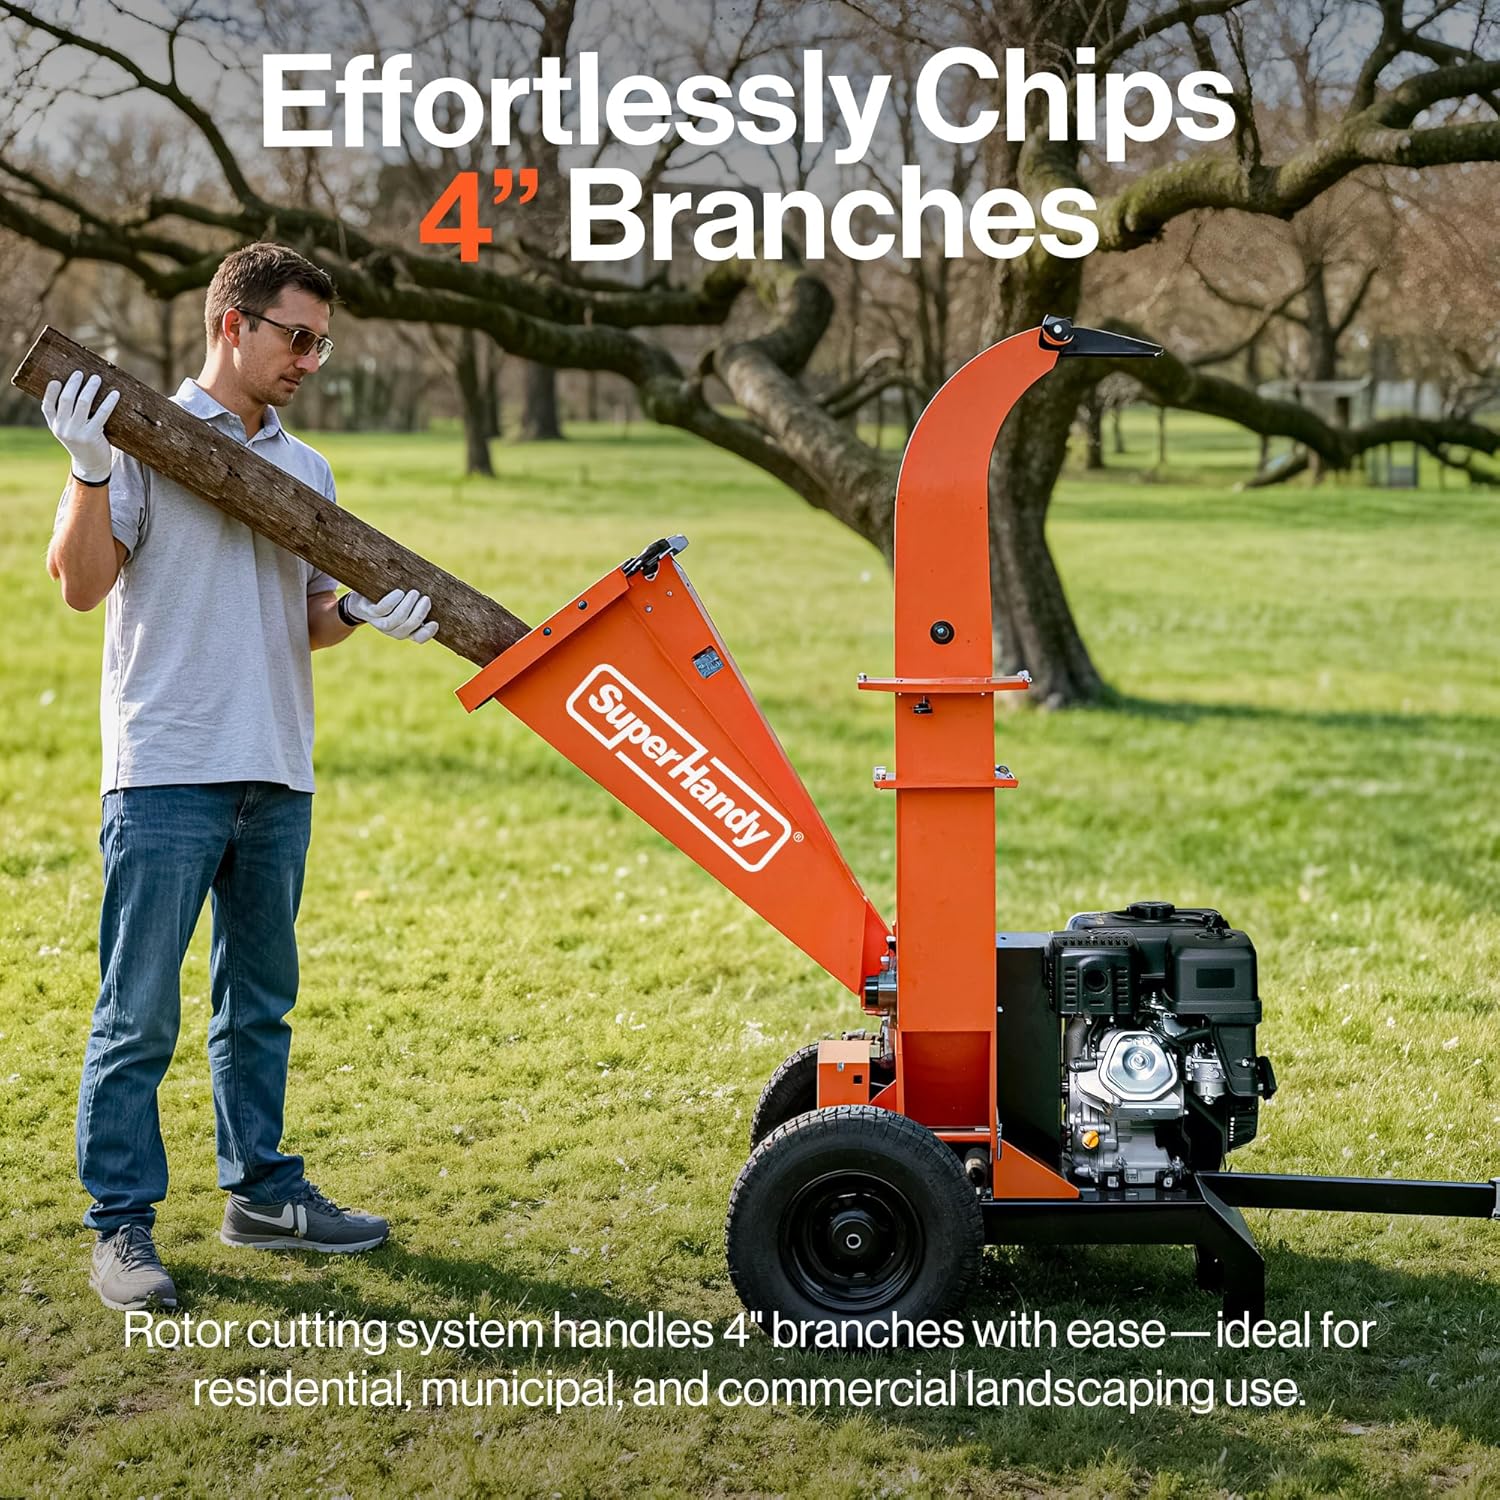
- Causes: Overfeeding the machine, feeding wet or excessively green material, dull chipper blades, or attempting to chip material larger than the machine’s specified capacity. For example, a Wood Chipper with a 3-inch capacity won't handle 5-inch branches efficiently.
- Solutions: Immediately shut off the engine and disconnect the spark plug. Carefully clear the feed chute and discharge area of all material. Inspect your blades; if they're dull, it's time for sharpening or replacement. Feed material more slowly and ensure it's within the recommended size and dryness guidelines for your specific wood chipper.
Performance Drops: If your chipper is running but not producing chips effectively, or seems less powerful than usual, it’s likely experiencing a performance drop.
- Symptoms: Slow chipping, incomplete shredding, machine struggling, excessive vibration during operation.
- Causes: The most frequent culprit is dull chipper blades. Other factors include a clogged air filter, a fouled or worn spark plug, stale or contaminated fuel, or a slipping drive belt (as discussed above).
- Solutions: Start by inspecting the blades – sharpen or replace them as needed. Check and clean or replace the air filter. Replace the spark plug. Ensure you're using fresh, clean fuel. Re-check the drive belt tension.
Unusual Noises: Any sound other than the normal operating hum of your chipper should prompt immediate investigation.
- Symptoms: Grinding, squealing, knocking, clanking, or excessive vibration.
- Causes: Squealing often points to a loose or worn drive belt. Grinding or clanking might indicate loose bolts, worn bearings, or even a foreign object (like a rock or metal fragment) that has entered the chipping mechanism. Knocking could suggest engine issues if the noise originates from there.
- Solutions: Shut down and disconnect power. Thoroughly inspect the entire machine, especially the chipping chamber. Check all bolts and fasteners for tightness. Inspect drive belts for wear or damage. If you suspect bearing issues, professional service might be required. Always remove any foreign objects carefully. This applies to all models, from a compact Compact Wood Chipper to a powerful Towable Wood Chipper Shredder.
Off-Season Storage Strategies to Prevent Damage and Extend Machine Life
Proper off-season storage is critical to protecting your investment and ensuring your wood chipper is ready for action next spring. Neglecting this step can lead to rust, deteriorated fuel, and damaged components.
- Thorough Cleaning: Remove all wood chips, sap, and debris from the hopper, discharge chute, and around the engine. A pressure washer can be useful, but ensure electronics are covered and allow everything to dry completely.
- Fuel Management: For gas-powered models, either add a fuel stabilizer to a full tank and run the engine for a few minutes to circulate it, or completely drain the fuel tank and carburetor. Stale fuel can gum up the carburetor and fuel lines.
- Engine Protection: Remove the spark plug, pour a teaspoon of clean engine oil into the cylinder, and gently pull the recoil starter a few times to distribute the oil. Reinstall the spark plug. This prevents rust on cylinder walls.
- Blade Protection: Clean your chipper blades and cutter assembly thoroughly. For extended storage, consider lightly coating blades with a rust preventative oil or removing them for separate, dry storage.
- Battery Care: For electric start models , disconnect the battery terminals, clean them, and store the battery in a cool, dry place. Using a trickle charger to maintain charge over winter is recommended.
- General Inspection & Covering: Perform a final check for loose bolts or worn parts. Store your chipper in a dry, protected area, ideally indoors. Cover it with a breathable tarp to protect against dust and moisture.
Preparing Your Chipper for Extended Inactivity
When the season for yard work winds down, proper preparation of your wood chipper for extended inactivity is crucial for preventing damage and ensuring it's ready for the next spring. Start by thoroughly cleaning the machine, removing all debris, sap, and dust from the hopper, discharge chute, and around the engine. Next, drain the fuel tank completely or add a high-quality fuel stabilizer, then run the engine for a few minutes to circulate the stabilized fuel through the system. Change the engine oil and replace the oil filter. For long-term storage, it's wise to "fog" the engine: remove the spark plug, pour a small amount of engine oil into the cylinder, pull the starter cord a few times to distribute it, then reinstall the plug. Clean or replace the air filter. Finally, lubricate all moving parts, bearings, and pivot points as specified in your owner's manual. Inspect the chipper blades for sharpness and condition; sharpen or replace them as needed. If your chipper has an electric start battery, remove it and store it in a cool, dry place, keeping it charged periodically. Cover your wood chipper with a breathable, waterproof cover and store it in a dry, protected area, away from direct sunlight and extreme temperatures.

Essential Safety Protocols for Operating and Maintaining Your Wood Chipper
Operating and maintaining a wood chipper, also known as a chipper shredder or garden shredder, demands a vigilant approach to safety. Prioritize your well-being and the safety of those around you.
- Read the Manual: Always thoroughly read and understand your specific chipper's owner's manual before operation or maintenance. Safety guidelines can vary significantly between models, whether you own a compact unit or a robust machine.
- Personal Protective Equipment (PPE): Always wear appropriate PPE. This includes safety glasses or a full face shield, hearing protection (earmuffs or earplugs), heavy-duty work gloves, and sturdy, non-slip work boots. Avoid loose clothing, jewelry, or anything that could get tangled in moving parts.
- Clear Work Area: Ensure your operating area is free of bystanders, children, pets, and any obstacles that could cause tripping or interference. Maintain a safe distance from the chipper's intake hopper and discharge chute.
- Inspect Before Use: Before each operation, perform a quick visual inspection. Check for loose bolts, damaged components, or worn belts. Confirm all safety guards, shields, and deflectors are securely in place and functioning correctly.
- Proper Feeding Technique: Never force material into the chipper. Feed branches and debris steadily, small end first, and at a pace the machine can handle. Always keep your hands and feet well clear of the feed chute and never reach into the hopper while the engine is running. Use a push paddle or stick if material needs to be guided.
- Emergency Stop: Familiarize yourself with the location and function of the emergency stop switch or engine kill switch. Test its functionality periodically to ensure it works instantly.
- Maintenance Safety: When performing any maintenance, clearing a jam, or making adjustments, always turn off the engine, remove the spark plug wire (or disconnect the battery for electric start models), and wait for all moving parts to come to a complete stop. This "lockout/tagout" procedure prevents accidental starting.
- Fueling Precautions: Refuel your chipper when the engine is off and cool, in a well-ventilated outdoor area. Avoid spilling fuel, and never smoke or operate open flames while fueling.
Frequently Asked Questions About Wood Chipper Maintenance and Longevity
How often should I sharpen or replace my chipper blades?
The frequency of blade sharpening or replacement depends heavily on your wood chipper's usage and the type of material processed. For typical homeowner use, inspecting the blades every 10-20 hours of operation is a good practice. If you notice a significant drop in chipping performance, excessive vibration, or ragged, inefficient cuts, it's definitely time for sharpening or replacement. Keeping your blades consistently sharp,ensures optimal efficiency and reduces unnecessary strain on the engine.
What type of oil should I use for my wood chipper engine?
Most wood chippers, particularly those with a gas engine, utilize standard small engine oil. Common recommendations include SAE 30, 10W-30, or 5W-30, with the specific viscosity often depending on the ambient operating temperature and the engine manufacturer's specifications. Always consult your specific chipper's owner's manual for the exact recommended oil type and viscosity. Using the correct oil is vital for the long-term health and performance of your engine, whether it's powering a compact garden shredder or a robust Towable Wood Chipper designed for larger tasks.
Can I chip wet wood?
While most modern wood chippers can handle slightly damp material, it's generally recommended to chip dry wood whenever possible. Wet wood is significantly denser, harder to chip cleanly, and can quickly dull blades, leading to frequent jams and reduced efficiency. Chipping wet material also creates more sticky residue, which can rapidly clog the discharge chute and internal components, necessitating more frequent cleaning. For the best performance and to prolong the life of your machine, including all Wood Chippers, aim for dry or seasoned branches.
How do I prevent my wood chipper from jamming?
Preventing jams involves several key operational and maintenance practices. Always feed material steadily and at a pace the machine can comfortably handle, avoiding the temptation to overload the hopper with too much material at once. Ensure your chipper blades are consistently sharp, as dull blades are a primary cause of jams. Additionally, vary the types of material you feed – don't feed a continuous stream of stringy, fibrous material without mixing in some firmer branches that can help push it through. Regular cleaning of the discharge chute and internal components also helps prevent the buildup of material that can lead to clogs.
Related Products


Leave a comment
All comments are moderated before being published.
This site is protected by hCaptcha and the hCaptcha Privacy Policy and Terms of Service apply.