


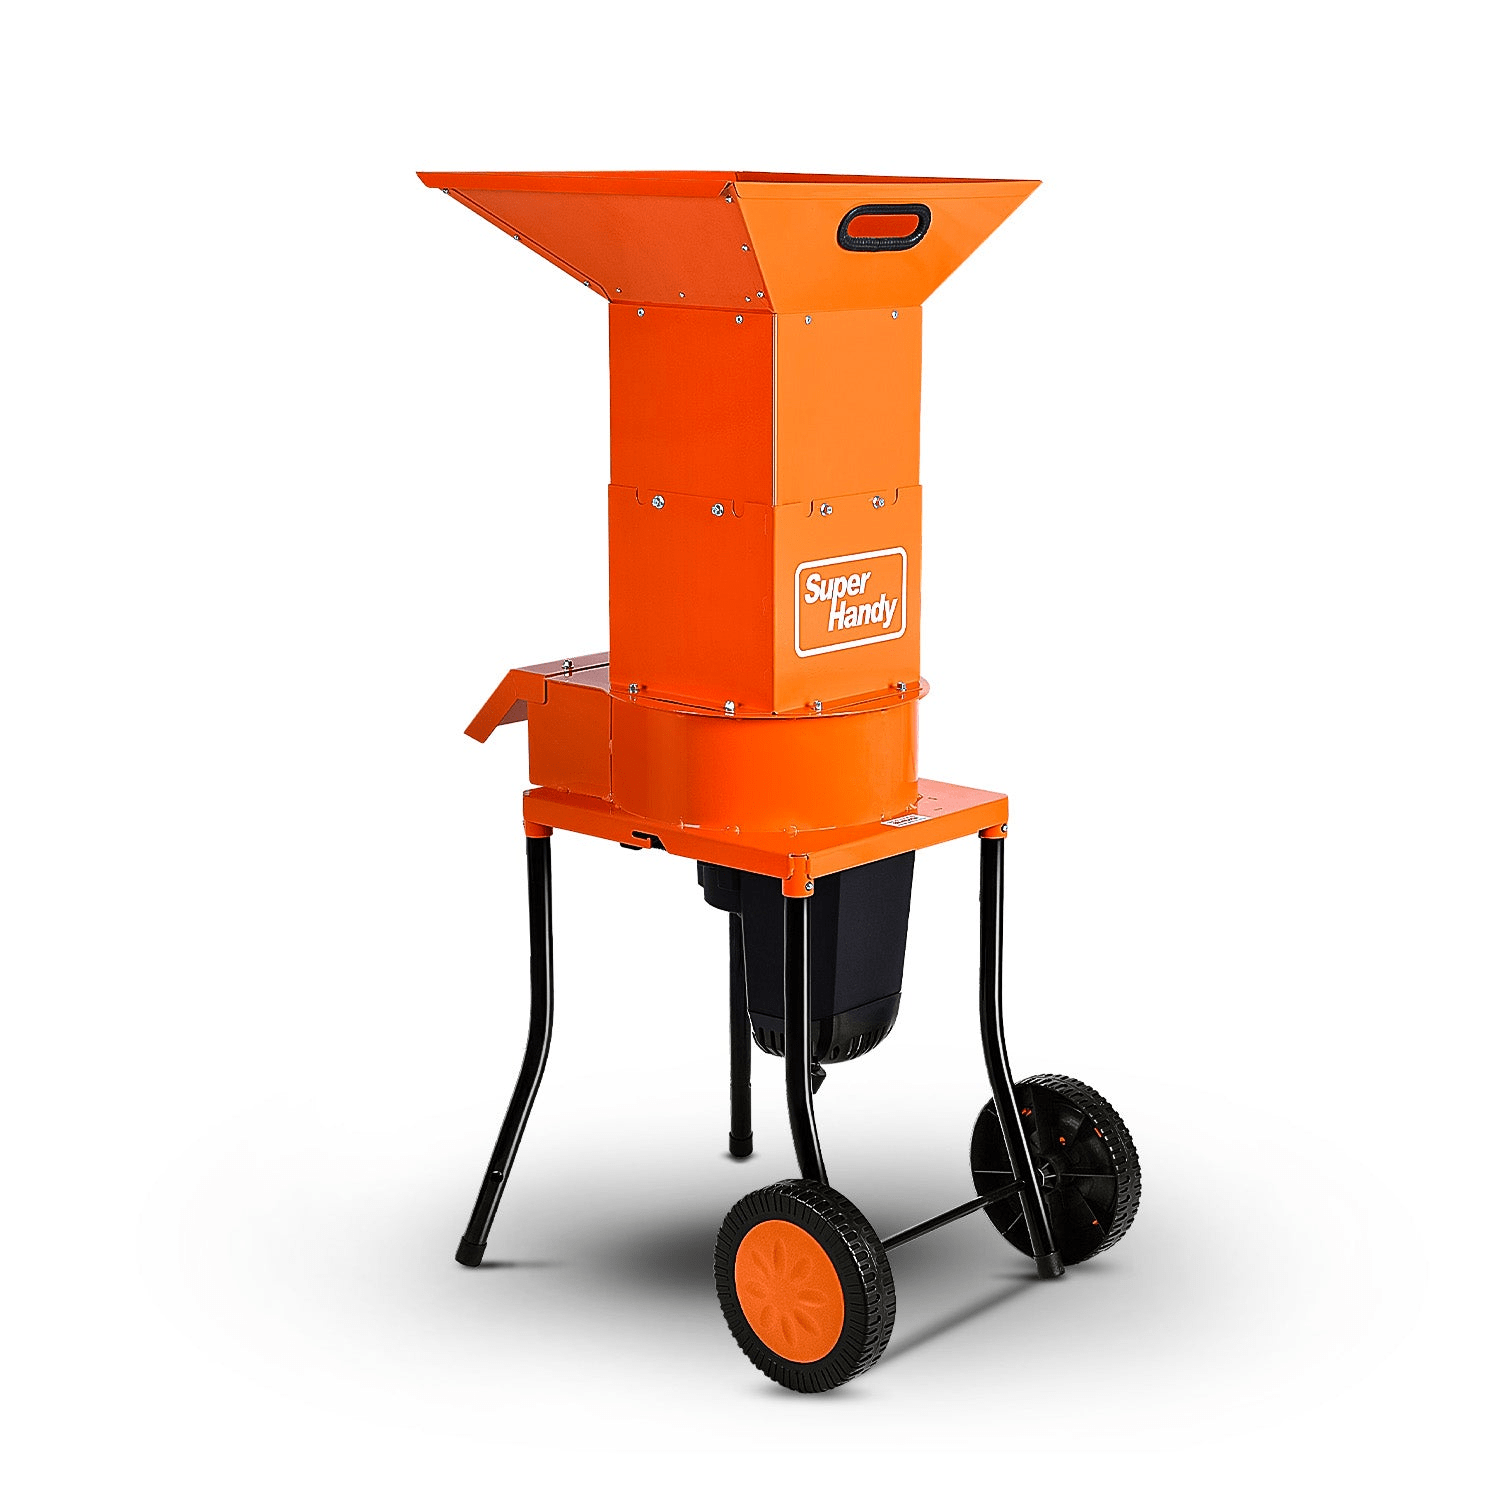
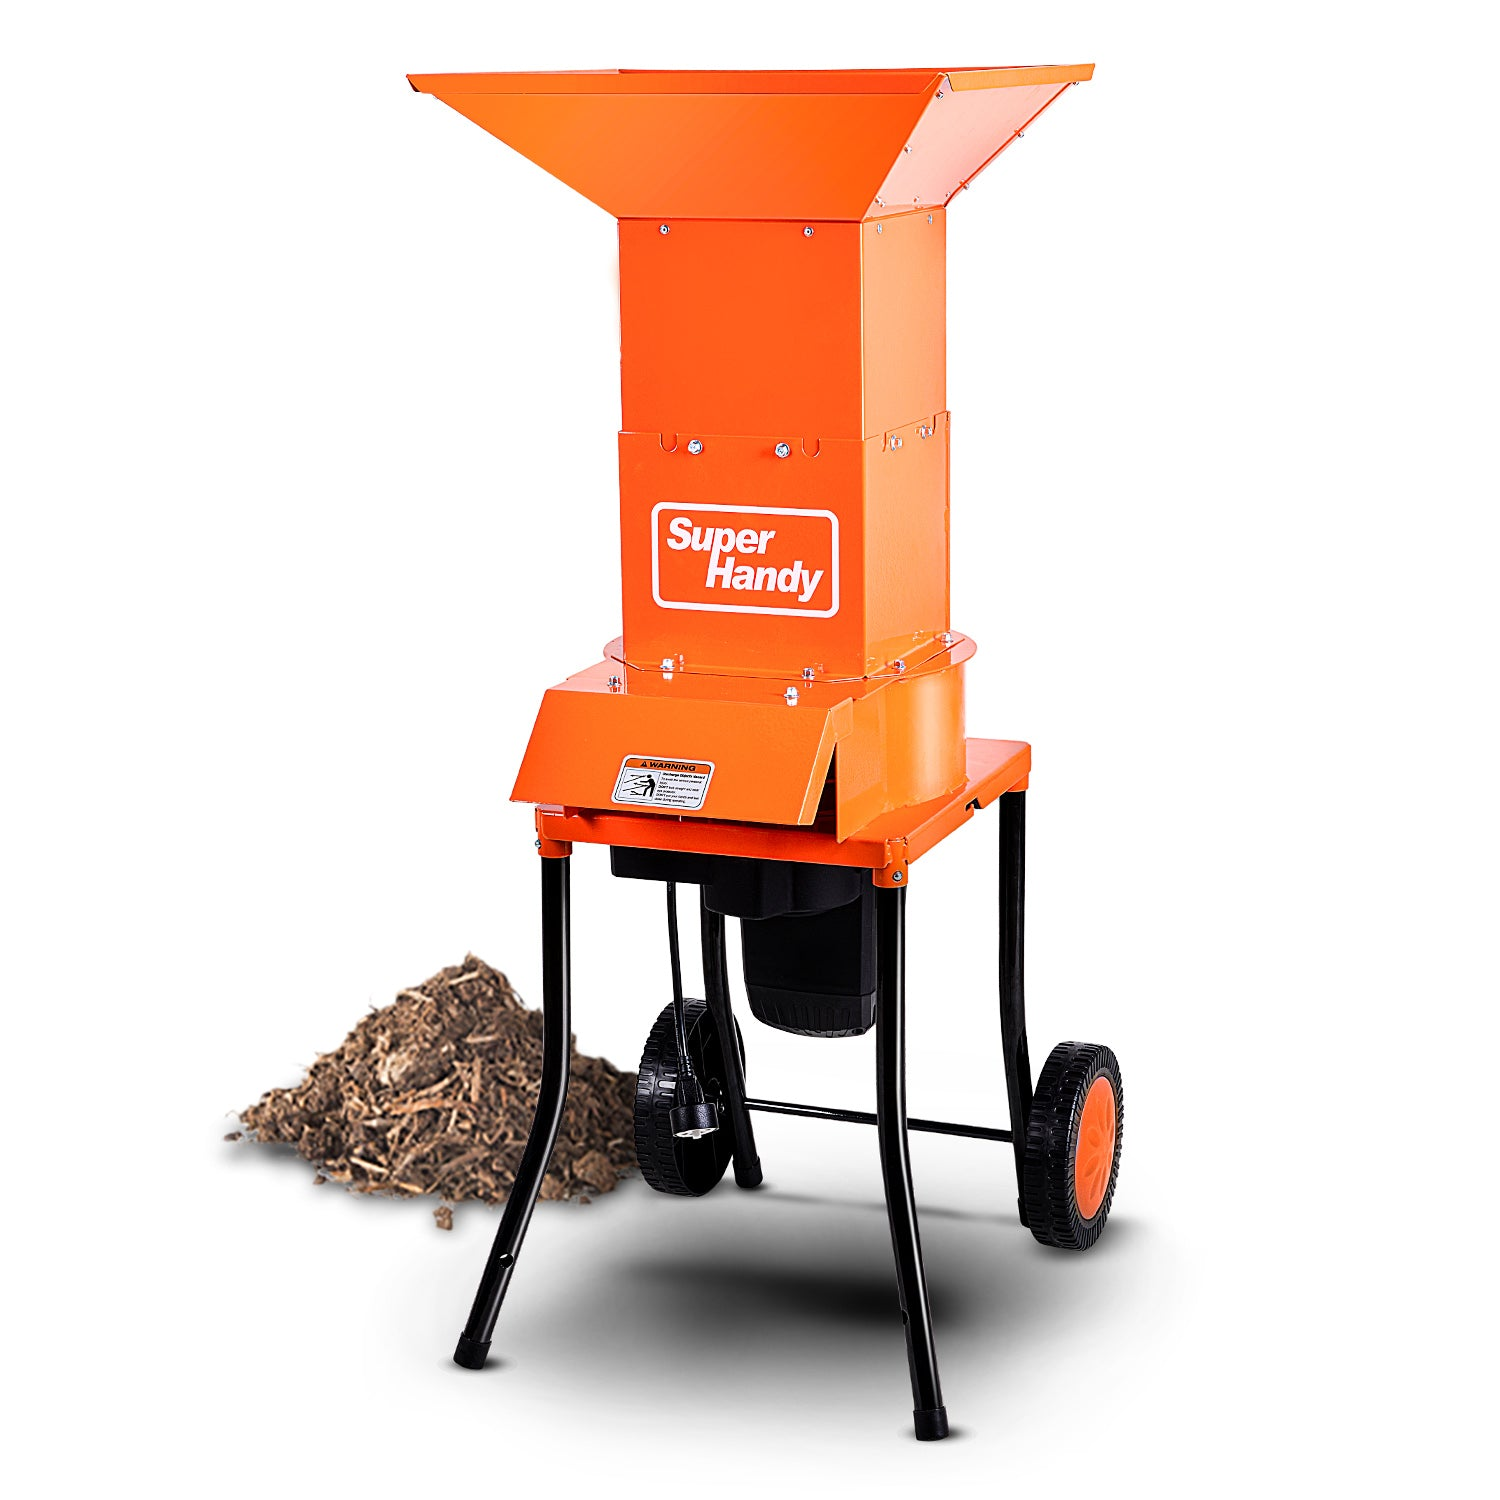
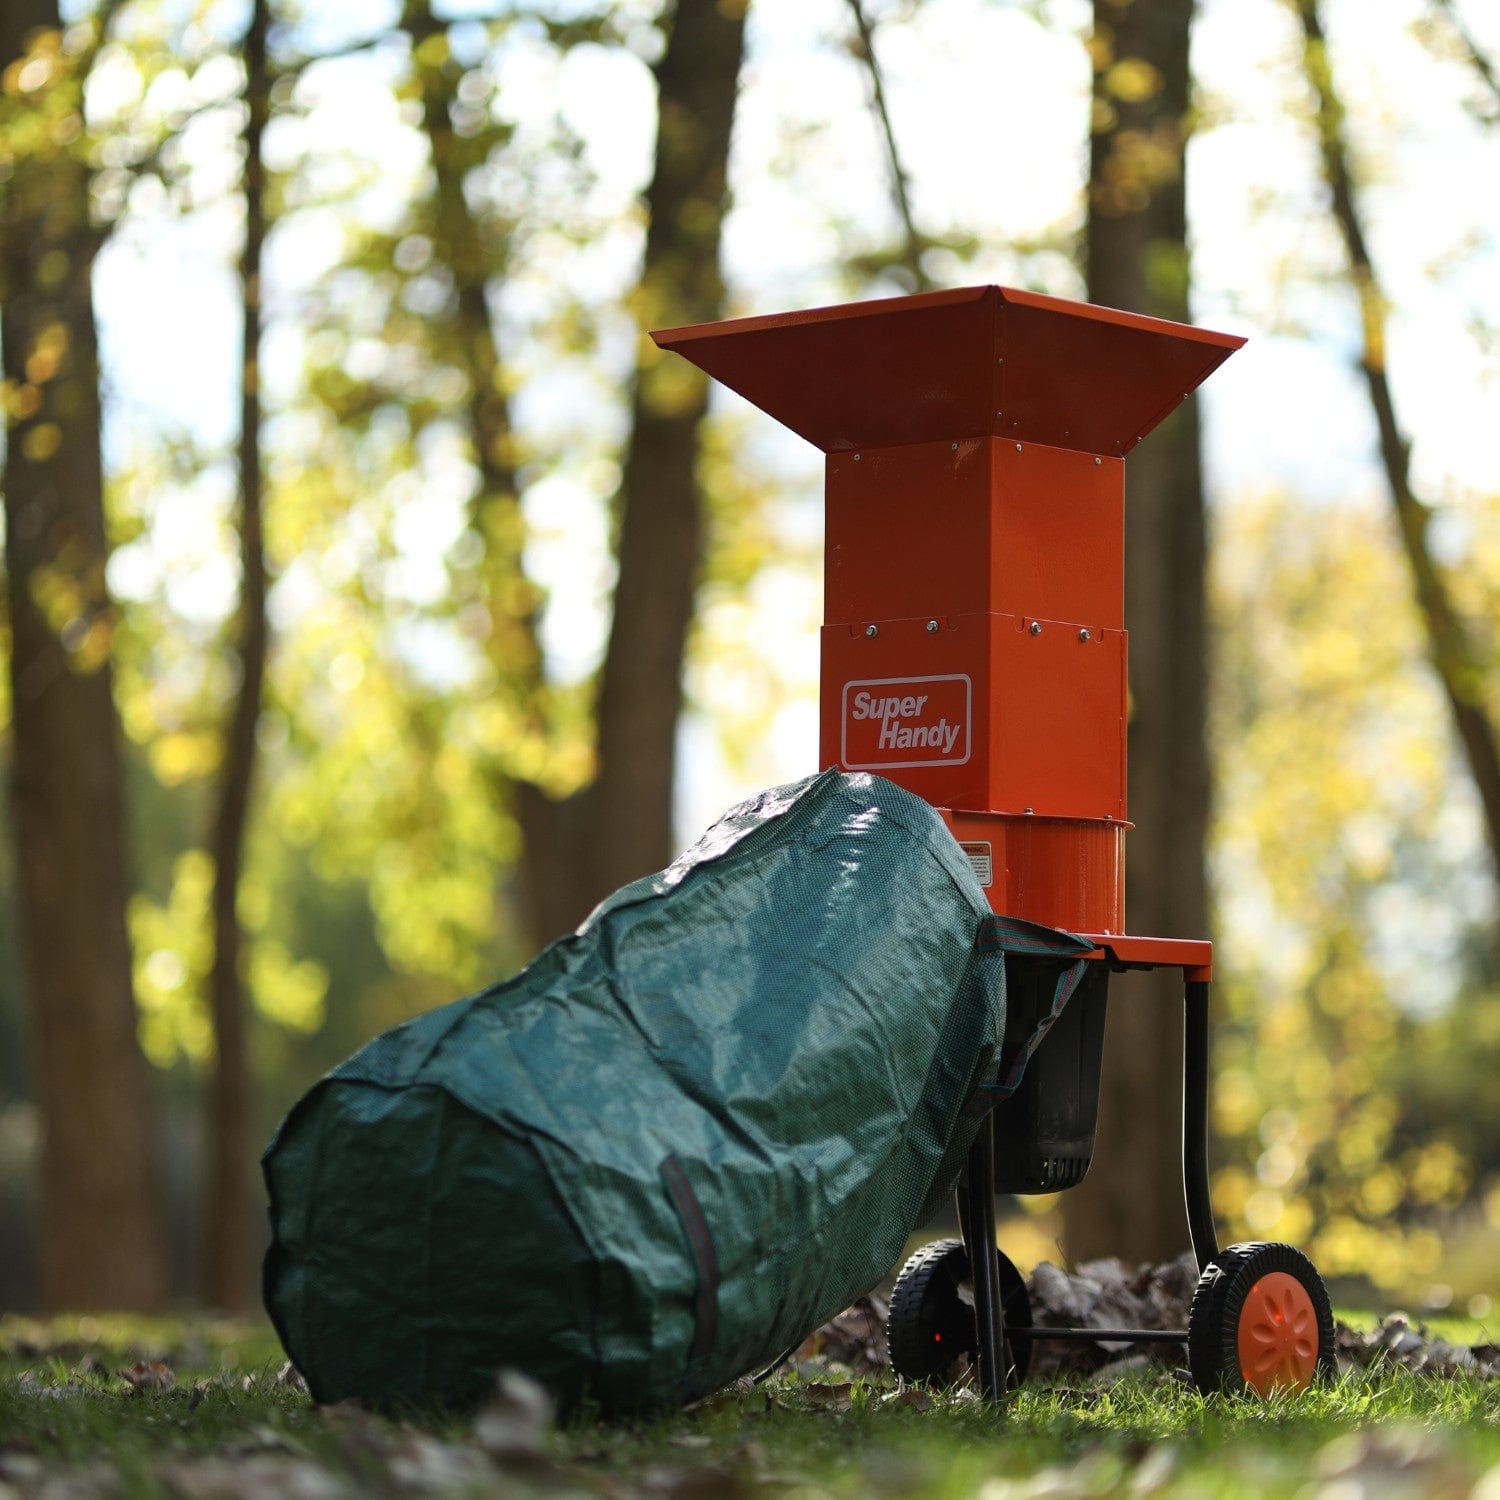
Understanding Your Electric Leaf Mulcher's Core Components
Before you can properly maintain your electric leaf mulcher, it’s helpful to know what you’re working with. While designs vary, most models share a few key parts. Familiarizing yourself with these components will make cleaning, inspection, and troubleshooting much easier.
- Hopper: This is the large, funnel-like opening at the top where you feed in leaves and light yard debris.
- Motor Housing: This unit protects the electric motor, which is the heart of your machine, providing the power to spin the cutting mechanism.
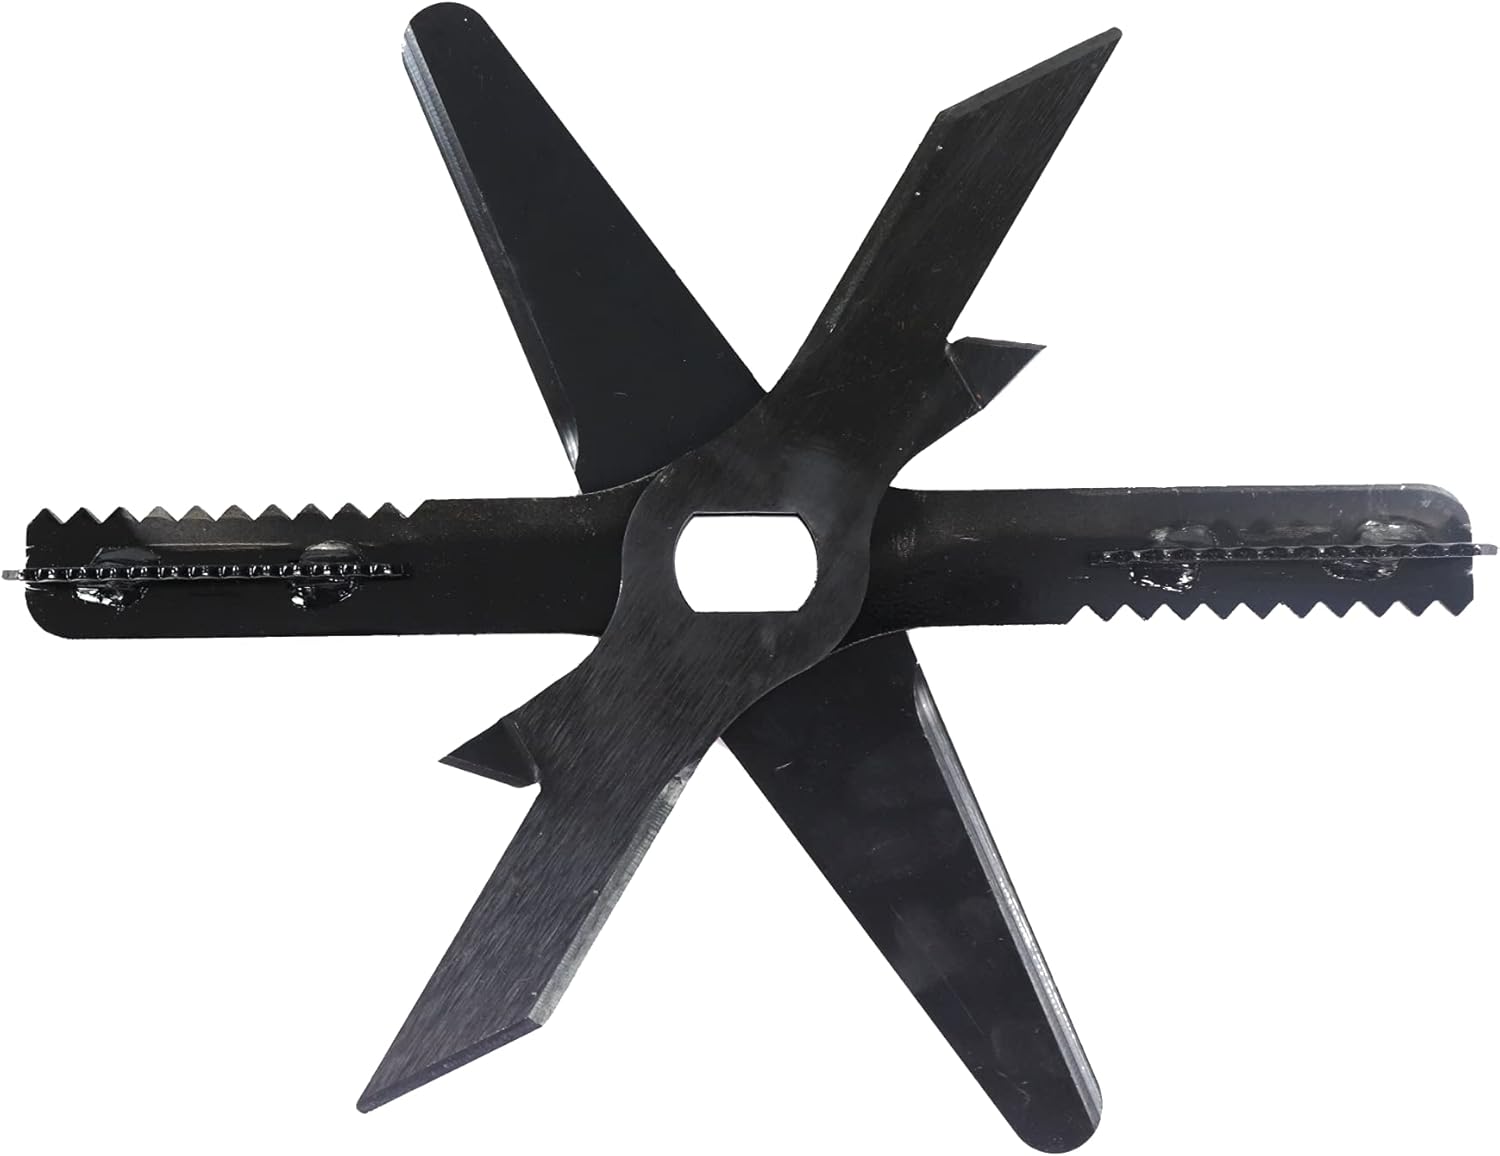
- Cutting Chamber & Blades/Lines: Located directly below the hopper, this chamber houses the cutting system. Depending on the model, it will use either sharp metal blades or heavy-duty plastic cutting lines to shred material.
- Discharge Chute: This is the outlet where the finely chopped mulch is expelled, often designed for easy attachment to a collection bag.
- Frame and Legs: This structure provides stability during operation, keeping the machine upright and secure.

Pre-Season Inspection: What to Check Before the First Fall Cleanup
Before you plug in your mulcher for the first time each season, a quick but thorough inspection can prevent unexpected breakdowns and potential safety hazards. Think of it as a 10-minute check-up that saves you hours of frustration later.
Here’s a simple checklist to run through:
- Power Cord and Plug: Carefully examine the entire length of the power cord for any cracks, fraying, or exposed wires. Check the plug for bent or damaged prongs.
- Housing and Frame: Look for any cracks in the plastic housing or loose connections in the frame.
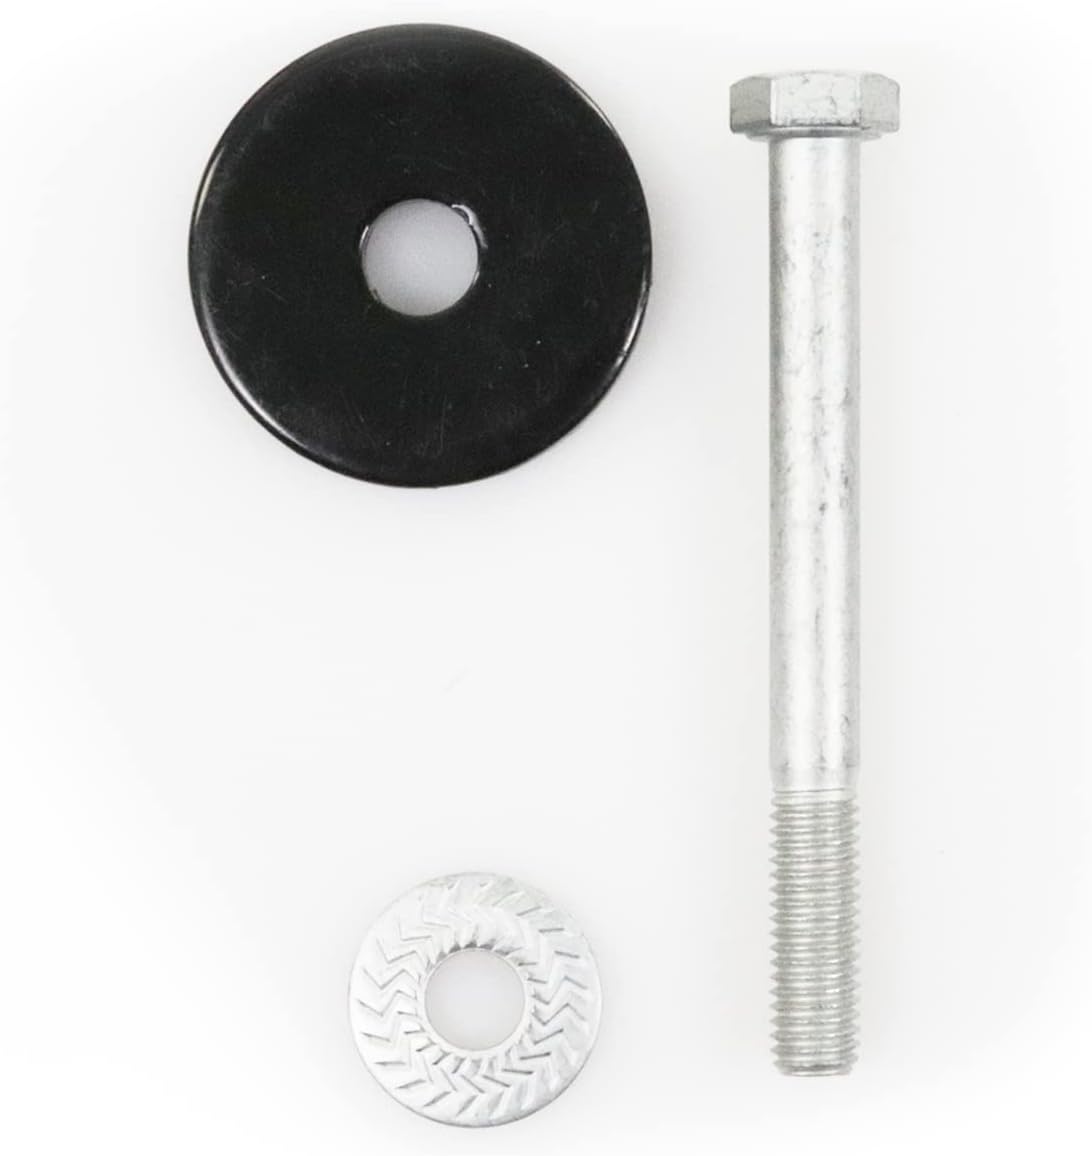
- Hardware: Check that all nuts, bolts, and screws are tight. Vibrations during operation can cause them to loosen over time.
- Safety Guards and Switches: Ensure all safety guards are in place and that the power switch functions correctly.
- Cutting Mechanism: Peer into the cutting chamber (with the unit unplugged!) to look for obvious damage to the blades or cutting lines.
Essential Cleaning Techniques for Optimal Performance
A clean leaf mulcher is a happy and efficient mulcher. Caked-on sap, damp leaf debris, and dirt can restrict airflow, cause clogs, and put unnecessary strain on the motor. Regular cleaning after each major use is the single best thing you can do for longevity.
First and foremost, always disconnect the machine from its power source before performing any cleaning or maintenance. This is a critical step for preventing accidental startups and serious injury. Following basic guidelines, like those outlined in OSHA's hand and power tool safety guidance, is essential for safe operation and upkeep. Once unplugged, use a stiff brush and a damp cloth to clear debris from the hopper and discharge chute. Use a wooden stick or a tool to dislodge stubborn material from the cutting chamber—never use your hands. Finally, wipe down the exterior, paying special attention to clearing any debris from the motor's air vents.
Blade Maintenance: Sharpening and Replacement Guide
The cutting system is where the real work happens, and its condition directly impacts performance. Whether your Leaf mulcher uses metal blades or durable trimmer lines, keeping them in top shape is key. Dull blades or worn lines shred less effectively, produce coarser mulch, and force the motor to work harder, which can lead to overheating.
If your model uses plastic cutting lines, simply replace them when they become worn, frayed, or broken. For models with metal blades, you have two options: sharpening or replacement. You’ll know it’s time for maintenance when you notice the machine is processing leaves more slowly or the resulting mulch is stringy rather than finely chipped. To sharpen, carefully remove the blade according to your owner’s manual, secure it in a vise, and use a flat file or a bench grinder to restore the cutting edge, making sure to maintain the original angle. If a blade is severely nicked, bent, or cracked, it should always be replaced to ensure safe and balanced operation.
Motor Care: Keeping the Powerhouse Running Smoothly
The motor is the heart of your electric leaf mulcher, and keeping it in top condition is crucial for both performance and longevity. The biggest threat to an electric motor is overheating, which is most often caused by blocked air vents. Over time, dust, dirt, and fine leaf particles can clog these vents, trapping heat and putting a strain on the motor.
Before or after each use, take a moment to inspect the motor housing's air vents. Use a stiff-bristled brush or a can of compressed air to clear away any accumulated debris. This simple step ensures proper airflow, allowing the motor to cool itself effectively as it runs. Also, listen to your mulcher. If you hear any unusual grinding, whining, or straining sounds, stop immediately. This could indicate a bearing issue or that you're overloading the unit. Feeding leaves too quickly can overwork the motor, so maintain a steady, manageable pace. For coverage planning, Medicare.gov outlines when wheelchairs and scooters may qualify as durable medical equipment.
Cord and Plug Safety: Preventing Electrical Hazards
Working with any electric power tool requires a healthy respect for electricity. Your mulcher’s power cord is its lifeline, but it can also be a significant hazard if neglected. Before every single use, perform a quick but thorough visual inspection of the entire cord and plug. Look for any cuts, nicks, or abrasions in the outer insulation that might expose the inner wires. Check that the plug's prongs are straight and secure.
If you find any damage, do not use the mulcher until the cord is professionally repaired or replaced. When using an extension cord, ensure it is a heavy-duty, outdoor-rated cord with the proper gauge (AWG) to handle the amperage of your mulcher; using an undersized cord can cause overheating and a potential fire risk. Following basic OSHA hand and power tool safety guidance is essential for preventing electric shock and other injuries. Always keep the plug connection point dry and elevated off damp ground, and never unplug the unit by yanking on the cord—pull firmly on the plug itself.

Storage Best Practices for Year-Round Protection
How you store your electric leaf mulcher during the off-season directly impacts how well it will perform next fall. Putting it away dirty is a recipe for problems. Caked-on sap and plant debris can corrode metal parts, attract pests, and harden over time, making them difficult to remove later. After your final use of the season, give your mulcher a thorough cleaning as described in the previous sections.
Once clean and completely dry, store the mulcher in a sheltered, dry location such as a garage, basement, or shed. Protecting it from the elements is key. Exposure to moisture can lead to rust on the blades and corrosion in electrical components. Extreme temperature fluctuations and direct sunlight can also make plastic components brittle and prone to cracking. For added protection, you can place a tarp or a fitted cover over the unit to keep it free from dust and nesting critters. Finally, coil the power cord loosely to avoid creating sharp kinks or stress points that could damage the wiring over time.
Troubleshooting Common Electric Leaf Mulcher Issues
Even with perfect maintenance, you might occasionally run into a problem. Before you panic, consult this quick troubleshooting guide. Always unplug your electric leaf mulcher before performing any inspection or attempting to clear a jam.
-
Problem: The mulcher won’t start.
-
Solution: Start with the basics. Is the mulcher firmly plugged into the extension cord, and is the extension cord plugged into a working outlet? Check your home’s circuit breaker or fuse box to see if it has been tripped. Some models have a safety switch or button that must be engaged; ensure it is properly activated.
-
Problem: The motor hums, but the blades don’t spin.
-
Solution: You most likely have a jam. Unplug the unit and look into the cutting chamber. A thick twig, a rock, or a dense wad of wet leaves can wedge against the cutting line or blades, preventing them from moving. Carefully remove the obstruction (wear thick gloves!) and try again.
-
Problem: The mulcher is vibrating excessively or making loud, unusual noises.
-
Solution: This often points to an issue with the cutting system. Unplug the mulcher and inspect the blades or cutting lines. A bent, chipped, or severely unbalanced blade can cause violent shaking. The blade may need to be replaced. Also, check that all accessible nuts and bolts on the housing are tight.
-
Problem: Mulching performance is poor, and it clogs easily.
-
Solution: This is a classic sign of dull blades. Sharp blades slice cleanly, while dull ones tear and shred, which leads to clogs. It's time to sharpen or replace them. You may also be feeding material too quickly or trying to mulch excessively wet leaves, which tend to clump and clog the discharge chute. If repeated troubleshooting doesn't solve a persistent problem, it might be a sign of a more serious internal issue, and it could be time to consider a new, reliable Leaf mulcher.
When to Consider Professional Servicing or Replacement
While most routine maintenance on an electric leaf mulcher can be handled at home, there are times when a problem is best left to a professional—or when it’s more practical to invest in a new machine. Recognizing these moments can save you time, money, and frustration.
Consider calling a professional service technician if you encounter:
- Persistent Motor Problems: If the motor repeatedly fails to start, stalls under a normal load, or makes loud grinding or whining noises that you can’t resolve with basic troubleshooting, it could indicate an internal electrical or mechanical failure.
- Damaged Wiring or Housing: Exposed internal wires, a cracked motor casing, or significant damage to the main body of the mulcher are serious safety hazards that require expert repair.
- Complex Part Replacement: If a repair involves disassembling the motor or other sealed components, it’s often wiser to let a trained technician handle it to ensure it’s reassembled correctly and safely.
Sometimes, the cost of a professional repair can approach or even exceed the price of a new unit. As a general rule, if a repair estimate is more than 50% of the cost of a new model, replacement is the more economical choice. Investing in a new Leaf mulcher not only resolves your immediate issue but also provides you with the latest technology, peak efficiency, and a fresh warranty.

Maximizing Mulching Efficiency: Tips and Tricks
Getting the most out of your electric leaf mulcher isn't just about maintenance; it's also about how you use it. By adopting a few smart techniques, you can speed up your yard work and create a finer, more useful mulch for your garden beds and compost pile.
- Work with Dry Leaves: This is the golden rule of mulching. Wet leaves are heavy, clump together, and can easily clog the shredding chamber and discharge chute. This puts unnecessary strain on the motor and results in a coarse, soggy output. For best results, mulch on a dry day after the morning dew has evaporated.
- Feed Material Gradually: Avoid the temptation to stuff the hopper full. Overloading the machine will cause it to jam and can bog down the motor. Instead, feed leaves and small twigs into the hopper at a steady, consistent pace. This allows the cutting mechanism to work efficiently, producing a finer mulch and finishing the job faster.
- Mix It Up: If you’re mulching dense, matted leaves, try alternating them with small, dry twigs or lighter, fluffier leaves. The twigs help break up the leaf clumps and keep material flowing freely through the mulching chamber.
- Check Your Cutting Line: Your mulcher is only as good as its cutting system. Ensure you are using the correct diameter trimmer line as specified by the manufacturer. Using a line that is too thick or too thin can decrease performance and potentially harm the motor.
Seasonal Maintenance Schedule: A Month-by-Month Breakdown
Staying on top of maintenance is easy when you follow a simple seasonal schedule. Here’s a breakdown to keep your electric leaf mulcher in prime condition throughout the year.
Early Fall (Pre-Season Tune-Up)
- Inspect: Before the first use of the season, give your mulcher a thorough inspection. Check the power cord and plug for cracks or frays. Examine the housing for any damage sustained during storage.
- Clean: Clear out any dust, cobwebs, or old debris from the hopper, shredding chamber, and discharge chute.
- Replace Cutting Line: Start the season fresh. Install a new set of cutting lines for maximum shredding power.
Mid-Fall (During Peak Use)
- After Each Use: Unplug the machine and perform a quick clean. Brush out any remaining leaf debris from the chamber and chute to prevent it from hardening and causing a blockage next time.
- Weekly: Take a moment to inspect the cutting lines for wear and tear. If they look frayed or have become significantly shorter, replace them. A quick visual check of the power cord is also a good habit.
Late Fall / Early Winter (Post-Season Storage Prep)
- Thorough Cleaning: This is the most important cleaning of the year. Unplug the mulcher and remove all caked-on plant matter and dirt from every nook and cranny. A clean machine is less likely to corrode or attract pests during storage.
- Final Inspection: Check for any damage that occurred during the busy season. Note any parts that may need to be ordered or repairs that should be made before the next fall.
- Proper Storage: Store your clean, dry leaf mulcher in a sheltered location like a garage or shed to protect it from moisture and extreme temperatures.
Safety First: Essential Precautions for Mulcher Operation
An electric leaf mulcher is a powerful tool that makes yard cleanup a breeze, but it must be operated with care and respect. Following essential safety precautions is non-negotiable for protecting yourself and others from injury.
Before you begin, always equip yourself with the proper Personal Protective Equipment (PPE). This includes safety glasses or goggles to shield your eyes from flying debris, heavy-duty gloves to protect your hands, and sturdy, closed-toe footwear. Hearing protection is also highly recommended, as the machine can be loud during operation.
Electrical safety is paramount. Always inspect the power cord for any signs of damage, such as frays or cracks, before plugging it in. Use a heavy-duty extension cord that is rated for outdoor use and can handle the amperage of your mulcher. Never operate the machine in the rain, on wet ground, or in damp conditions to avoid the risk of electric shock.
During operation, keep your hands and feet away from the hopper opening and the discharge chute at all times. If the machine becomes clogged, always turn it off and unplug it from the power source before attempting to clear the jam. According to the Occupational Safety and Health Administration, disconnecting tools from power before servicing or cleaning is a critical step in preventing accidents. Finally, ensure your work area is on level ground and clear of children, pets, and any tripping hazards.

Frequently Asked Questions About Electric Leaf Mulcher Maintenance
Even the most robust tools require a bit of care to perform at their best. To help you get the most out of your machine, we’ve compiled answers to some of the most common questions we receive about electric leaf mulcher maintenance. Following these simple guidelines will ensure your mulcher is always ready for yard day.
FAQ: How Often Should I Clean My Mulcher?
The short answer: after every major use. While it might seem tedious, consistent cleaning is the most effective way to prevent long-term problems. Keeping your electric leaf mulcher free of debris ensures optimal performance and extends the life of its motor and cutting components.
For practical purposes, we can break this down into two types of cleaning:
-
Quick Clean (After Every Use): Once you’ve finished mulching, disconnect the power cord. Use a stiff brush and a cloth to remove any loose leaves, twigs, and dust from the hopper, mulching chamber, and discharge chute. This prevents sap and plant matter from hardening, which can cause clogs and put unnecessary strain on the motor during the next use. This five-minute task makes a huge difference.
-
Deep Clean (Seasonally or As Needed): At the end of the fall season, or after a particularly demanding job like mulching wet, sappy leaves, a more thorough cleaning is in order. After unplugging the unit, use a putty knife or wooden scraper to gently remove any caked-on debris from the interior walls and around the cutting assembly. Wipe down all surfaces with a damp cloth and ensure the machine is completely dry before storing it. This prevents rust, corrosion, and mold growth.
FAQ: What Are the Signs My Mulcher Blades Need Replacing?
The cutting mechanism is the heart of your mulcher, and its condition directly impacts the quality of your mulch. While some models use durable cutting lines, many rely on metal blades that eventually wear down. Before inspecting the blades, always ensure the machine is completely unplugged from its power source. Adhering to proper maintenance and safety checks is a core principle of the OSHA hand and power tool safety guidance, which helps prevent accidental startups and injuries.
Look for these four key indicators that it’s time for a replacement:
-
Reduced Mulching Efficiency: If you notice the mulcher is taking much longer to process leaves or is struggling with material it once handled easily, the blades are likely dull. Instead of finely chopping debris, worn blades tend to shred or tear it, resulting in a stringy, coarse output that isn't ideal for your garden.
-
Visible Nicks, Dents, or Cracks: A visual inspection is your best tool. Look closely at the cutting edges of the blades. Are they rounded over? Do you see significant chips, nicks from hitting rocks, or cracks in the metal? Any visible damage compromises the blade's integrity and cutting power. A severely damaged blade can also become unbalanced.
-
Increased Vibration or Unusual Noises: A mulcher that suddenly starts vibrating more than usual or makes loud rattling or grinding sounds may have an unbalanced or broken blade. Continuing to operate the unit in this condition can cause further damage to the motor and other components.
-
Frequent Clogging: While wet leaves can cause any mulcher to clog, a sudden increase in jams with dry material often points to dull blades. When the blades can't cut cleanly, material builds up inside the chamber instead of flowing through, leading to frustrating and frequent blockages.
Related Products
Leave a comment
All comments are moderated before being published.
This site is protected by hCaptcha and the hCaptcha Privacy Policy and Terms of Service apply.