


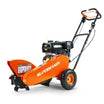


You want your chicken plucker machine to work well every time. Regular care keeps your machine strong for long-term use. You can keep your chicken plucker running with just a few simple steps. Even if you use a Electric Chicken Plucker, these tips help. Your machine will thank you!
Key Takeaways
-
Cleaning and taking care of your chicken plucker machine helps it work well and last longer. Clean it every day to get rid of feathers and dirt. Dry it so it does not get rusty.
-
Look at important parts like rubber fingers, bolts, and belts each week. Change parts that are worn out and tighten any loose screws. This stops the machine from breaking and keeps it safe.
-
Put oil on moving parts once a month. Check the electrical parts to make sure everything works well and to stop expensive repairs.
Why Maintenance Matters
Protecting Your Investment
You spend good money on your chicken plucker machine. You want it to last as long as possible. Regular maintenance helps you avoid costly repairs and keeps your machine running smoothly. When you skip maintenance, you risk more than just a dirty machine. Here’s what can happen if you neglect care:
-
Equipment failures and breakdowns can stop your work.
-
You might have to replace your machine sooner, which costs more.
-
Emergency repairs often cost more than simple upkeep.
-
Your machine may use more energy, raising your bills.
-
Safety hazards can put you and others at risk.
If you let your machine get out of shape, you can also damage the birds or end up with poor product quality. Misaligned parts or worn-out pieces can cause birds to get stuck or bruised. That means more rejects and wasted time. Taking care of your machine protects your investment and keeps your operation safe.
Consistent Performance
You want your machine to work well every time you use it. Regular maintenance is the key to consistent performance. When you clean, inspect, and lubricate your machine, you help it run faster and more efficiently. Well-maintained plucking fingers can last up to 30% longer. That means fewer replacements and less downtime.
A clean and well-cared-for machine also gives you better results. You get cleaner birds and smoother operation. You spend less on repairs and keep your machine’s lifespan as long as possible. By following a simple routine, you make sure your chicken plucker machine stays reliable for years.
Daily Cleaning for Your Chicken Plucker Machine
Keeping your chicken plucker in top shape starts with a good daily cleaning routine. If you clean your poultry plucking machine after every use, you stop bacteria and dirt from building up. This habit improves hygiene, keeps your machine running smoothly, and helps you get the best feather removal every time.
Remove Feathers and Debris
You should always start by turning off and unplugging your poultry plucking machine. Safety comes first! Next, grab a soft-bristled brush and sweep away all the feathers and debris from the plucking fingers, rollers, and any other parts where waste collects. Many chicken plucker models have a debris collection system that makes this step quick and easy. Removing feathers and dirt right away keeps your machine clean and prevents blockages that can slow down feather removal.
Tip: If your poultry plucking machine has stainless steel parts, you’ll find it much easier to wipe down. Stainless steel resists bacteria and rust, so it’s perfect for cleaning chickens and keeping your machine in great shape.
Here’s a simple checklist for this step:
-
Use a brush to remove feathers and debris from all surfaces.
-
Check corners and crevices for hidden waste.
-
Empty the debris collection system if your machine has one.
By removing waste daily, you support better hygiene and make cleaning and sanitation much easier.
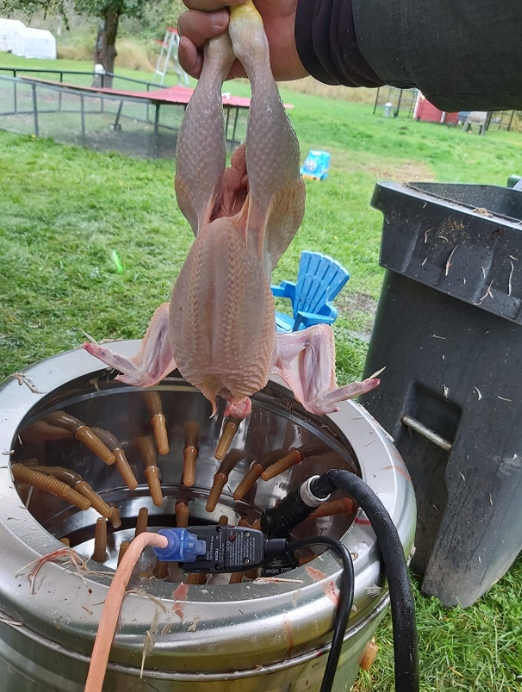
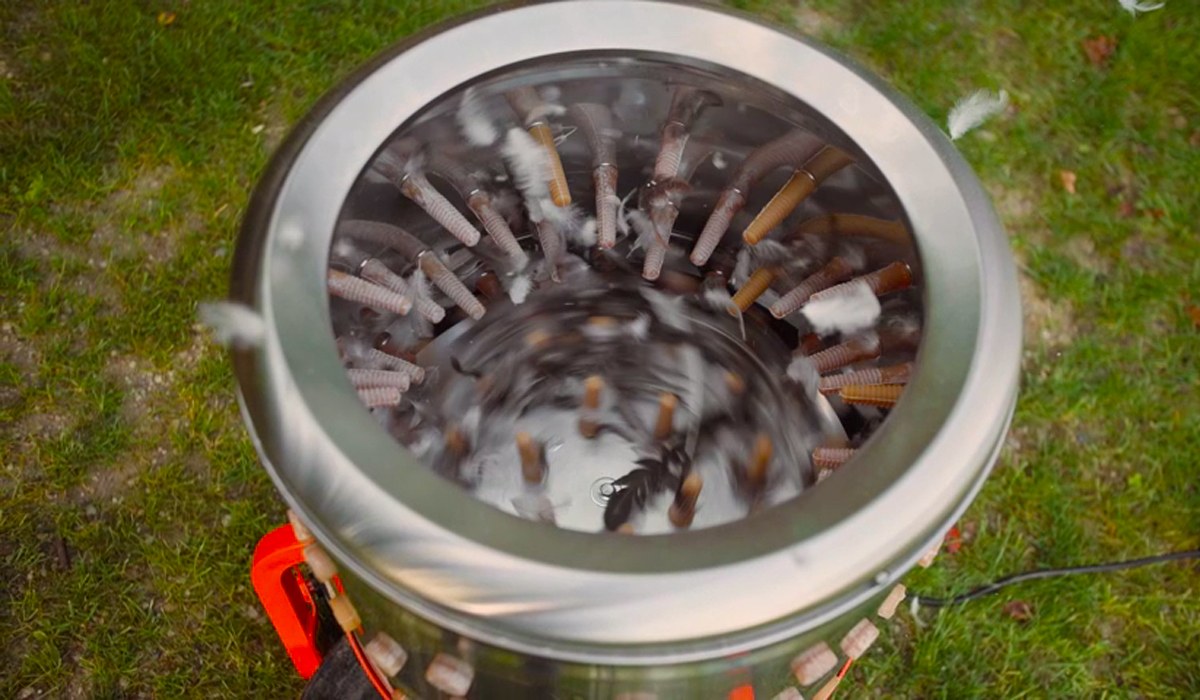
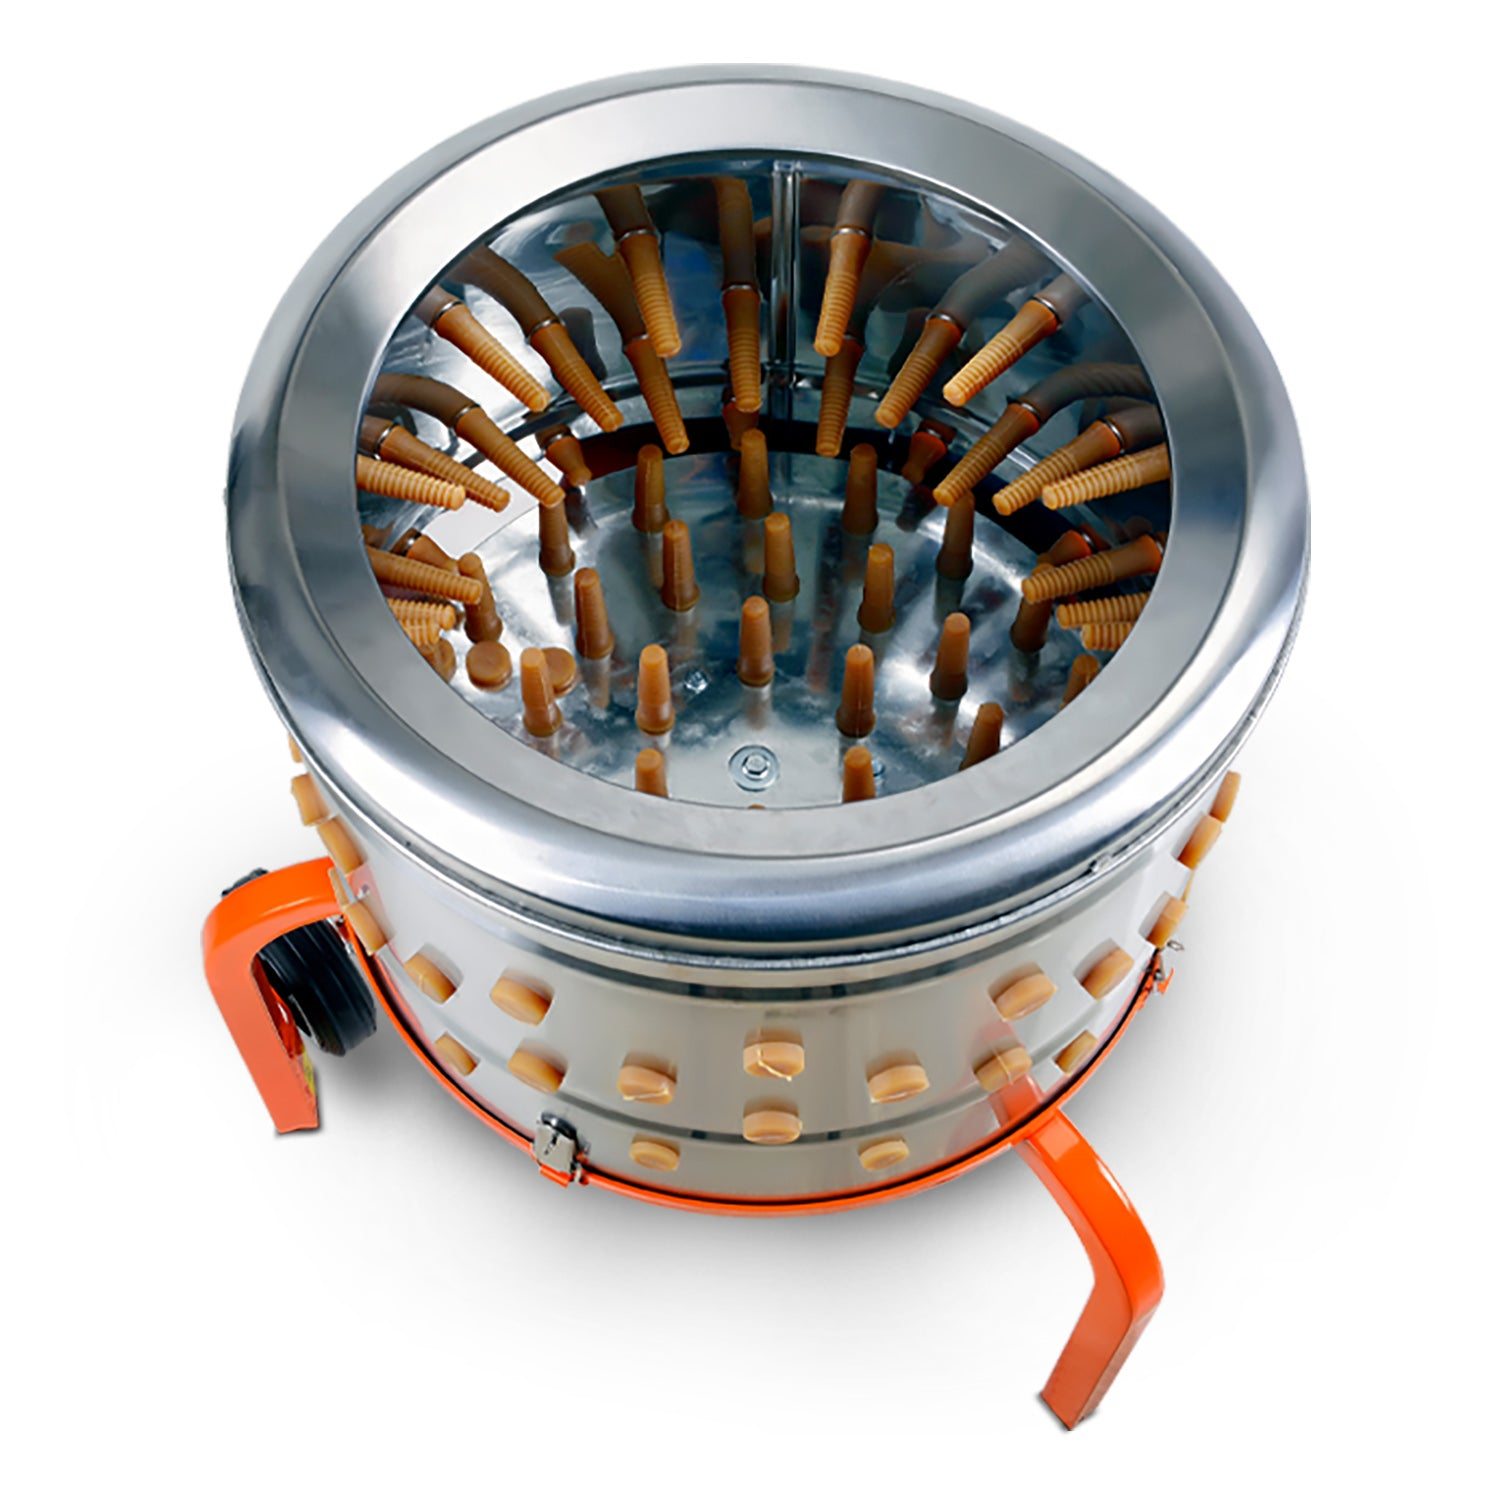
Clean Drum and Rubber Fingers
Once you’ve cleared away the big stuff, it’s time to focus on the drum and rubber fingers. These parts do most of the work in your poultry plucking machine, so they need extra attention. Rinse the drum and rubber fingers with water after every use. You can use a hose with a trigger nozzle for a strong spray that knocks off stuck bits. Add a small amount of dish soap or a gentle cleaner to help break down grease and grime.
-
Use a damp cloth or soft brush to wipe down the drum and fingers.
-
Avoid harsh chemicals, which can damage rubber and metal parts.
-
For tight spots, try a brush or even an air blower to get rid of hidden dirt.
After cleaning, rinse everything with clean water. Make sure you remove all soap and residue. This step keeps your chicken plucker working well and helps maintain poultry quality.
Note: Regular cleaning of the drum and rubber fingers not only improves hygiene but also extends the life of your poultry plucking machine.
Prevent Rust
Rust can ruin your chicken plucker if you don’t take steps to stop it. After you finish cleaning, always dry your poultry plucking machine completely. Water left on metal parts can cause rust and shorten the life of your machine. Stainless steel drums resist rust, but you still need to dry them well.
You can also use special products to protect your machine. For example, some people use food-safe rust inhibitors like JAX T-Oil to coat metal surfaces. This creates a barrier that keeps moisture out. If you want to go the extra mile, look for machines with electropolished parts. These parts are smoother, easier to clean, and up to 30 times more resistant to corrosion.
Here’s a quick table to help you remember the best ways to prevent rust:
|
Method |
What It Does |
|---|---|
|
Dry after cleaning |
Stops water from causing rust |
|
Use rust inhibitors |
Adds a protective layer to metal surfaces |
|
Choose stainless steel |
Resists rust and is easy to clean |
|
Electropolished parts |
Makes cleaning easier and boosts corrosion resistance |
Remember: A dry, clean poultry plucking machine lasts longer and works better.
By following these daily cleaning steps, you keep your chicken plucker machine in top condition. Good cleaning and sanitation habits mean your poultry plucking machine will give you years of reliable service. Plus, you’ll enjoy better results every time you use it.
Weekly Maintenance Tips
You want your chicken plucker to last for years. Weekly care is just as important as daily cleaning. These maintenance tips help you spot problems early and keep your machine running smoothly. Let’s break down what you should do every week.
Inspect Rubber Fingers
Rubber fingers do the hard work in your chicken plucker. They grab and pull feathers from each bird. Over time, these fingers can crack, lose flexibility, or even break. If you use your chicken plucker often, you need to check the rubber fingers every week. Look for any signs of wear and tear. If you see cracks, splits, or the rubber feels stiff, it’s time to replace them.
Tip: Worn rubber fingers can’t grip feathers well. This means your chicken plucker won’t clean birds as fast or as thoroughly. Replacing them keeps your machine working at its best.
Here’s a quick checklist for inspecting rubber fingers:
-
Squeeze each finger to check for flexibility.
-
Look for cracks, splits, or missing pieces.
-
Replace any finger that looks worn or damaged.
If you keep up with this simple check, you’ll avoid bigger problems later. You’ll also keep your chicken plucker working like new.
Tighten Bolts and Screws
Loose bolts and screws can cause big trouble for your chicken plucker. When parts get loose, your machine can vibrate, make loud noises, or even break down. You might notice the chicken plucker shaking more than usual or hear strange sounds. These are warning signs. Stop the machine right away and check for loose parts.
Every week, grab a wrench or screwdriver and go over all the bolts and screws on your chicken plucker. Tighten anything that feels loose. This keeps your machine stable and safe.
-
Loose bolts and screws can make your chicken plucker less efficient.
-
They can also lead to accidents or damage.
-
Regular checks help you catch problems before they get worse.
Note: If you ever hear a new noise or feel extra vibration, turn off your chicken plucker and check for loose bolts and screws before using it again.
Check for Wear
Your chicken plucker has many moving parts. Each week, take a few minutes to inspect for wear and tear. Start with the drive belts. Make sure they aren’t cracked, frayed, or slipping. If you see any damage, replace the belt right away. Next, check the wiring. Look for any exposed wires or signs of wear. Safe wiring keeps your chicken plucker running and helps prevent electrical problems.
Listen to your machine when it runs. Unusual sounds from the motor or moving parts can be an early sign of trouble. If you hear grinding, squeaking, or rattling, stop and investigate.
Here’s a simple table to help you remember what to check each week:
|
Part to Check |
What to Look For |
What to Do |
|---|---|---|
|
Rubber Fingers |
Cracks, stiffness, missing tips |
Replace if worn |
|
Bolts & Screws |
Looseness |
Tighten |
|
Drive Belts |
Cracks, fraying, slipping |
Replace if damaged |
|
Wiring |
Exposed wires, wear |
Repair or replace |
|
Motor & Moving Parts |
Unusual sounds |
Inspect and fix as needed |
Keeping up with regular maintenance helps your chicken plucker last longer and work better. You’ll spend less money on repairs and get better results every time.
If you follow these weekly maintenance tips, you’ll keep your chicken plucker in top shape. You’ll also catch small problems before they turn into big ones. Make weekly checks part of your routine, and your machine will reward you with years of reliable service.
Monthly Lubrication and Inspection
You want your electric chicken plucker to run smoothly every time. Monthly checks help you catch small problems before they grow. This step is just as important as daily and weekly care. Let’s look at what you should do each month.
Lubricate Moving Parts
Your electric chicken plucker has many moving parts. These parts need oil or grease to work well. If you skip this step, your machine can get noisy or even break down. Find the spots where the manual says to add oil. Most electric chicken plucker models have grease points on the motor, bearings, and gears.
-
Wipe away old grease and dirt first.
-
Use food-safe oil or grease.
-
Add just enough to coat the parts. Too much can attract dust.
Tip: If your chicken plucker starts to squeak, it’s time to add more oil. Don’t wait for a breakdown!
A well-oiled electric chicken plucker will last longer and work better. You’ll notice smoother action and less wear on your machine.
Examine Electrical Components
Electric chicken plucker machines rely on safe wiring and good connections. Each month, unplug your machine and open the access panel. Look for loose wires, burnt spots, or frayed cords. If you see any damage, fix it right away or call a pro.
Here’s a quick checklist:
|
What to Check |
What to Do |
|---|---|
|
Power cord |
Look for cuts or frays |
|
Switches |
Test for smooth action |
|
Motor connections |
Tighten loose wires |
|
Plugs and outlets |
Check for heat or burns |
Note: Regular maintenance keeps your electric chicken plucker safe and reliable. Never use a damaged machine.
By following these monthly steps, you keep your chicken plucker in top shape. Your electric chicken plucker will thank you with years of steady service.
Annual Deep Cleaning and Parts Replacement
Deep Clean Drum and Tub
Once a year, give your chicken plucker a deep clean. This step keeps your machine running like new. Start by unplugging the machine and removing any loose parts. Take out the drum and tub if your model allows. Use warm, soapy water and a soft brush to scrub every surface. Pay close attention to the corners and seams. Dirt and grease can hide there.
Rinse everything with clean water. Dry all parts with a towel. Let them air dry for a few hours before putting the chicken plucker back together. If you see any rust spots, use a gentle scrub pad to remove them. You want your machine to stay clean and safe for every use.
Tip: A deep clean once a year helps prevent buildup that daily cleaning might miss. Your chicken plucker will work better and last longer.
Replace Worn Parts
Annual care means more than just cleaning. You should also focus on inspecting and replacing parts. Look at the rubber fingers, belts, and any seals on your chicken plucker. If you see cracks, splits, or worn spots, swap them out. New parts help your machine pluck birds faster and more gently.
Here’s a quick checklist for your annual checkup:
-
Inspect rubber fingers for damage.
-
Check belts for wear.
-
Look at seals and gaskets.
-
Replace any part that looks old or broken.
A well-maintained chicken plucker gives you better results and fewer problems. Make this yearly routine part of your plan, and your machine will reward you with years of service.
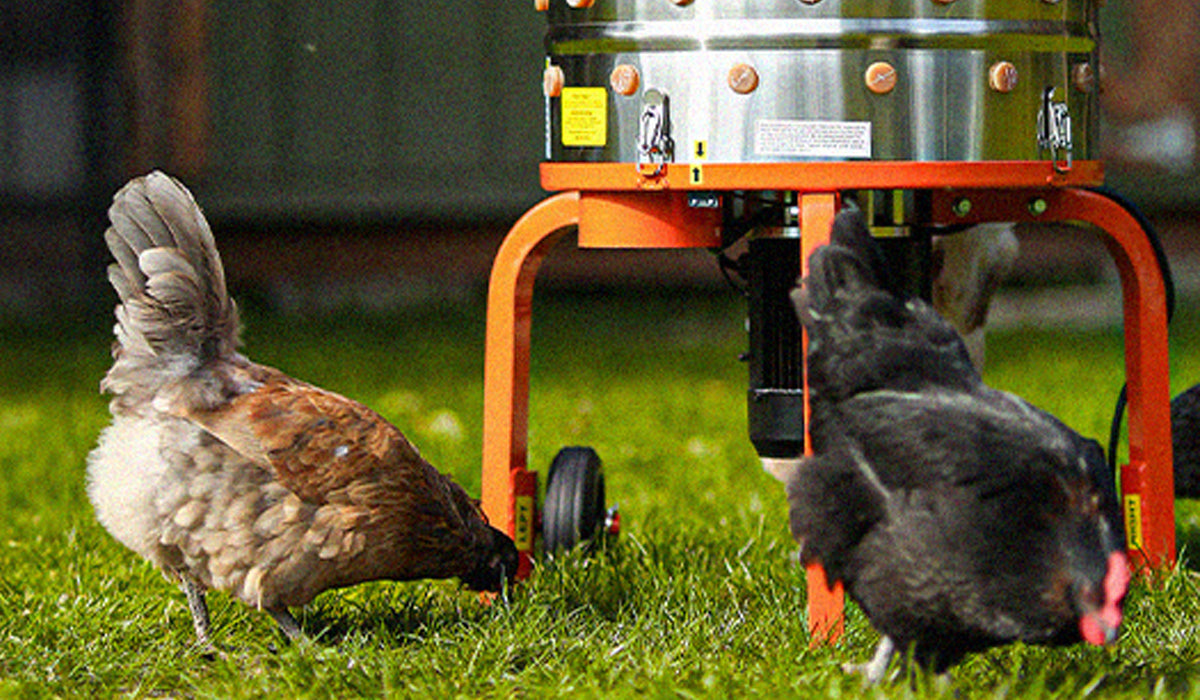
Storage Tips for Chicken Plucker
Store in a Dry Place
You want your chicken plucker to last for years, right? Where you store it makes a big difference. Always pick a dry and safe spot for your machine. Moisture is the enemy here. If you let water or damp air get to your chicken plucker, rust can start to form. Rust eats away at metal parts and can ruin your machine fast. A dry place keeps your plucker safe from this kind of damage.
Storing your chicken plucker in a dry spot also keeps out dust and animals. Dust can clog up moving parts, and small animals might chew on wires or rubber fingers. You can make things even better by covering your machine when you’re not using it. A simple tarp or fitted cover works great. This keeps your plucker clean and ready for the next job.
Tip: Covering your chicken plucker during storage helps keep it in top shape and saves you time on cleaning later.
Here’s a quick checklist for storing your chicken plucker:
-
Find a dry, safe location.
-
Keep the machine off the ground if possible.
-
Cover it to protect from dust and animals.
-
Check the area for leaks or dampness.
Avoid Humidity
Humidity can sneak up on you and cause big problems. When you store your chicken plucker in a humid place, moisture can build up on metal parts. This leads to rust and weakens the machine over time. You might not notice the damage right away, but it adds up. Keeping your chicken plucker in a dry spot stops this from happening. It protects the build quality and helps your machine work well for years. Good storage habits save you money and keep your plucker ready whenever you need it.
Troubleshooting Your Poultry Plucking Machine
Even the best poultry plucking machine can run into trouble now and then. Don’t worry—most problems have simple fixes. Here’s how you can spot and solve the most common issues.
Unusual Noises
Strange sounds from your poultry plucking machine usually mean something needs attention. You might hear grinding, rattling, or squeaking. These noises often come from loose bolts, worn rubber fingers, or something stuck inside the drum. Stop your electric chicken plucker right away if you hear anything odd.
-
Check all bolts and screws. Tighten any that feel loose.
-
Inspect the drum for stuck feathers or debris.
-
Look at the rubber fingers. Replace any that are cracked or broken.
If the noise continues after these checks, call a professional. Never ignore loud or new sounds.
Power Issues
Sometimes your poultry plucking machine won’t start or stops suddenly. Here’s what you can do:
-
Make sure the power cord is plugged in tightly.
-
Press the main switch to turn on your electric chicken plucker.
-
If nothing happens, check the reset button on the leakage protector.
-
Remove any blockages that might trigger the safety shut-off.
-
Wait 30 seconds before restarting if the machine stopped due to locked rotor protection.
Never use your poultry plucking machine with damaged cords or plugs. Always follow safety instructions to avoid electrical problems.
Poor Plucking Results
If your poultry plucking machine leaves too many feathers or damages the birds, check these things:
-
Make sure the rubber fingers are in good shape and placed correctly.
-
Adjust the machine to fit the size of your birds.
-
Use the right scalding method before plucking.
-
Don’t mix old and new rubber fingers. This causes uneven results.
-
Set the machine speed and efficiency for the type of bird you process.
Sometimes, you’ll need to remove pin feathers by hand for a perfect finish.
If you try these steps and still have problems, it’s time to get help from a repair expert. Taking quick action keeps your poultry plucking machine running strong.
Long-Term Durability
Prevent Corrosion
You want your chicken plucker to last as long as possible. Corrosion is one of the biggest threats to your machine’s lifespan. You can stop rust and damage before they start by following a few simple steps:
-
Clean your chicken plucker after every use. Remove all feathers, dirt, and debris from the drum and rubber fingers.
-
Use a damp cloth or a brush to reach tight spots. Air blowers work well for hidden areas.
-
Rinse and dry the machine completely. Water left behind can cause rust.
-
Inspect your machine weekly. Look for worn parts, loose screws, and dry spots that need oil.
-
Replace damaged rubber fingers right away. Flexible fingers help prevent wear on other parts.
-
Once a year, take the machine apart for a deep clean. Check the wiring and all metal surfaces.
-
Store your chicken plucker in a dry place. Use a cover to keep out dust and moisture.
-
Choose gentle cleaners to protect both metal and rubber parts.
Keeping up with these habits will protect your machine’s lifespan and help you get the most out of your investment.
Schedule Regular Checks
Regular checks are the secret to great durability and build quality. You should inspect your chicken plucker after every use or between batches. Look at the drum, rubber fingers, and all bolts or screws. If you spot cracks, tears, or loose parts, fix them right away. Clean the machine each time to catch problems early.
-
Replace or tighten parts as needed.
-
Make these checks part of your routine.
-
You’ll avoid big repairs and keep your machine running smoothly.
When you follow these steps, you help your chicken plucker last longer. You also save money and enjoy better results every time. Regular maintenance means fewer breakdowns, a longer lifespan, and more reliable performance. That’s how you get the most out of your chicken plucker for years to come.
Looking after your chicken plucker machine helps it last longer. You can save money and stop it from breaking down. This also keeps your equipment safe to use.
-
Doing regular care can lower your costs by half and make your machine work better.
-
Experts agree that following good routines and safety rules is important.
Begin now—make caring for your machine a habit so you get many years of easy plucking!
FAQ
How often should you replace the rubber fingers?
You should check them every week. Replace any finger that looks cracked, stiff, or broken. Fresh fingers help your machine work better.
Can you use a pressure washer to clean your chicken plucker?
No, you should not use a pressure washer. It can damage the motor and rubber parts. Use a hose with a gentle spray instead.
What should you do if your chicken plucker smells bad?
Clean the drum and rubber fingers with warm, soapy water. Dry everything well. Bad smells usually mean you missed some dirt or feathers.
Related Products
Leave a comment
All comments are moderated before being published.
This site is protected by hCaptcha and the hCaptcha Privacy Policy and Terms of Service apply.