
















Unboxing Your New Electric Trailer Dolly: What to Expect
The arrival of your new electric trailer dolly is an exciting moment. It’s the key to effortlessly moving your boat, camper, or utility trailer. Inside the box, you’ll find the main components of your new equipment, carefully packed for shipping. Take a moment to lay everything out and cross-reference it with the parts list in your user manual.
Typically, you should find:
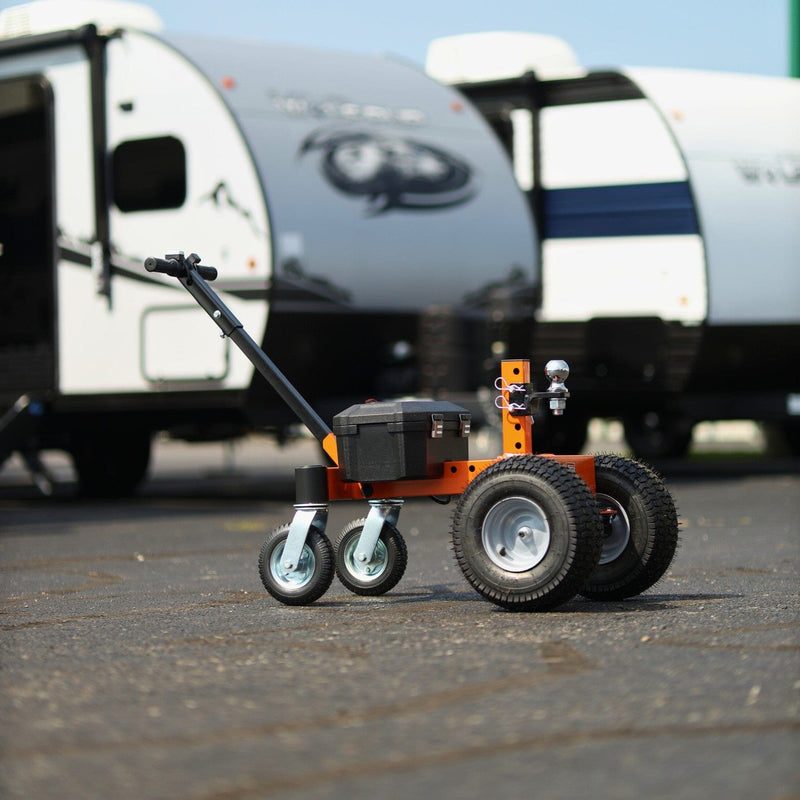
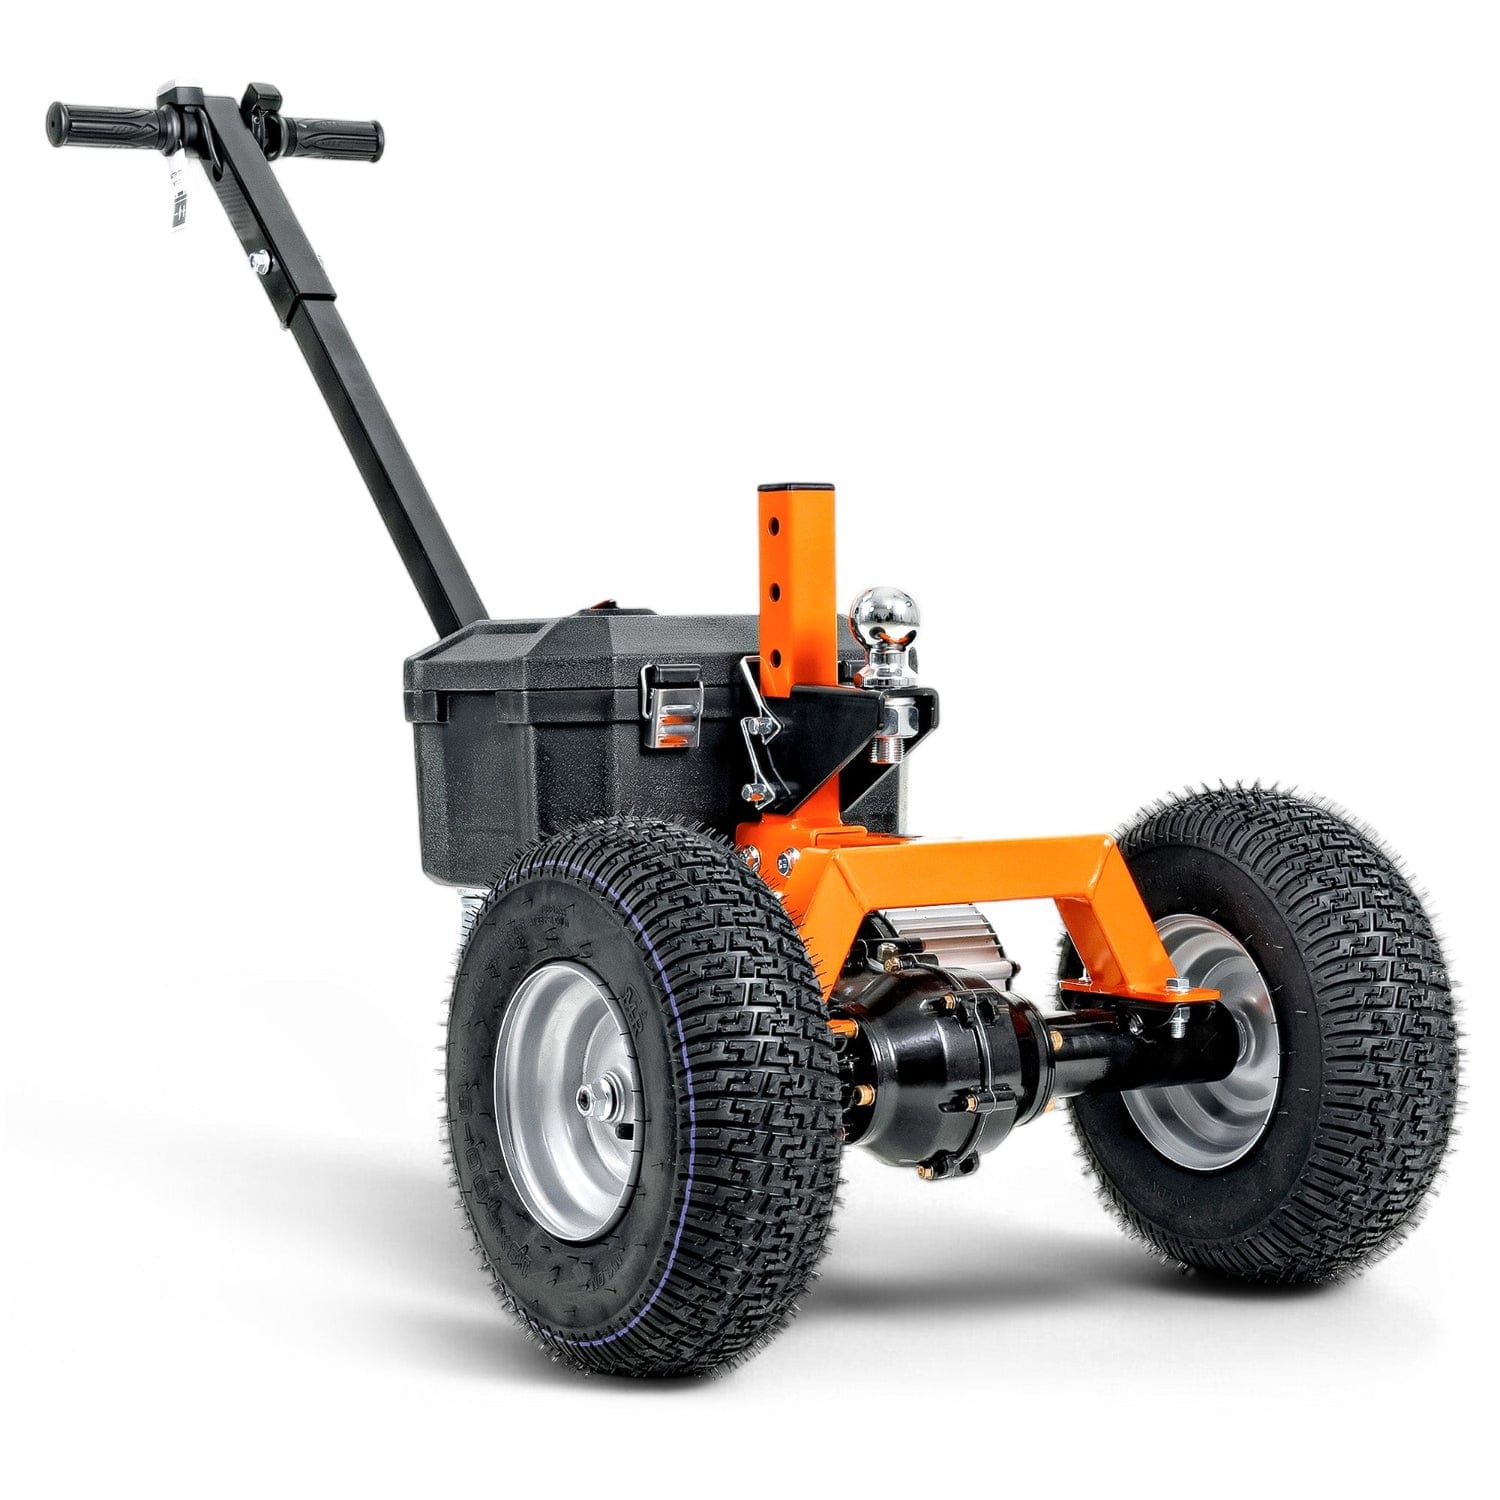
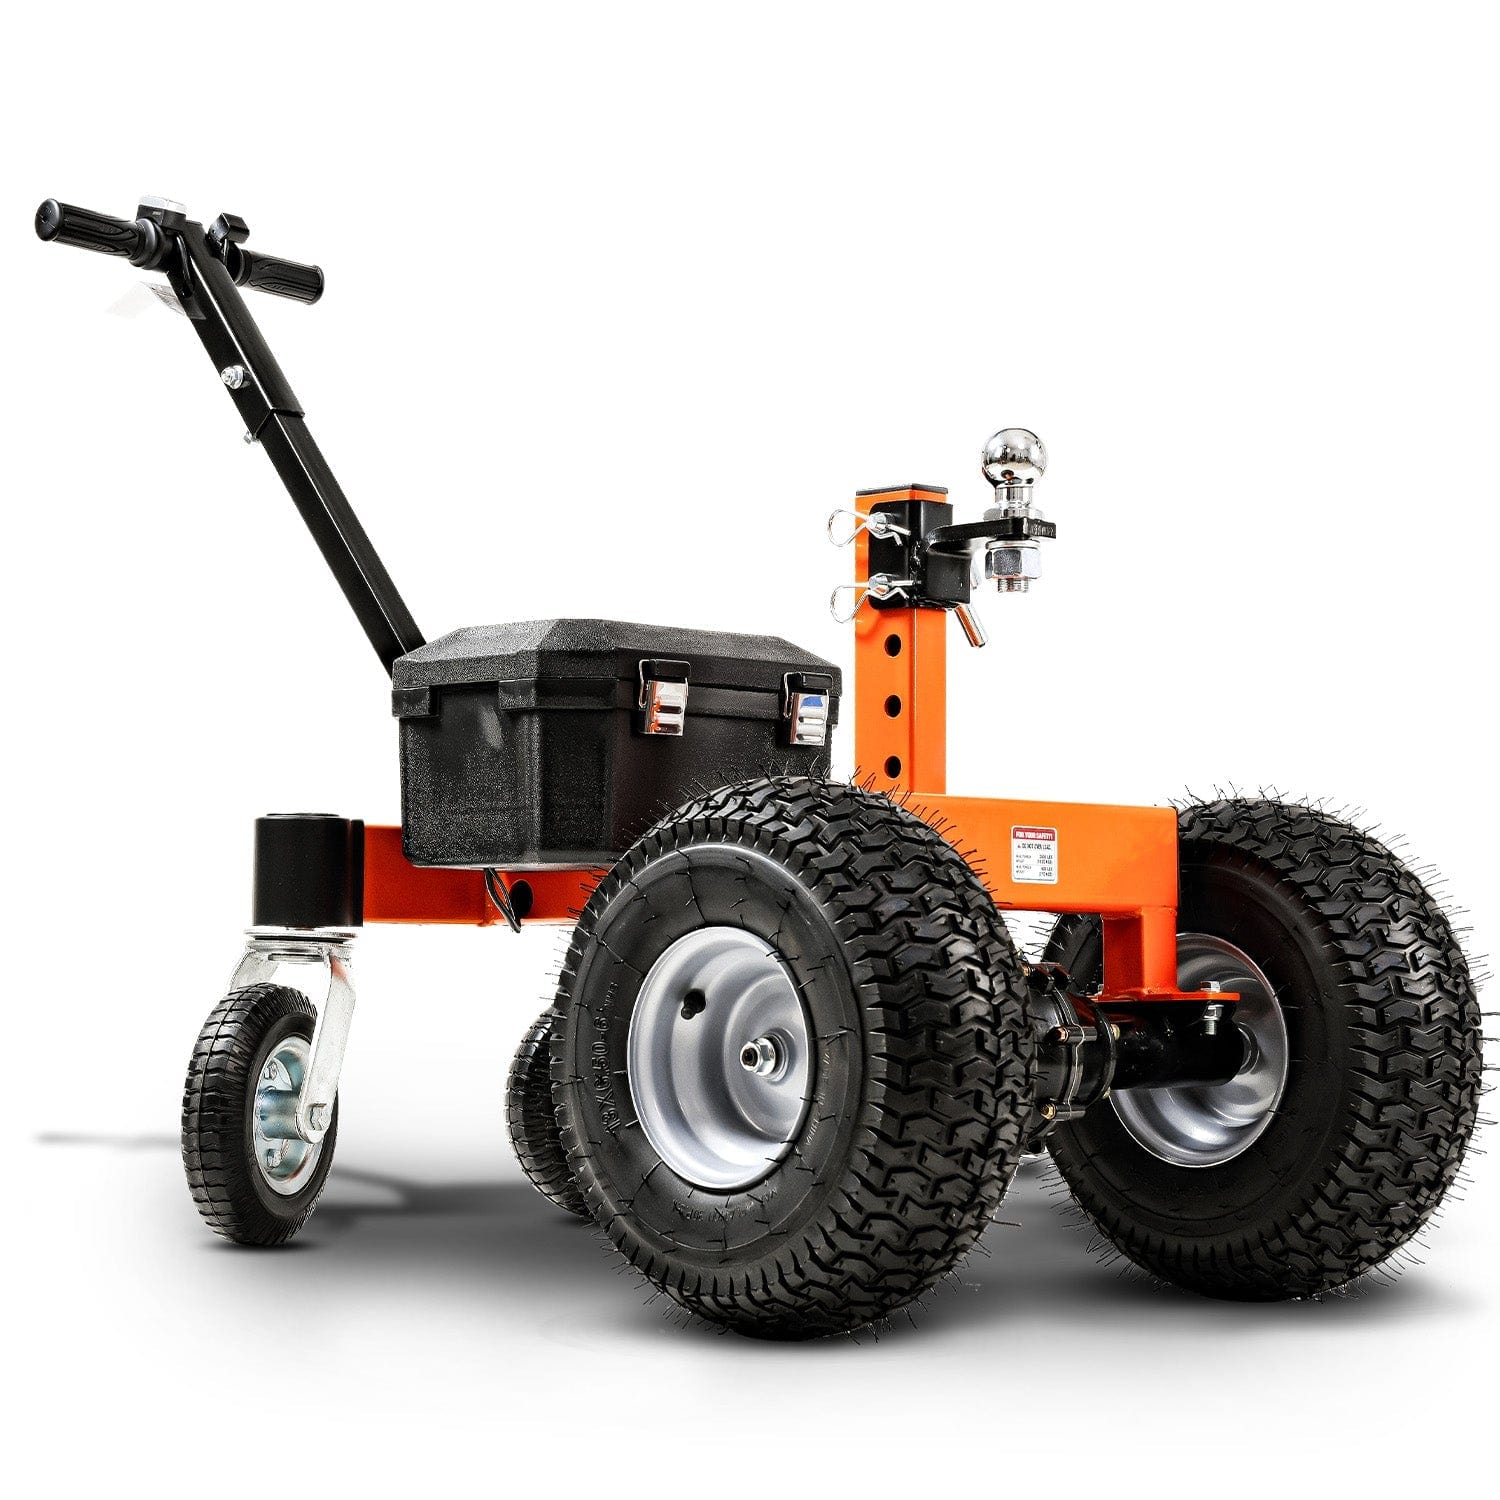
- The main dolly frame with the motor and axle assembly.
- The control handle and wiring.
- The wheels and mounting hardware.
- The battery pack and charger.
- An adjustable ball mount assembly.
- A bag containing all necessary nuts, bolts, and washers for assembly.
Inspecting each part for any signs of shipping damage is a crucial first step. If anything seems amiss, contact customer service before proceeding with assembly.
Essential Tools and Preparations Before First Use
Before you begin assembly, gather a few basic tools to make the process smooth and efficient. While your specific model may have slightly different requirements, you will generally need:
- A set of wrenches or a socket set.
- Pliers.
- A Phillips head screwdriver.
Choose a clean, flat, and well-lit area for assembly, like a garage floor or driveway. This gives you plenty of room to work and helps prevent losing small hardware. The most important preparatory step is to charge the battery. Connect the battery to the included charger and plug it into a standard wall outlet. A full initial charge ensures your dolly has maximum power for its first job.
Understanding Your Electric Trailer Dolly's Components
Familiarizing yourself with the parts of your electric trailer dolly will make operating it intuitive and safe.
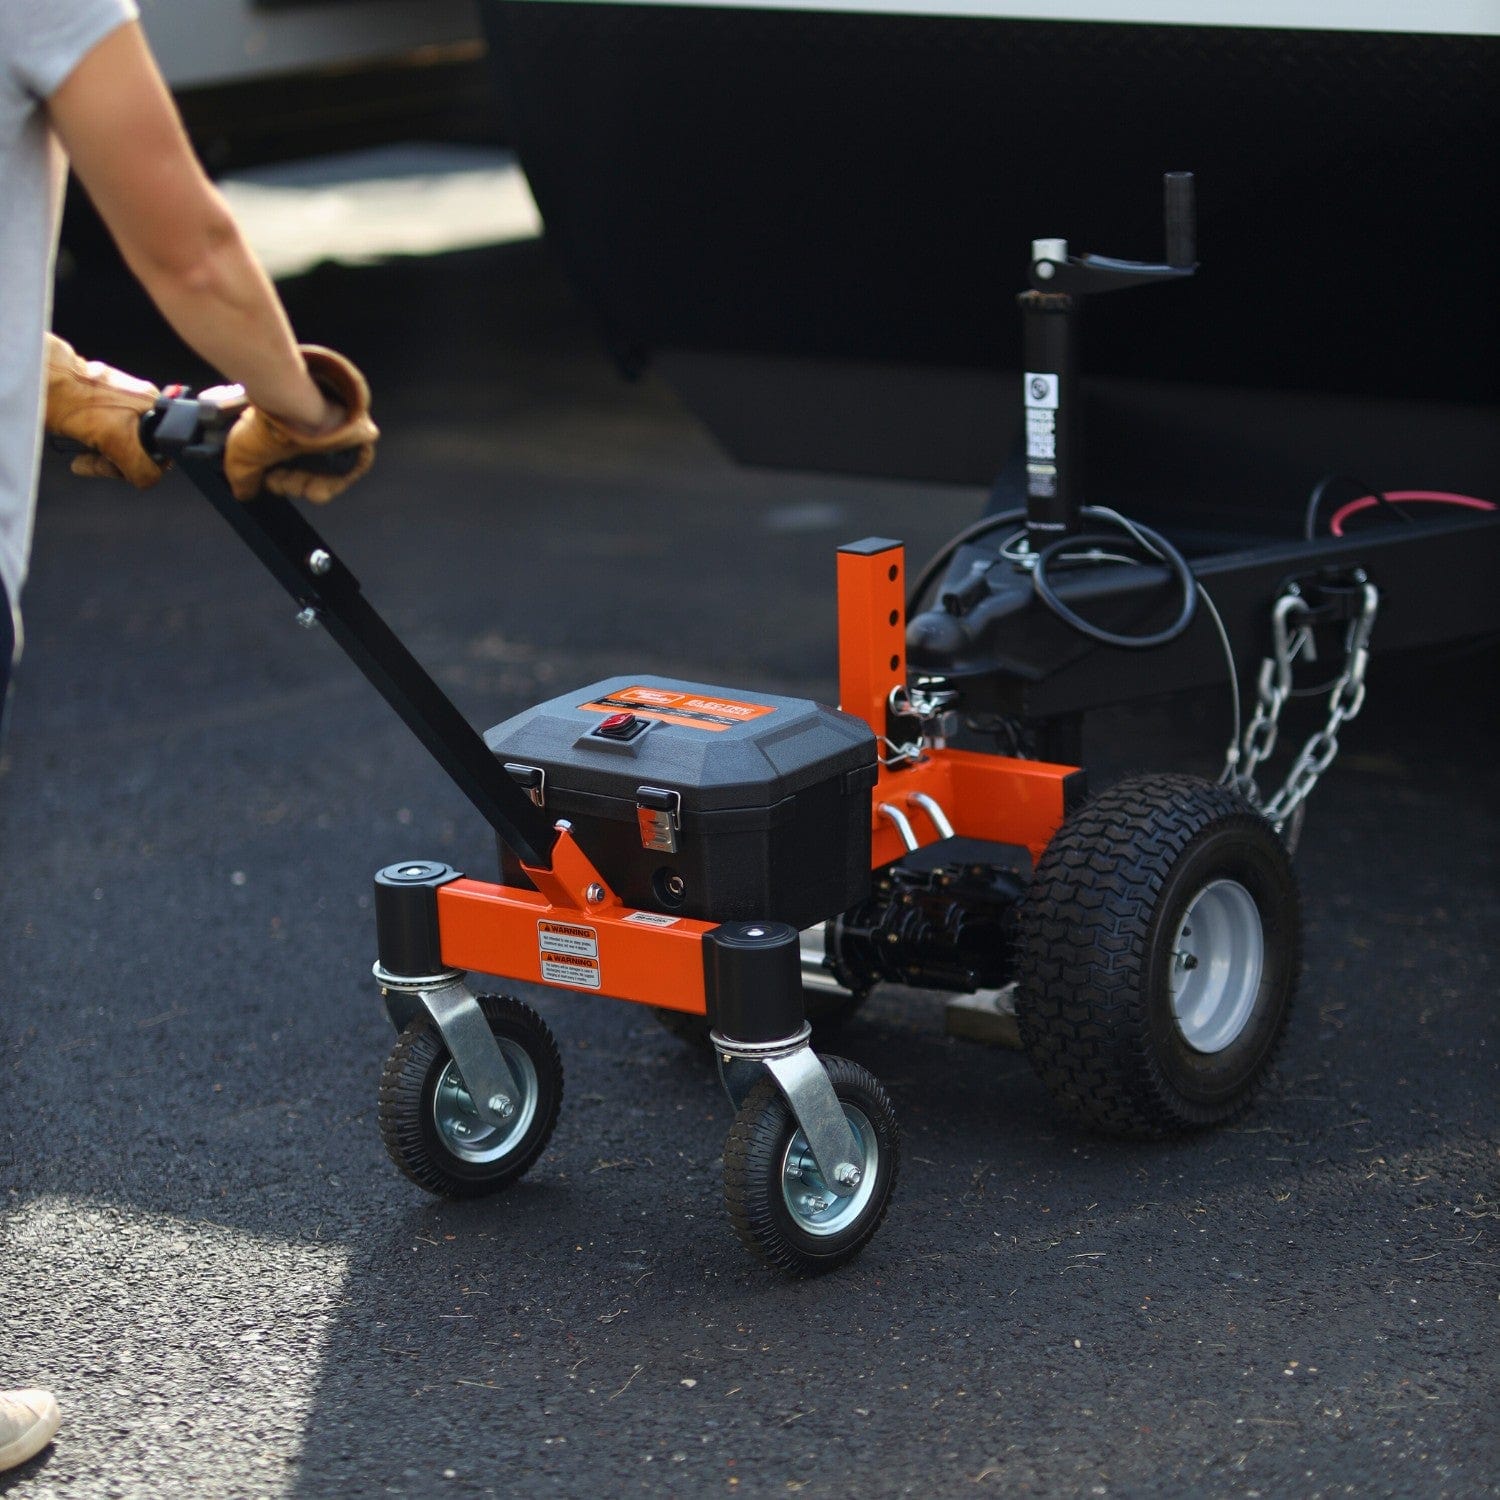
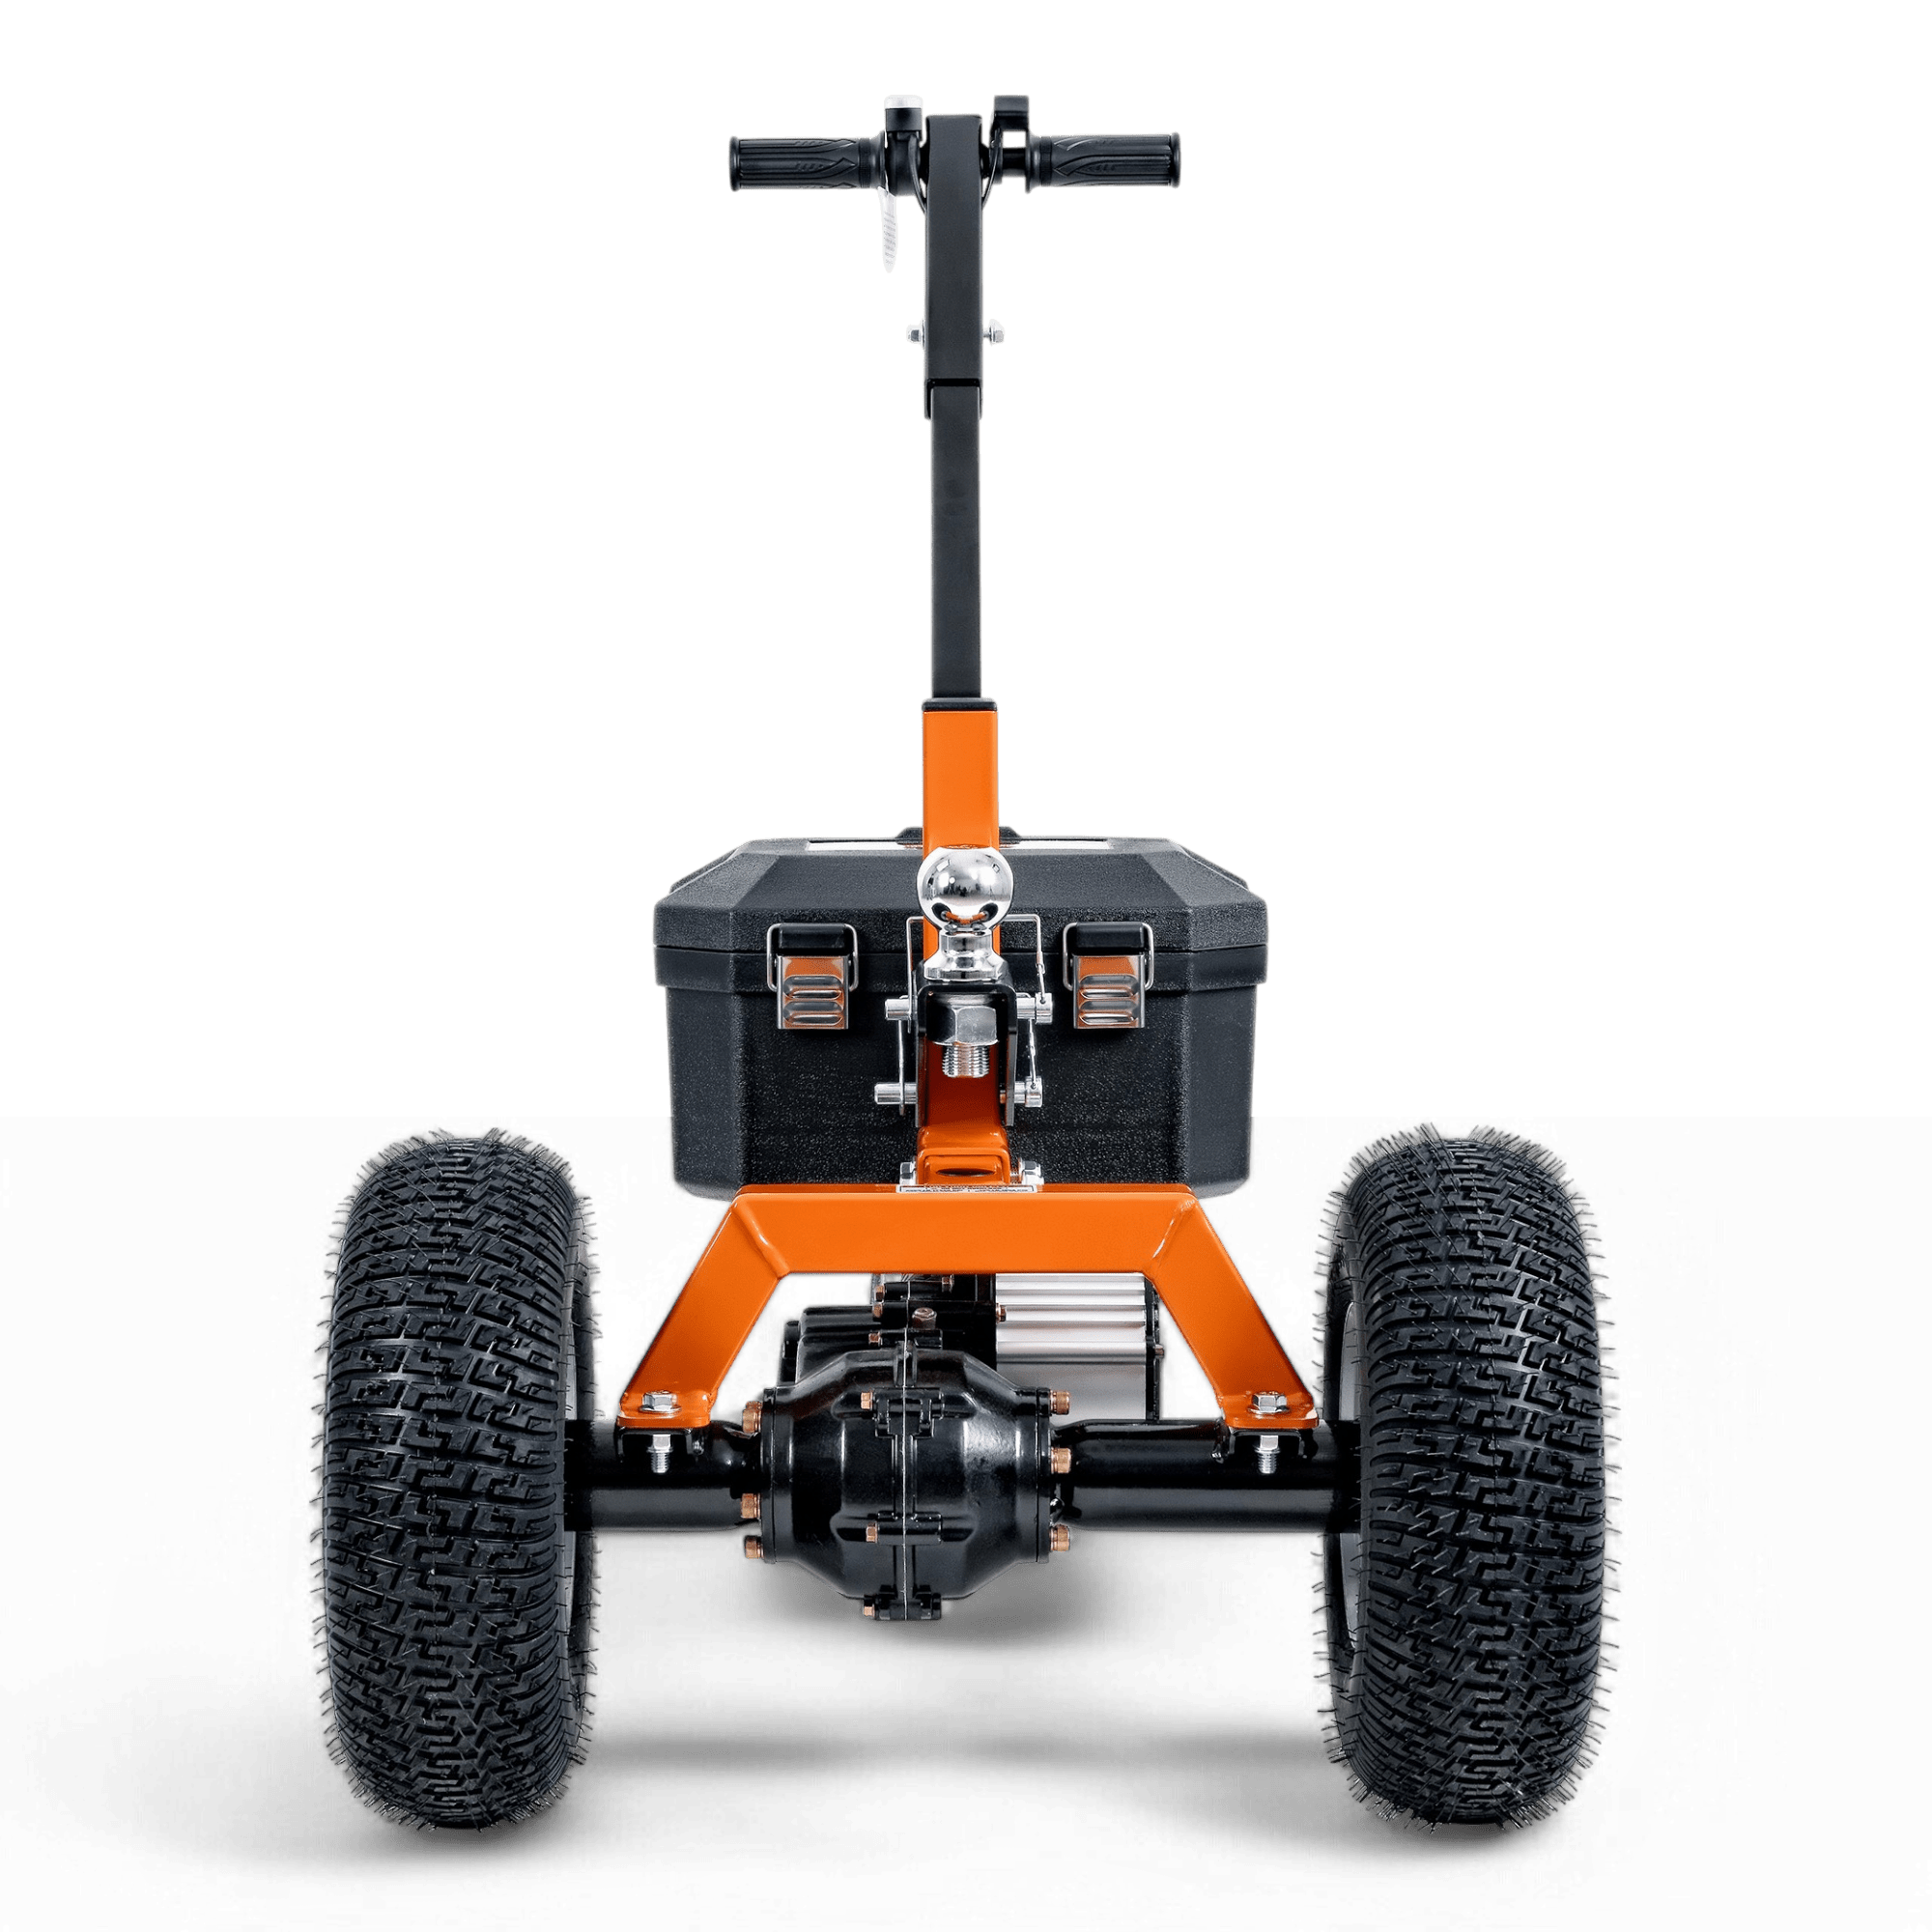
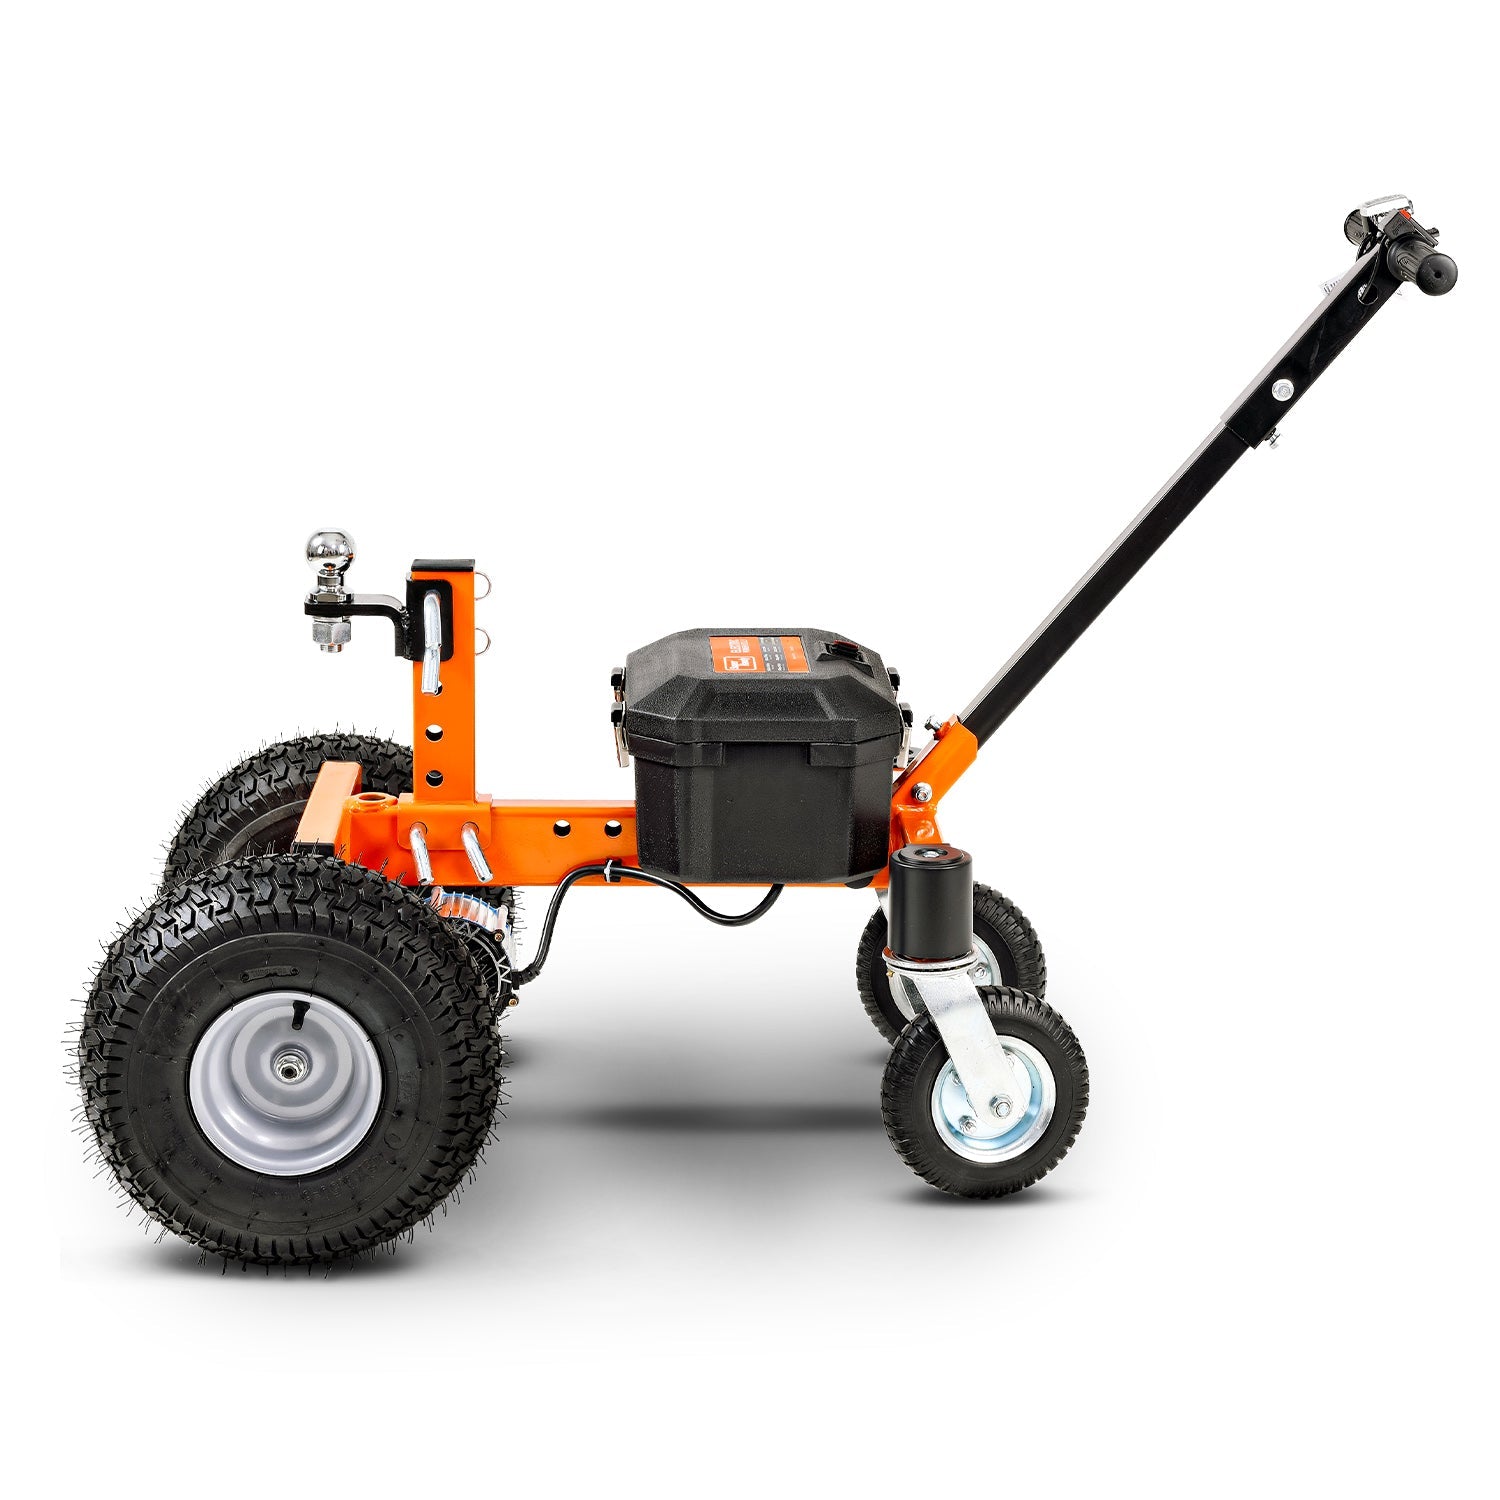
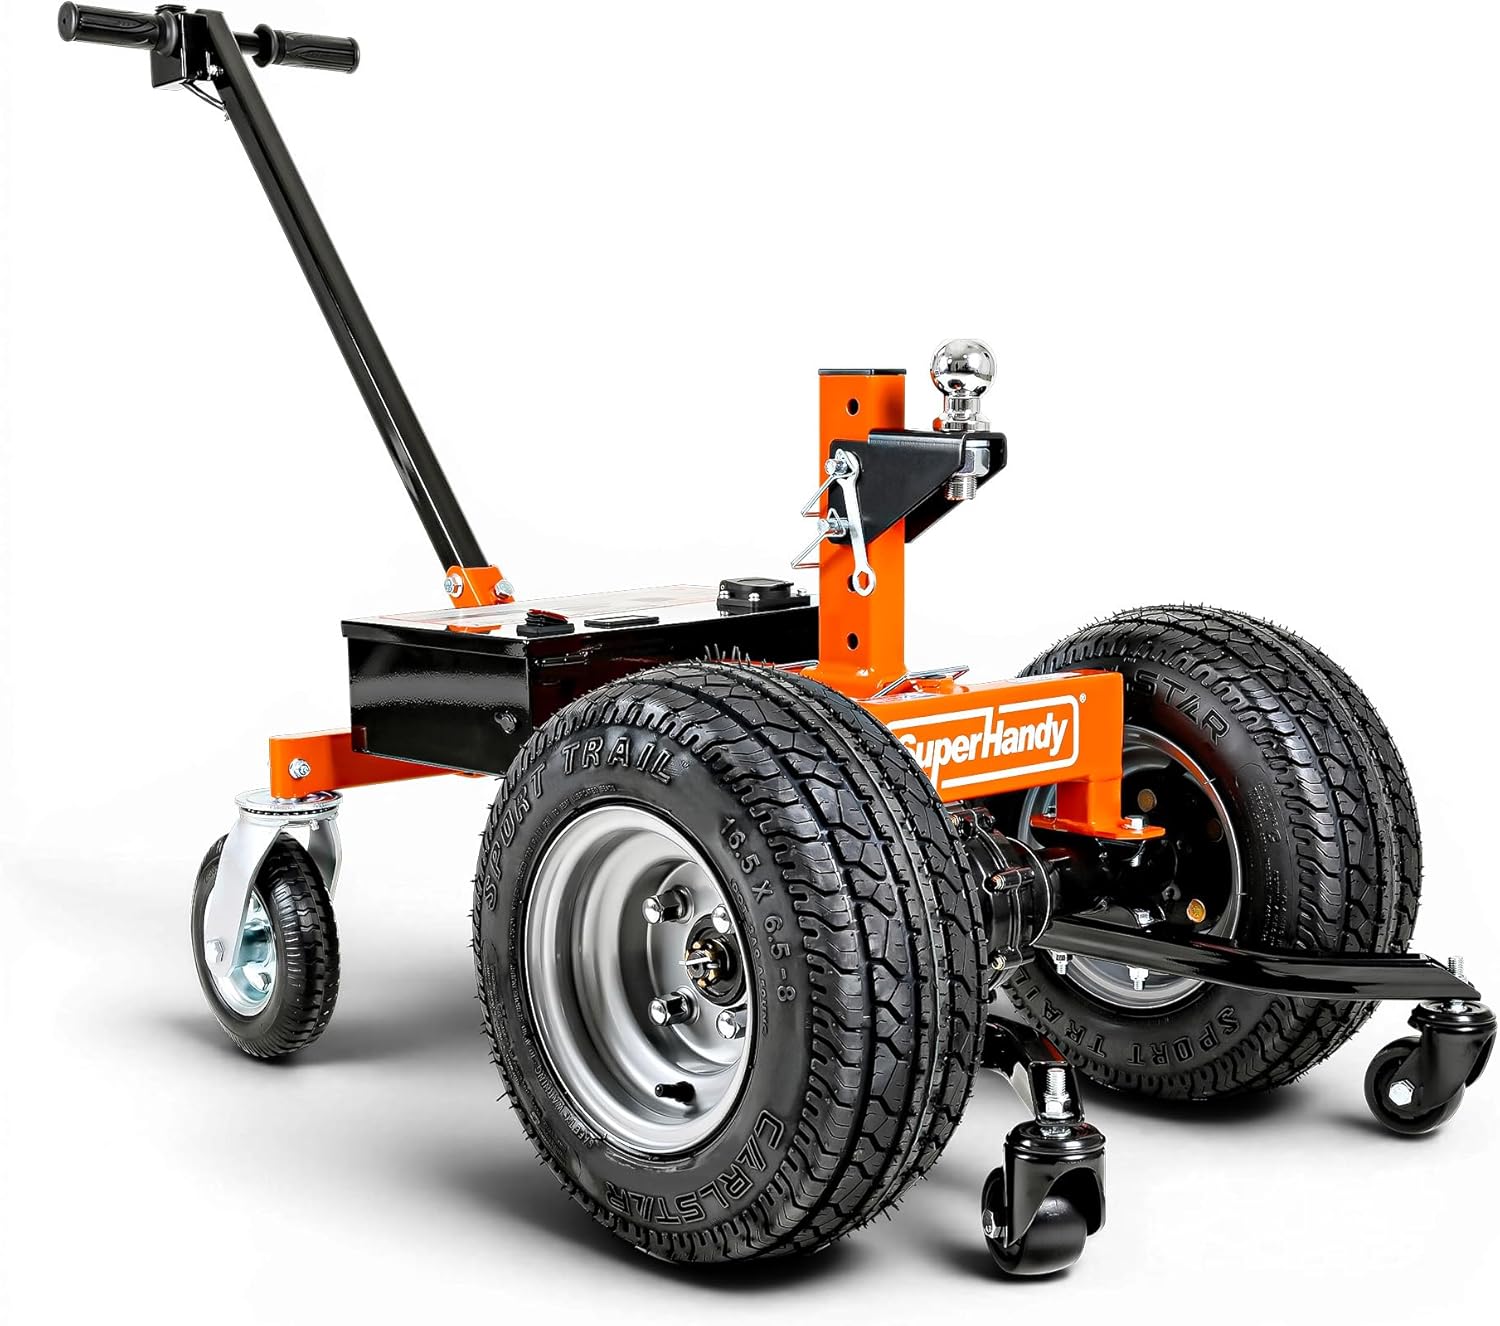
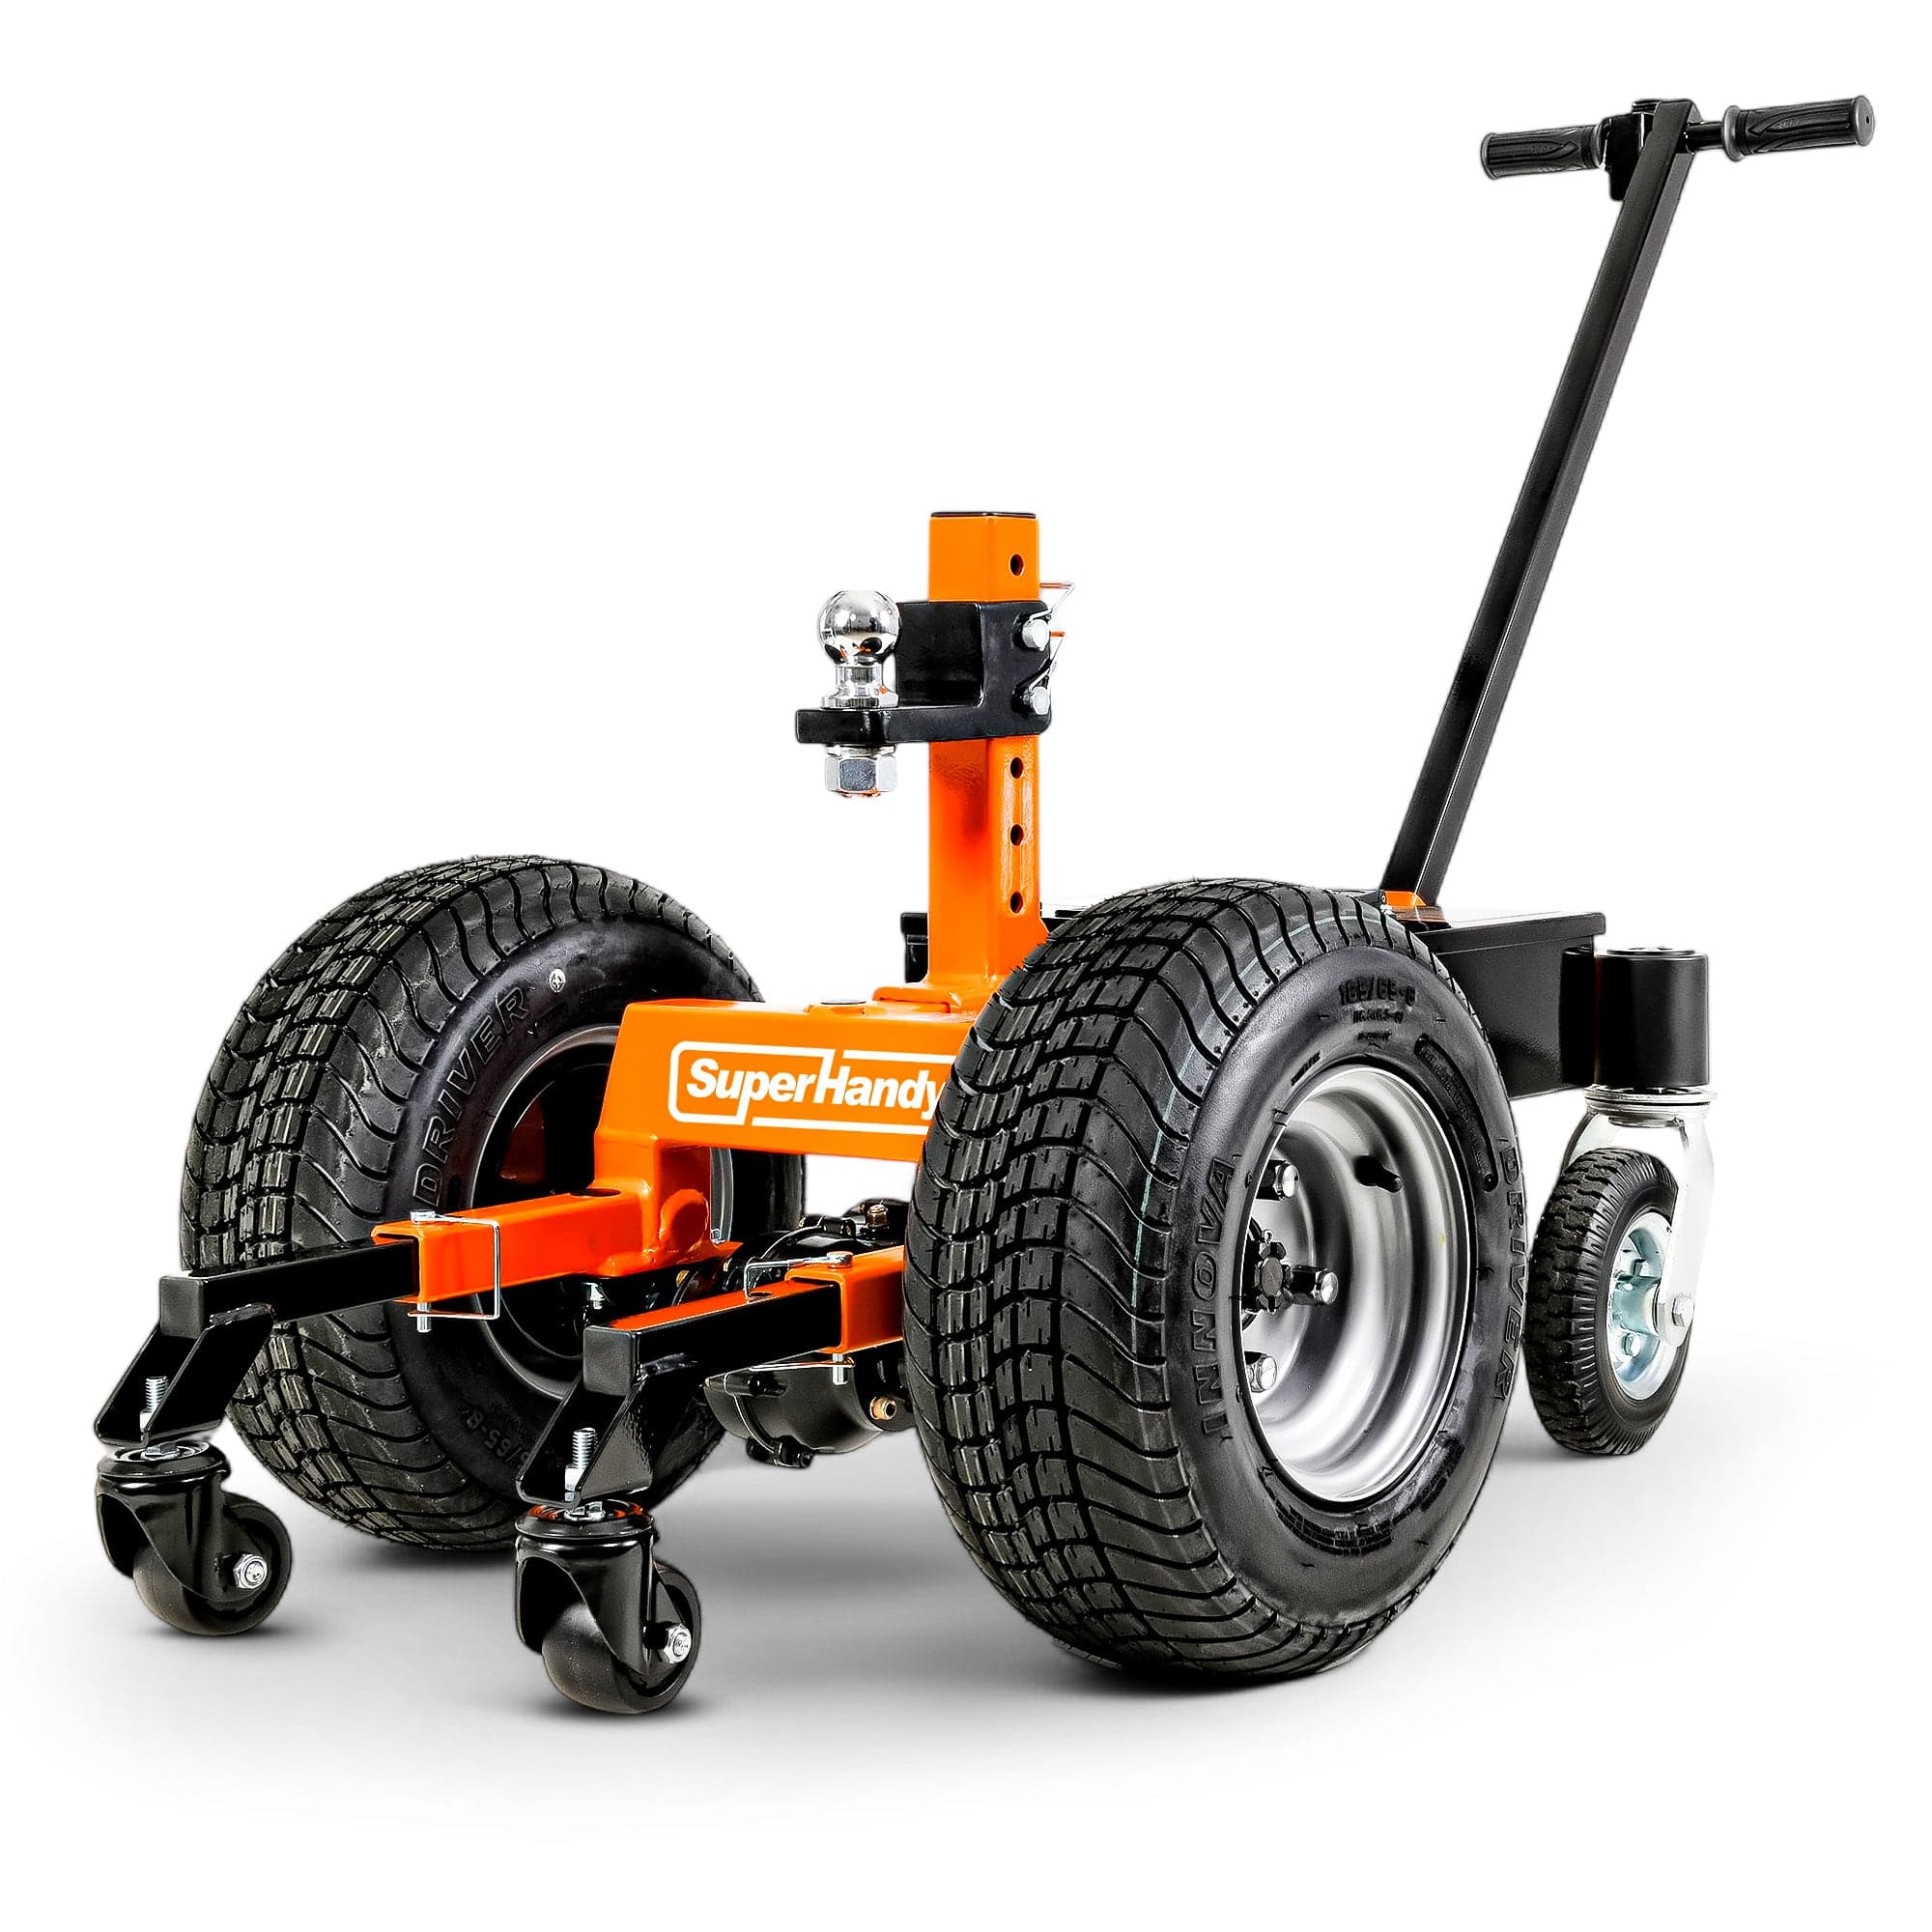
- Control Handle: This is your command center. It features the throttle for forward and reverse movement, a speed control switch, and the main power button.
- Adjustable Ball Mount: This is where the magic happens. The height of the hitch ball can be raised or lowered to match your trailer's coupler height, ensuring a level and secure connection.
- Drive Wheels: These heavy-duty, all-terrain tires provide the traction needed to move heavy loads across various surfaces, from pavement to packed gravel.
- Motor and Drivetrain: Housed within the frame, the powerful electric motor is the heart of the trailer dolly, providing the torque to move thousands of pounds with ease.
- Battery: The rechargeable lead-acid or lithium-ion battery provides the power for the motor. It’s designed for easy removal for charging.
Attaching Your Trailer to the Electric Dolly Safely
Connecting the dolly to your trailer is the most critical step. For safety, always chock the wheels of your trailer on both sides to prevent it from rolling unexpectedly.
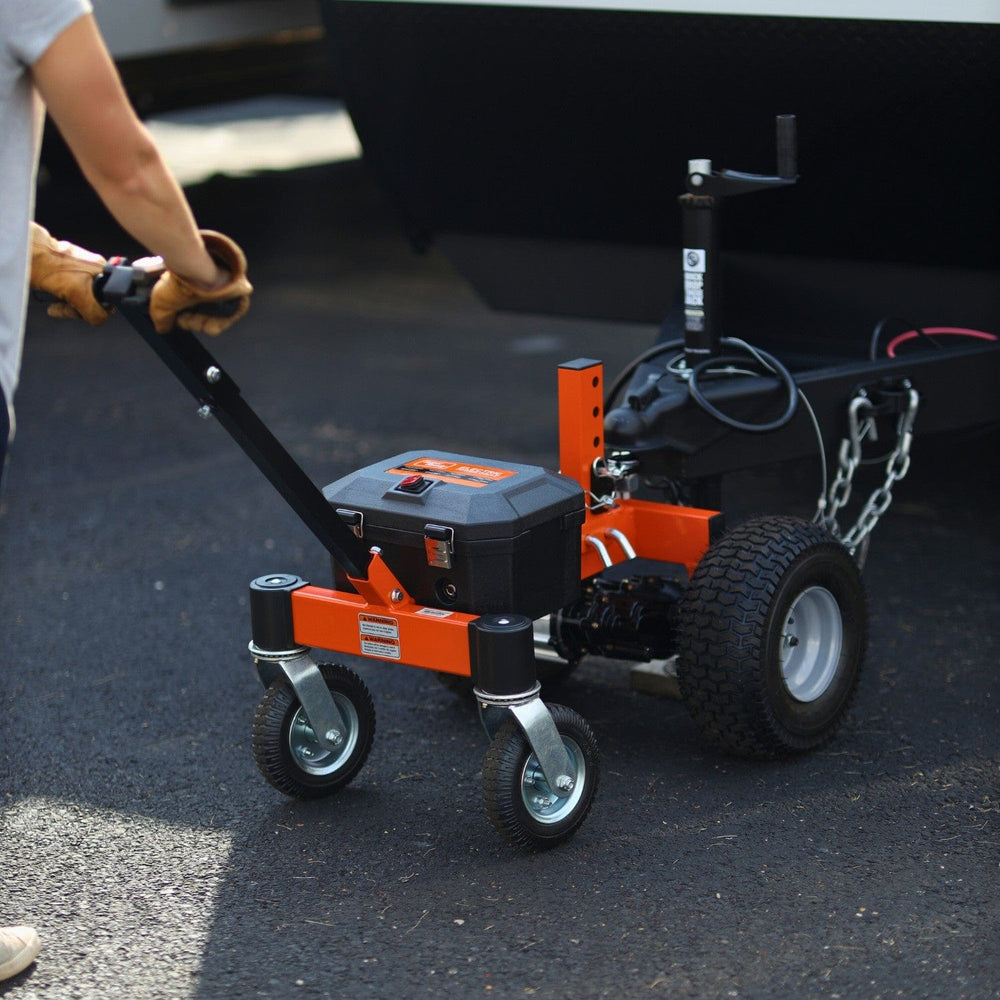
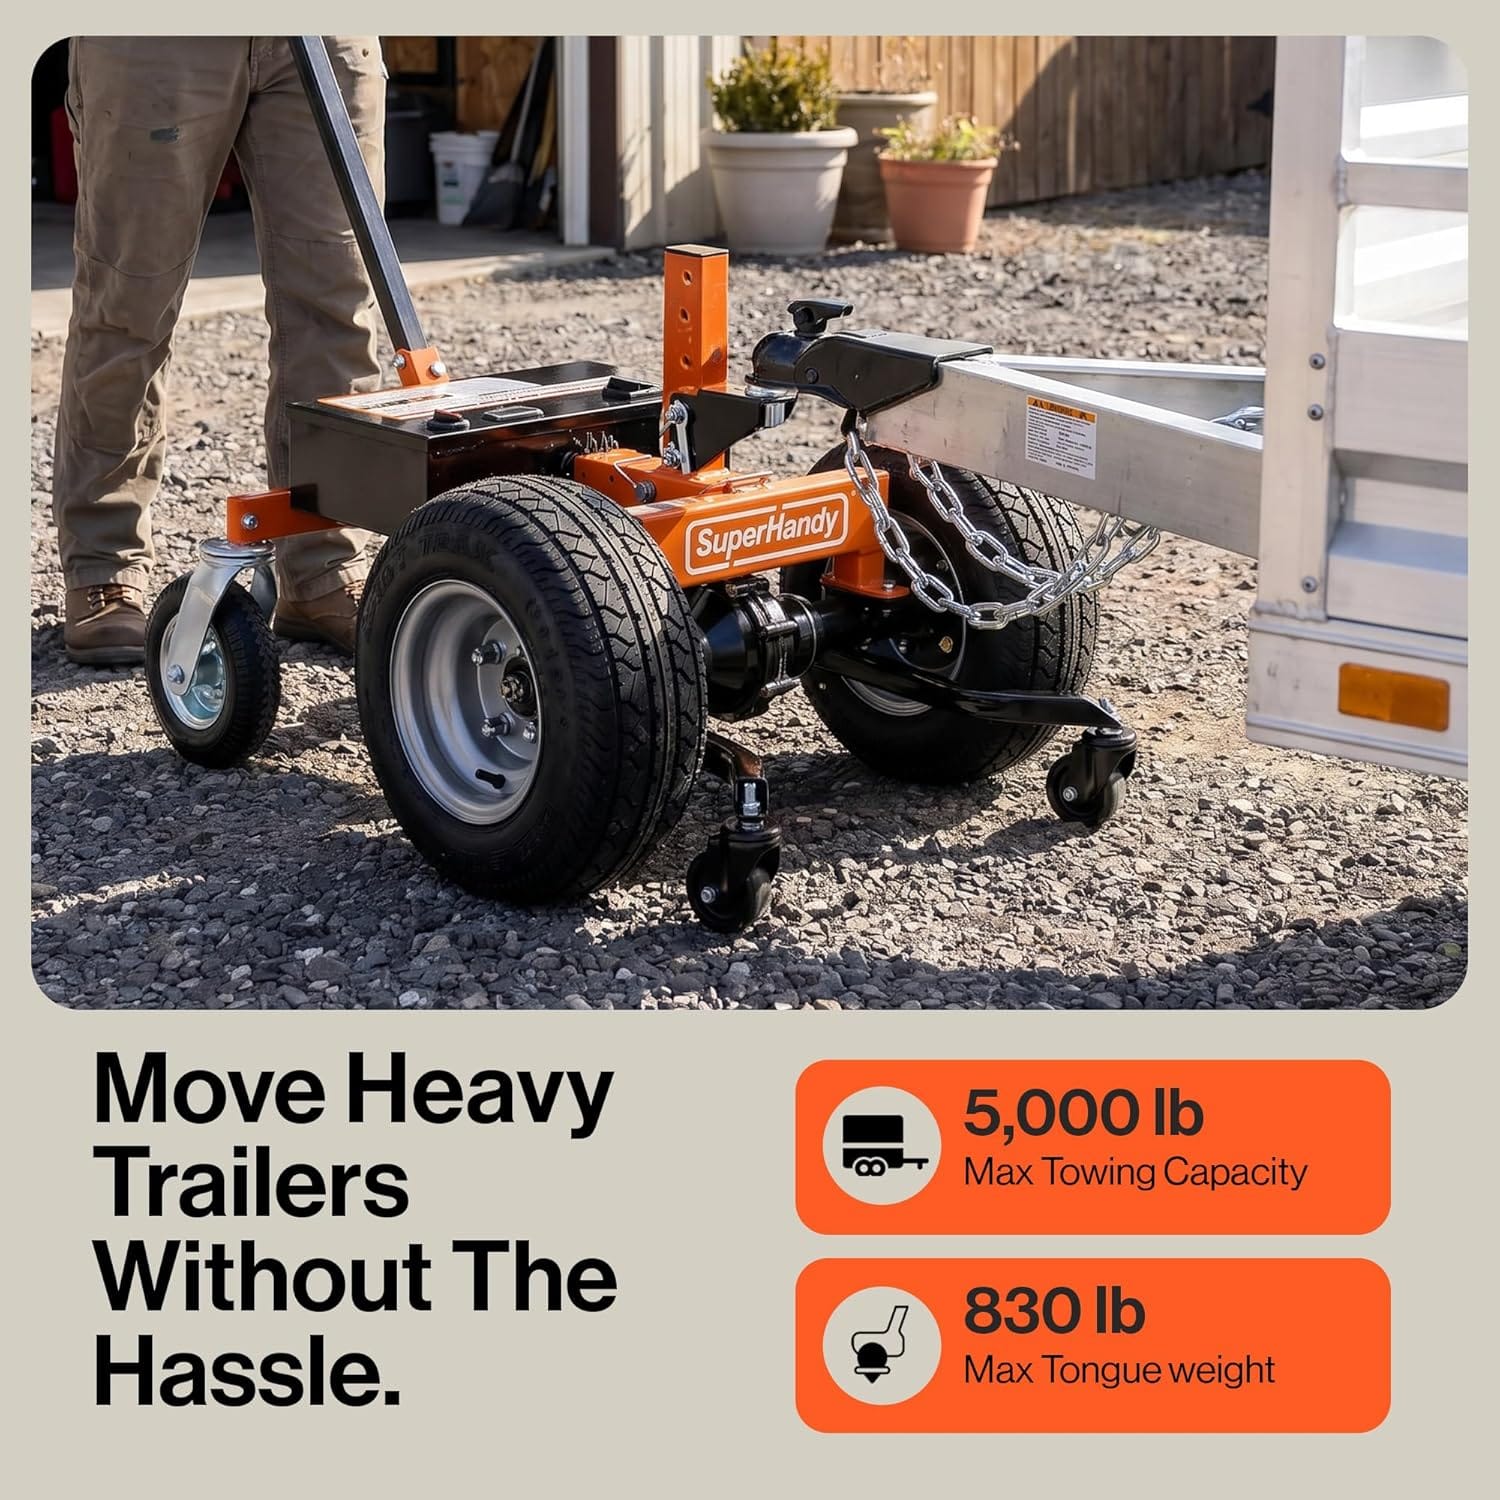
- Position the Dolly: Manually roll your electric trailer dolly into position, aligning the hitch ball directly underneath the trailer’s coupler.
- Adjust the Height: Use the crank handle or locking pin mechanism on the dolly to raise the hitch ball until it is just above the bottom edge of the coupler.
- Lower the Trailer: Using your trailer’s tongue jack, slowly lower the coupler down onto the hitch ball. Watch closely to ensure it seats completely.
- Secure the Latch: Once the coupler is fully seated on the ball, securely fasten the coupler latch. Insert the safety pin or lock to ensure it cannot accidentally open during movement.
- Raise the Jack: Fully retract the trailer's tongue jack so it is clear of the ground. Your trailer's tongue weight is now supported entirely by the trailer dolly.
With the trailer securely attached, you are almost ready to experience the convenience of powered maneuvering.
Connecting the Dolly to Your Trailer's Coupler
With your dolly assembled, the next step is creating a secure connection to your trailer. This is the most critical part of the setup, so take your time and double-check your work.
- Align the Dolly: Position the electric trailer dolly directly in front of your trailer's tongue. Ensure the dolly's ball mount is lined up underneath the trailer's coupler.
- Adjust the Height: Use the crank handle on the dolly's main shaft to raise or lower the ball mount. Adjust it so the top of the ball is slightly higher than the bottom edge of the coupler. This ensures that when you lower the trailer's tongue jack, the coupler will settle down onto the ball, not fall onto it.
- Lower and Latch: Slowly lower your trailer using its tongue jack. Guide the coupler so it fully encompasses the dolly's tow ball. Once the full weight of the trailer tongue is resting on the ball, continue retracting the tongue jack completely.
- Secure the Coupler: Close the latch on your trailer's coupler. It should snap firmly into place. As a final safety measure, insert the coupler's safety pin or lock to prevent the latch from accidentally opening during movement. Give the connection a firm tug to confirm it is completely secure.

Powering Up Your Electric Trailer Dolly: Battery Installation and Charging
Your electric trailer dolly's power comes from a robust, rechargeable battery system. Before your first move, you need to ensure it's installed correctly and fully charged.
- Battery Installation: Most models feature a slide-and-lock battery system. Align the battery pack with the housing on the dolly's control unit and slide it in until you hear a distinct "click." This confirms the battery is seated properly and making a solid electrical connection.
- Initial Charge: Even if your battery arrives with some charge, it's best practice to perform a full charging cycle before its first use. Connect the provided charger to the battery's charging port and plug it into a standard wall outlet. An indicator light on the charger will typically show red while charging and turn green when the battery is full. A full charge ensures you have maximum power and runtime for your first maneuvering session.
Proper battery care is essential for the longevity of all Electric Trailer Dolly models.
First Movement: Engaging the Drive System
With the trailer connected and the battery charged, you're ready to engage the motor. Your dolly has two primary modes: a "free-wheel" mode for easy manual positioning of the dolly itself, and a "drive" mode where the motor powers the wheels.
- Turn on the Power: Locate the main power switch on the control handle and turn it on. You should see a battery level indicator light up, giving you a clear idea of your available power.
- Engage Drive Mode: Find the drive engagement lever, usually located near the dolly's axle. To engage the motor, you will typically need to pull and turn this knob or lever to lock the transmission. You will feel it click into place. This physically connects the motor to the wheels. Caution: The dolly will not move under power if it is still in free-wheel mode.
Maneuvering Your Trailer with Precision: Forward and Reverse Controls
This is the moment you've been waiting for. The controls on your dolly's handle are designed for intuitive and precise operation.
- Forward/Reverse Switch: Locate the forward and reverse directional switch on the control panel. Select "FWD" for forward movement.
- Throttle Control: The handles feature a variable-speed thumb throttle or twist grip. To begin moving, slowly and gently press the throttle. The dolly will start to move forward, pulling the trailer with it. The more you press, the faster it will go.
- Practice Makes Perfect: Start in a clear, open area with plenty of space. Practice moving forward a few feet, then stopping. To reverse, simply stop the dolly, flip the switch to "REV," and gently apply the throttle again. The intuitive controls on models like the SuperHandy Electric Trailer Dolly make these initial movements smooth and manageable. Always make slow, deliberate movements to maintain complete control.
Navigating Tight Spaces and Obstacles
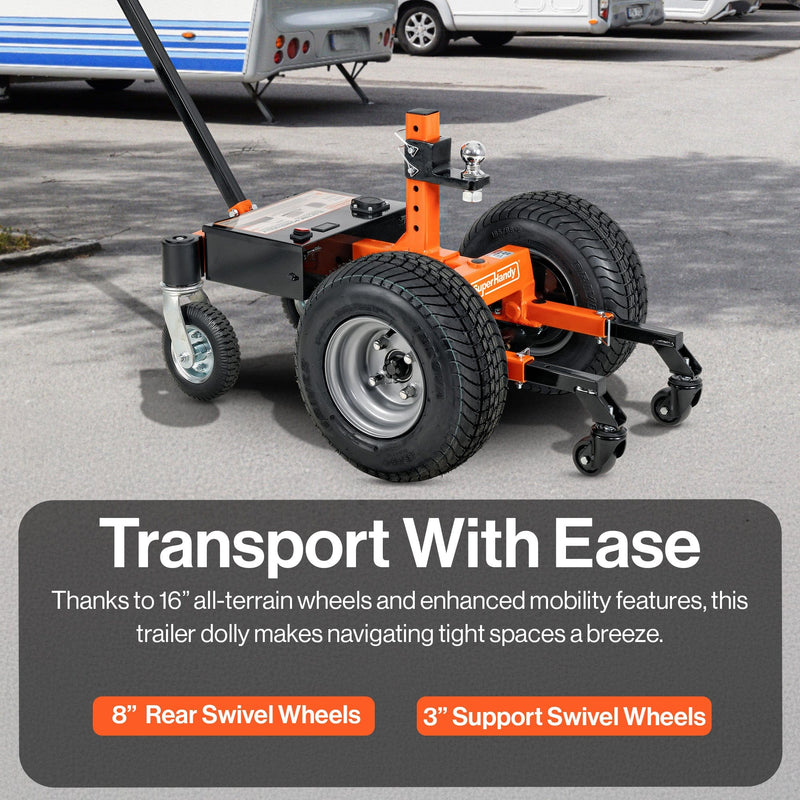
The real magic of an Electric Trailer Dolly is its incredible maneuverability. Unlike a tow vehicle, it allows for sharp turns and precise placement, making it ideal for navigating tight driveways, crowded garages, or packed storage lots.
When you first start, slow and steady is the key. Use the variable speed controls to maintain a walking pace. It’s highly recommended to have a spotter watch the corners and rear of the trailer, communicating any potential hazards. Remember that while the dolly can pivot tightly, your trailer's wheels will follow a wider arc. Practice in an open space to understand this dynamic before tackling a confined area. Pay attention to both ground-level obstacles like curbs and overhead obstructions such as tree branches or garage door frames.
Securing Your Trailer with the Electric Dolly
Once you have maneuvered your trailer into its final parking spot, it's crucial to secure it properly before detaching the dolly. This ensures the trailer won't roll or shift unexpectedly.
- Chock the Wheels: Place heavy-duty wheel chocks securely against the front and back of both trailer tires. This is the most important step for preventing movement.
- Lower the Tongue Jack: Use the trailer’s own tongue jack to slowly take the weight off the dolly. Lower it until the jack’s foot or wheel is firmly on the ground and supporting the trailer's tongue. Do not lift the coupler off the hitch ball yet.
- Power Down: Turn off the main power switch on your Electric Trailer Dolly and engage any safety brake or lock features it may have.
Disengaging the Electric Dolly from Your Trailer
With the trailer safely chocked and supported by its tongue jack, you can now disconnect the dolly.
- Unlock the Coupler: Open the latch on your trailer's coupler completely.
- Raise the Coupler: Continue lowering the trailer using its tongue jack. The coupler will lift vertically, clearing the dolly’s hitch ball.
- Move the Dolly: Once the coupler is completely free, you can carefully pull the Electric Trailer Dolly straight back and away from the trailer tongue.
- Store Properly: Move your dolly to its storage location. If it's battery-powered, now is a good time to connect the charger so it's ready for your next adventure.
Troubleshooting Common Issues During Initial Operation
Encountering a hiccup during your first use is common. Here are solutions to a few frequent issues:
- Dolly Won't Power On: First, confirm the battery is fully charged and securely connected. Check that the main power switch is in the "ON" position and that any emergency stop button has not been accidentally pressed.
- Wheels Spin Without Moving the Trailer: This usually indicates a loss of traction. The ground may be too wet, loose, or uneven. Try to operate on a solid, dry surface like concrete or pavement. Also, ensure there is adequate tongue weight pressing down on the dolly’s hitch ball to give the drive wheels sufficient grip.
- Movement is Jerky or Abrupt: Smooth operation comes with practice. Try to apply power more gradually using the throttle control. Avoid sudden starts and stops, which can put stress on the dolly and trailer.
- Steering is Difficult: Check the tire pressure on the dolly's drive wheels and caster wheel. Low pressure can make turning much harder. Ensure the caster wheel assembly is clean and able to pivot freely.
Maintenance Tips for Longevity and Optimal Performance
Your new electric trailer dolly is a powerful tool designed to make your life easier. To ensure it remains a reliable partner for years to come, a consistent maintenance routine is essential. Think of it as a small investment of time that pays huge dividends in performance, safety, and longevity. By following these simple tips, you'll keep your Electric Trailer Dolly in peak condition.
After Every Use: The Quick Check-Up
A few minutes of inspection after each use can prevent minor issues from becoming major problems.
- Wipe It Down: Clean off any dirt, mud, grass, or moisture from the frame, wheels, and drive components. Debris can accelerate wear and cause corrosion. Pay special attention to the area around the drive chain and axles.
- Inspect the Tires: Give the tires a quick visual check. Look for any signs of damage or significant wear. Ensure they are properly inflated according to the specifications in your user manual; proper inflation is key for stability and efficient movement.
- Check Hardware: Vibrations during operation can sometimes loosen nuts and bolts. Do a quick visual scan to ensure all critical hardware is secure and tight.
Battery Health is Paramount
The battery is the heart of your electric dolly. Proper care is non-negotiable for optimal performance.
- Charge Correctly: Always use the charger that came with your unit. Avoid letting the battery drain completely before recharging. After use, it's good practice to recharge the battery so it's ready for the next job. However, don't leave it on the charger indefinitely after it's fully charged unless your charger has an automatic shut-off feature.
- Keep Terminals Clean: Periodically inspect the battery terminals for any signs of corrosion (a white, powdery substance). If you see any, disconnect the battery and clean the terminals gently with a wire brush. A clean connection ensures maximum power transfer.
- Store Smart: If you plan on storing your electric trailer dolly for an extended period (more than a month), it's best to remove the battery. Store it in a cool, dry place, away from extreme temperatures. Give it a top-up charge every 1-2 months to maintain its health.
Periodic Maintenance: The Deeper Dive
Set a reminder to perform these tasks every few months or after approximately 20-30 hours of use.
- Lubricate Moving Parts: To ensure smooth, quiet operation and prevent rust, lubricate all moving components. This includes the drive chain, wheel axles, and the height-adjustment mechanism for the trailer ball. Use a high-quality chain lubricant or general-purpose grease as recommended by the manufacturer. Wipe away any excess to prevent it from attracting dirt.
- Inspect the Drive System: Closely examine the drive chain for proper tension and look for any stiff links or signs of wear. If your model, like the SuperHandy Trailer Dolly GUO092, has specific tensioning requirements, refer to your manual for adjustment instructions.
- Check Electrical Connections: Ensure all wiring is secure and free from frays, cuts, or damage. Check that all connectors are firmly seated.
By integrating these maintenance habits into your routine, you’ll not only extend the life of your electric trailer dolly but also ensure it operates safely and effectively every time you need to move your trailer.
Frequently Asked Questions
What is the weight capacity of this electric trailer dolly?
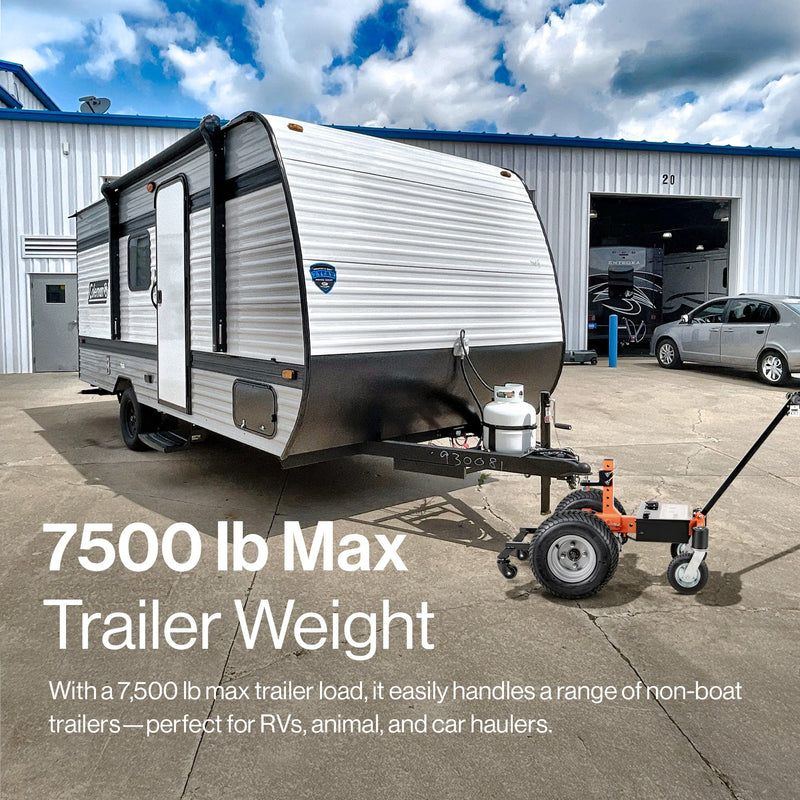
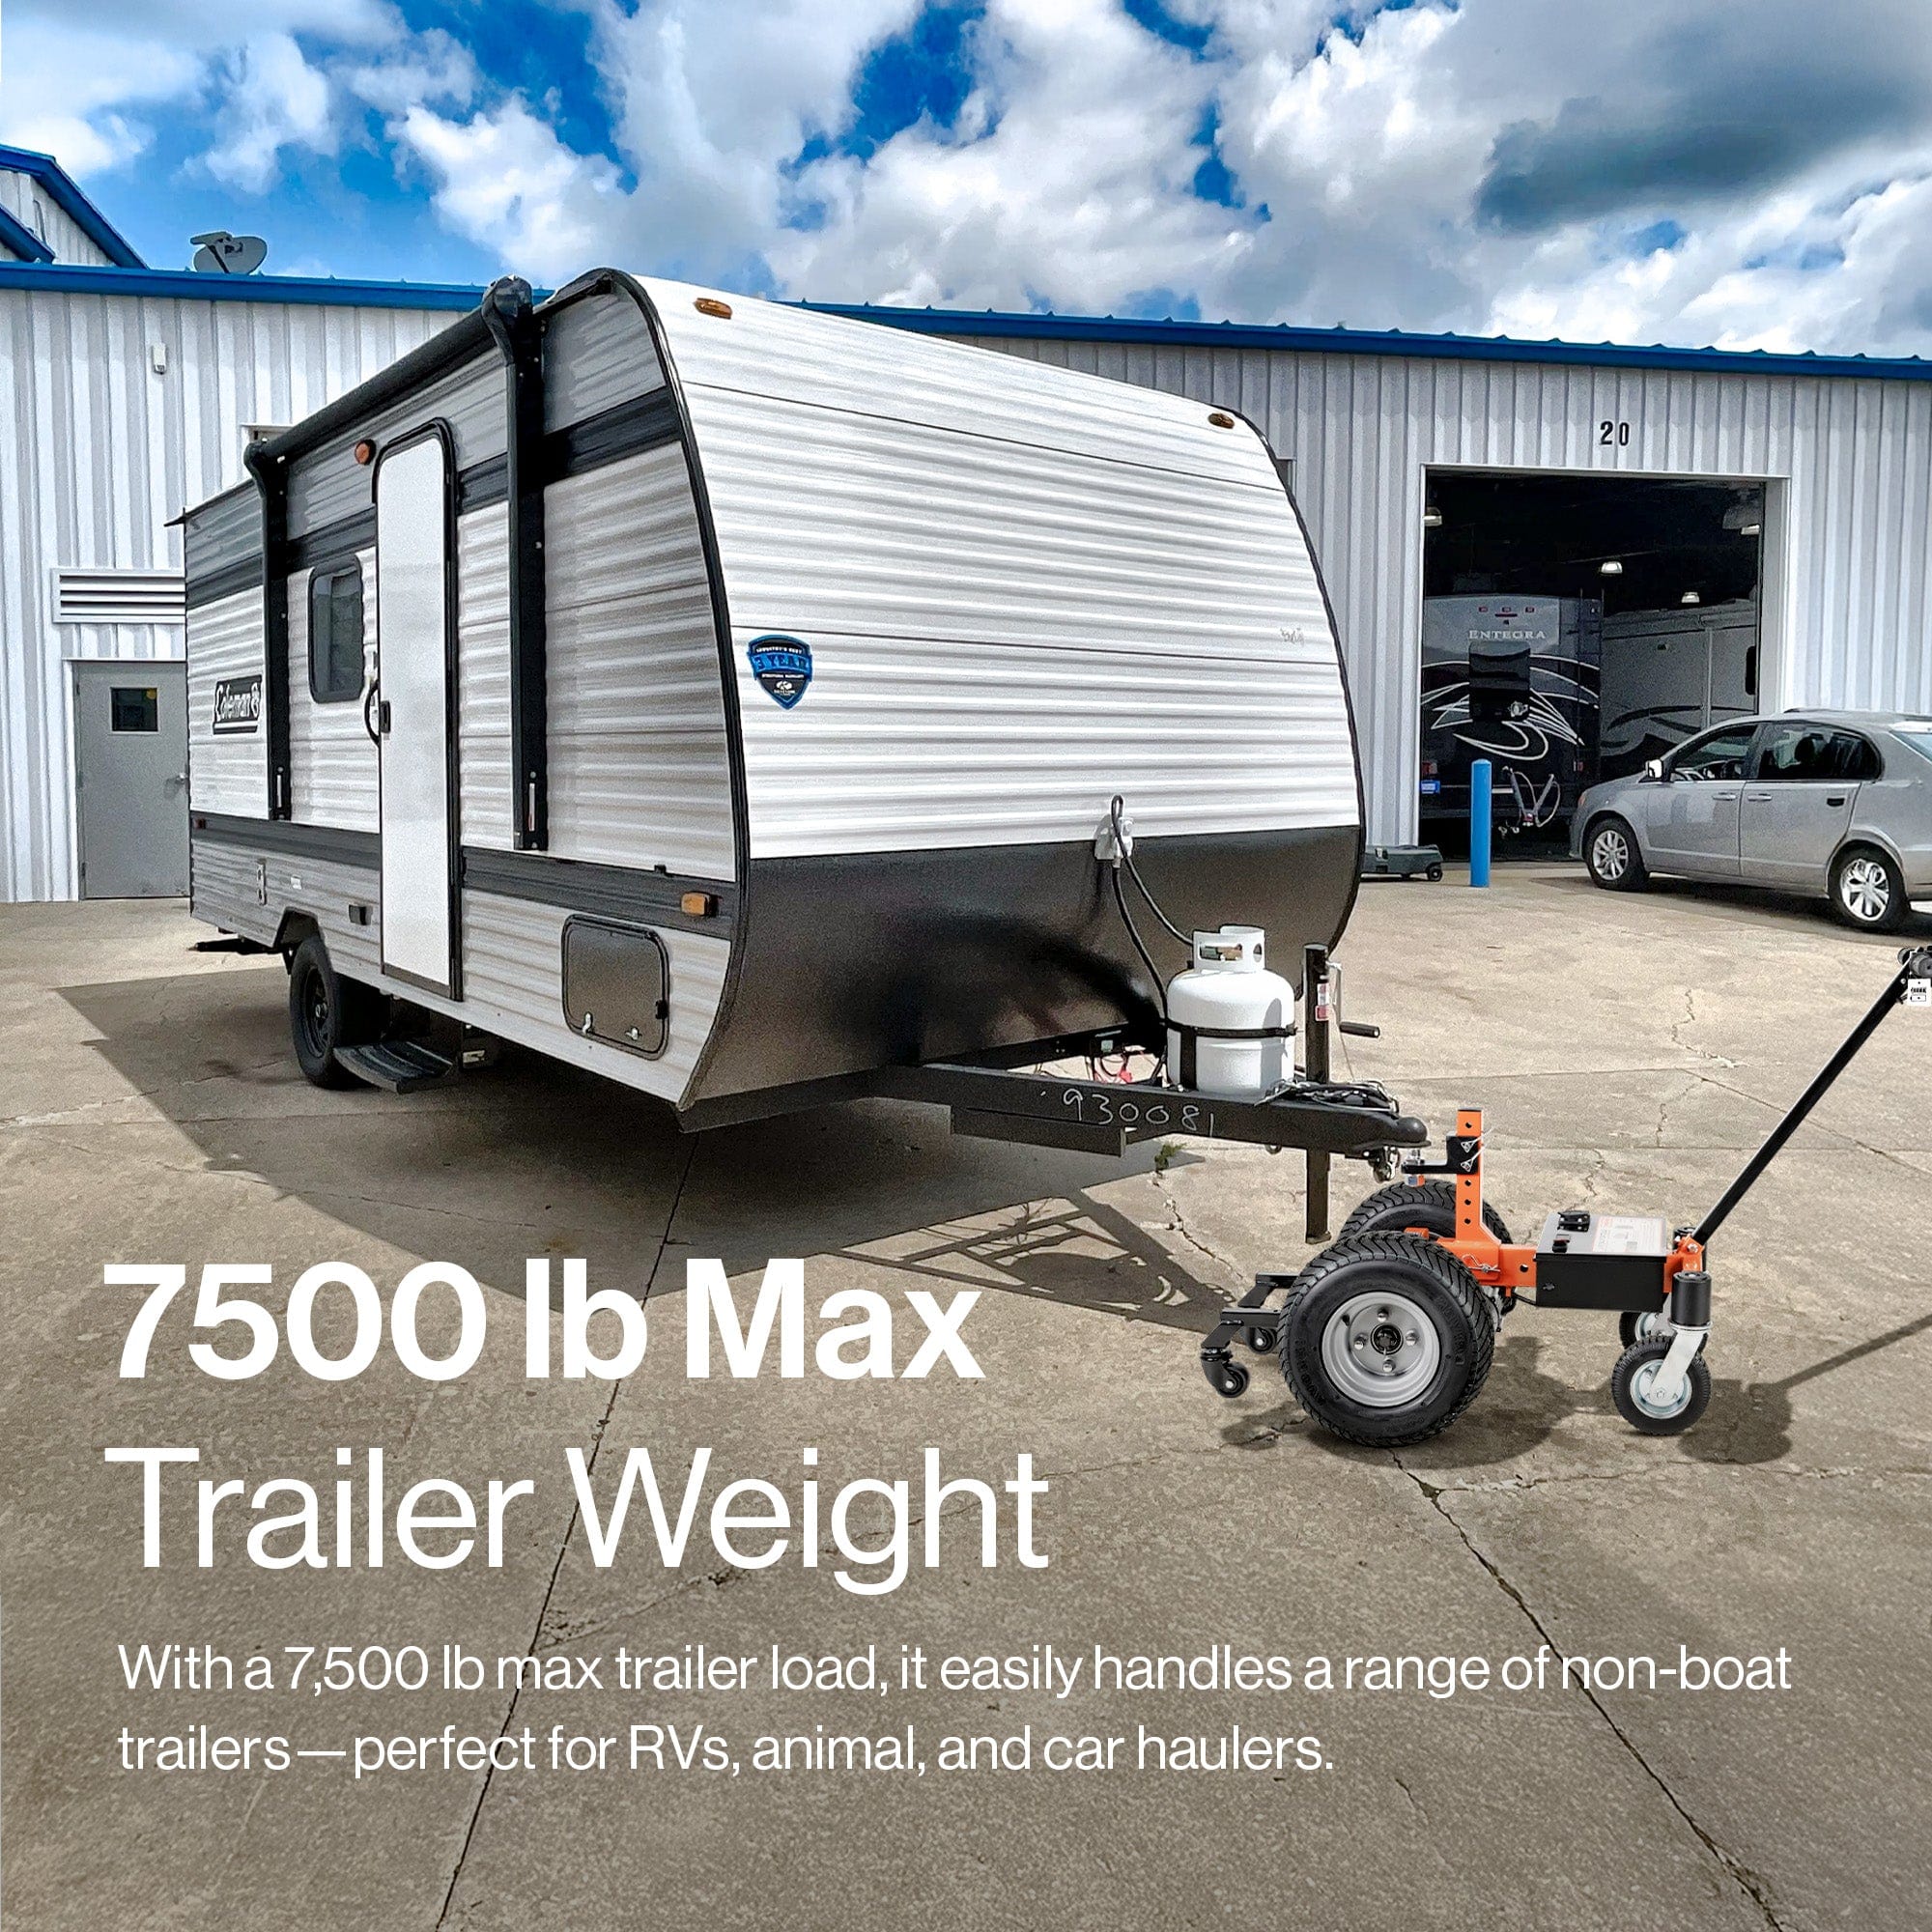
Understanding the weight capacity of your Electric Trailer Dolly is arguably the most critical factor for safe and effective operation. Exceeding these limits can not only damage the dolly's motor and frame but also create a serious safety hazard. Every electric trailer dolly has two primary weight ratings you must know and respect:
- Maximum Trailer Weight (Gross Trailer Weight - GTW): This is the total maximum weight of your trailer, including everything loaded onto it. It represents the total mass the dolly is designed to pull or push across a surface.
- Maximum Tongue Weight: This is the maximum downward vertical force that the trailer's coupler can exert on the dolly's hitch ball. An improperly balanced trailer can have an excessively high or low tongue weight, even if the gross trailer weight is within limits.
Both of these ratings are equally important. For instance, our popular SuperHandy 3600LBS Electric Trailer Dolly is rated for a maximum trailer weight of 3,600 pounds and a maximum tongue weight of 600 pounds. You must stay below both of these numbers. For heavier applications, a more robust model like the SuperHandy 10,000LBS Electric Trailer Dolly offers a significantly higher capacity to handle large boats, RVs, or equipment haulers.

How to Determine Your Trailer's Weight
Before you ever connect your dolly, you need to confirm your trailer's weights.
- Gross Trailer Weight (GTW): Check the manufacturer's compliance plate or sticker, usually located on the front frame of the trailer. This will list the Gross Vehicle Weight Rating (GVWR), which is the maximum your trailer should weigh when fully loaded. If you have a loaded trailer and are unsure of the current total weight, the most accurate method is to take it to a commercial weigh station (found at truck stops or landscaping supply yards).
- Tongue Weight: The ideal tongue weight is typically 10-15% of the total trailer weight. You can measure this using a dedicated tongue weight scale. For smaller trailers, you can also use a bathroom scale with a simple lever setup to get a reasonably accurate reading.
Remember that the stated capacity is based on operation on a hard, level surface like concrete or asphalt. Maneuvering on an incline, soft grass, or loose gravel dramatically increases the strain on the dolly's drive system. If you plan to operate on such surfaces, it is crucial to have a dolly with a capacity well above your trailer's actual weight to ensure you have enough power to move and control it safely.
Related Products


Leave a comment
All comments are moderated before being published.
This site is protected by hCaptcha and the hCaptcha Privacy Policy and Terms of Service apply.